How to Draw a Chipmunk (Easy Step by Step)
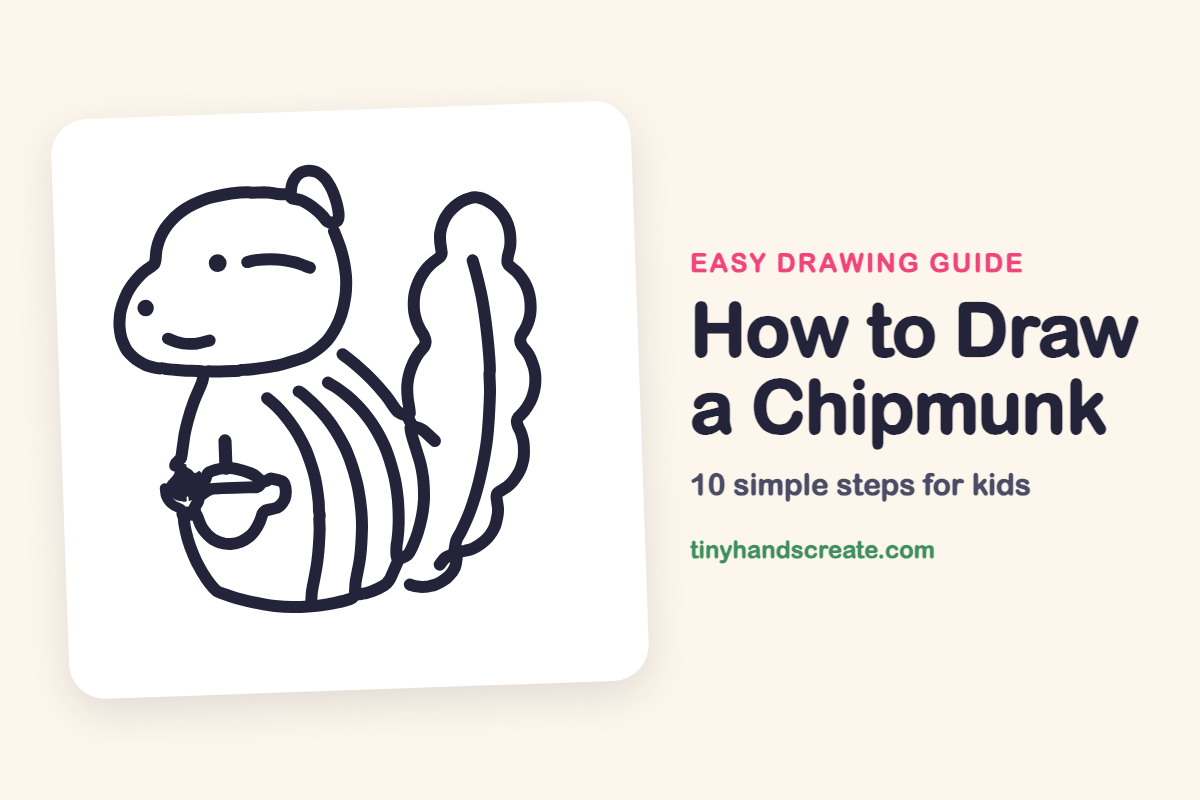
A chipmunk holding an acorn is a cute, simple drawing to try. It is built from a rounded head, a round body, a bumpy tail and a few curved stripes. Kids can make each part one step at a time.
- Medium
- 15 minutes
- 10 steps
You need: paper, a pencil, an eraser, and crayons or markers for coloring.
Start drawingIn this article (7 sections)
How to draw a chipmunk step by step
How to Draw a Chipmunk · tinyhandscreate.com
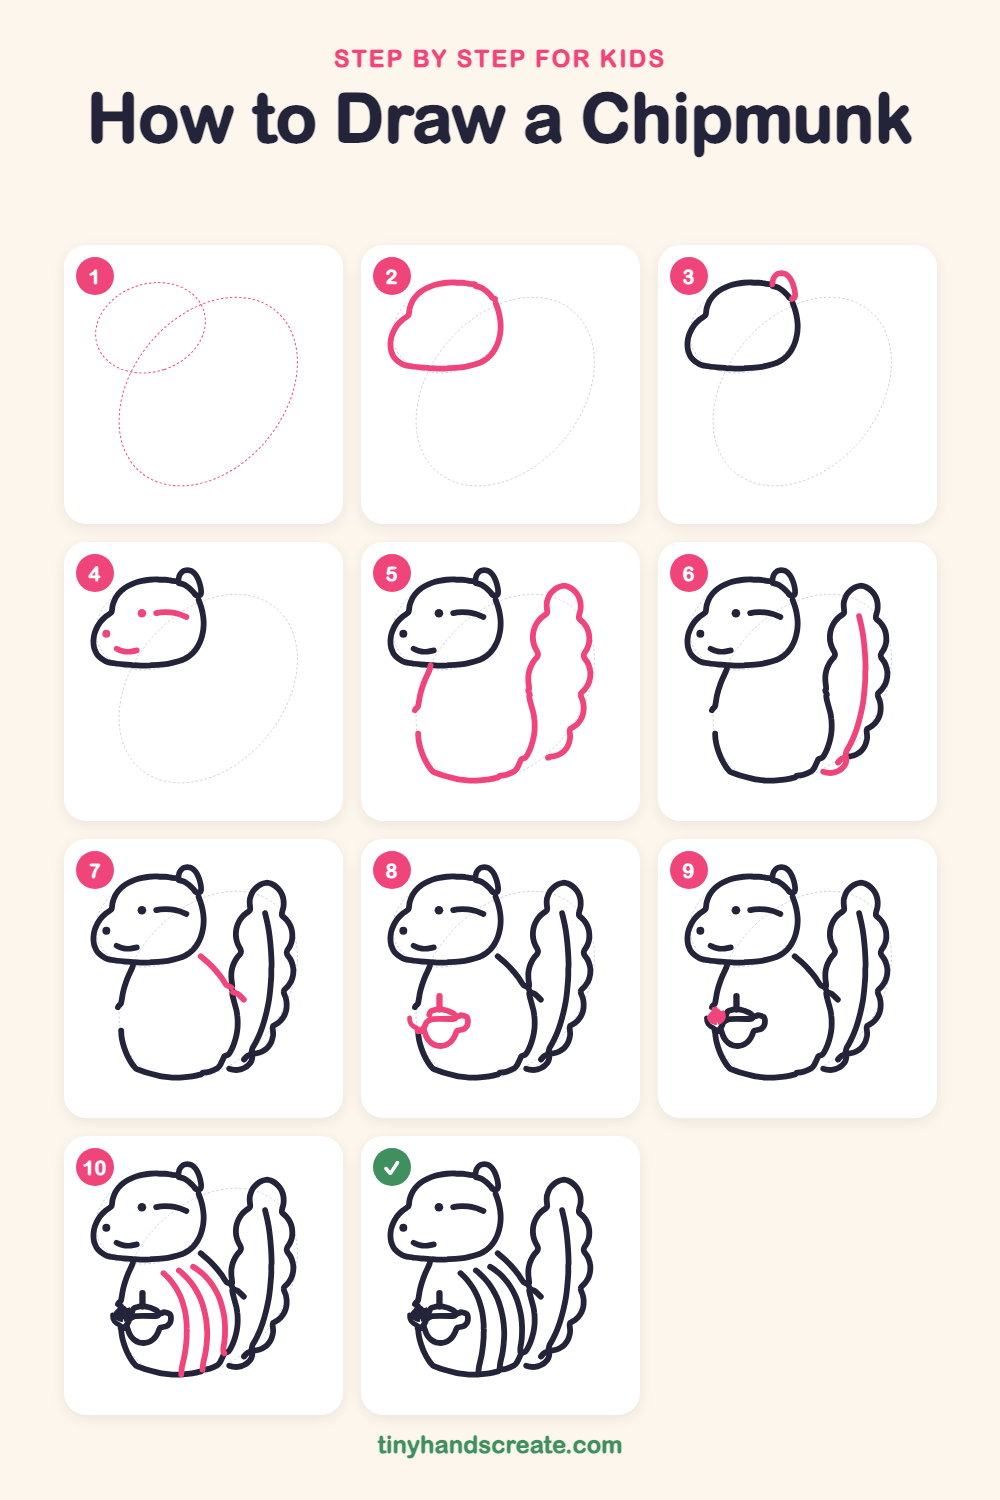
Step 1: Guide shapes
Lightly sketch these 2 ovals. They only show where the big parts go, so press softly. You will erase them at the end.
Step 2: The head
Draw a big rounded shape for the head, wider on the left where the nose sticks out. Make the top round and the bottom flat.
Step 3: The ear
On top of the head at the right, draw a small half-oval ear that sits on the head line, like a little hill.
Step 4: Eye, nose and smile
Draw a dot for the eye and a short curved line beside it for the brow. Then add a dot nose near the left tip and a small smile curve below it.
Step 5: Body and bumpy tail
Under the head, draw the round body. Start at the bottom of the head, curve down and around the bottom, and bring the line up the right side. Then draw a tall tail on the right with bumpy edges, like a stack of clouds.
Step 6: Tail line and curl
Draw one long curved line down the middle of the tail. Then add a little curl at the bottom of the tail, near the body.
Step 7: Back line
Draw a short curved line that starts under the right side of the head and slants down toward the tail.
Step 8: The acorn
On the left side of the tummy, draw a small acorn. Draw a tiny stem on top, then a flat cap, and a rounded cup below it.
Step 9: Tiny paw
Add a small dot on the left side of the acorn for the paw holding it.
Step 10: Body stripes
Draw three long curved stripes on the body to the right of the acorn, side by side, bending the same way as the round body.
All done!
Erase the guide shapes, go over your lines, then color it in.
Finished your chipmunk? Keep the pencils out and learn how to draw a skunk or how to draw a meerkat next.
Tips for drawing a chipmunk
- Look at the shapes first: a rounded head, a round body and a tall tail. Draw each one slowly with a steady line.
- The tail is the trickiest part. Think of it as three or four small bumps stacked on top of each other.
- Draw the stripes last and curve them the same way as the body, so they look like they wrap around it.
Free chipmunk coloring page
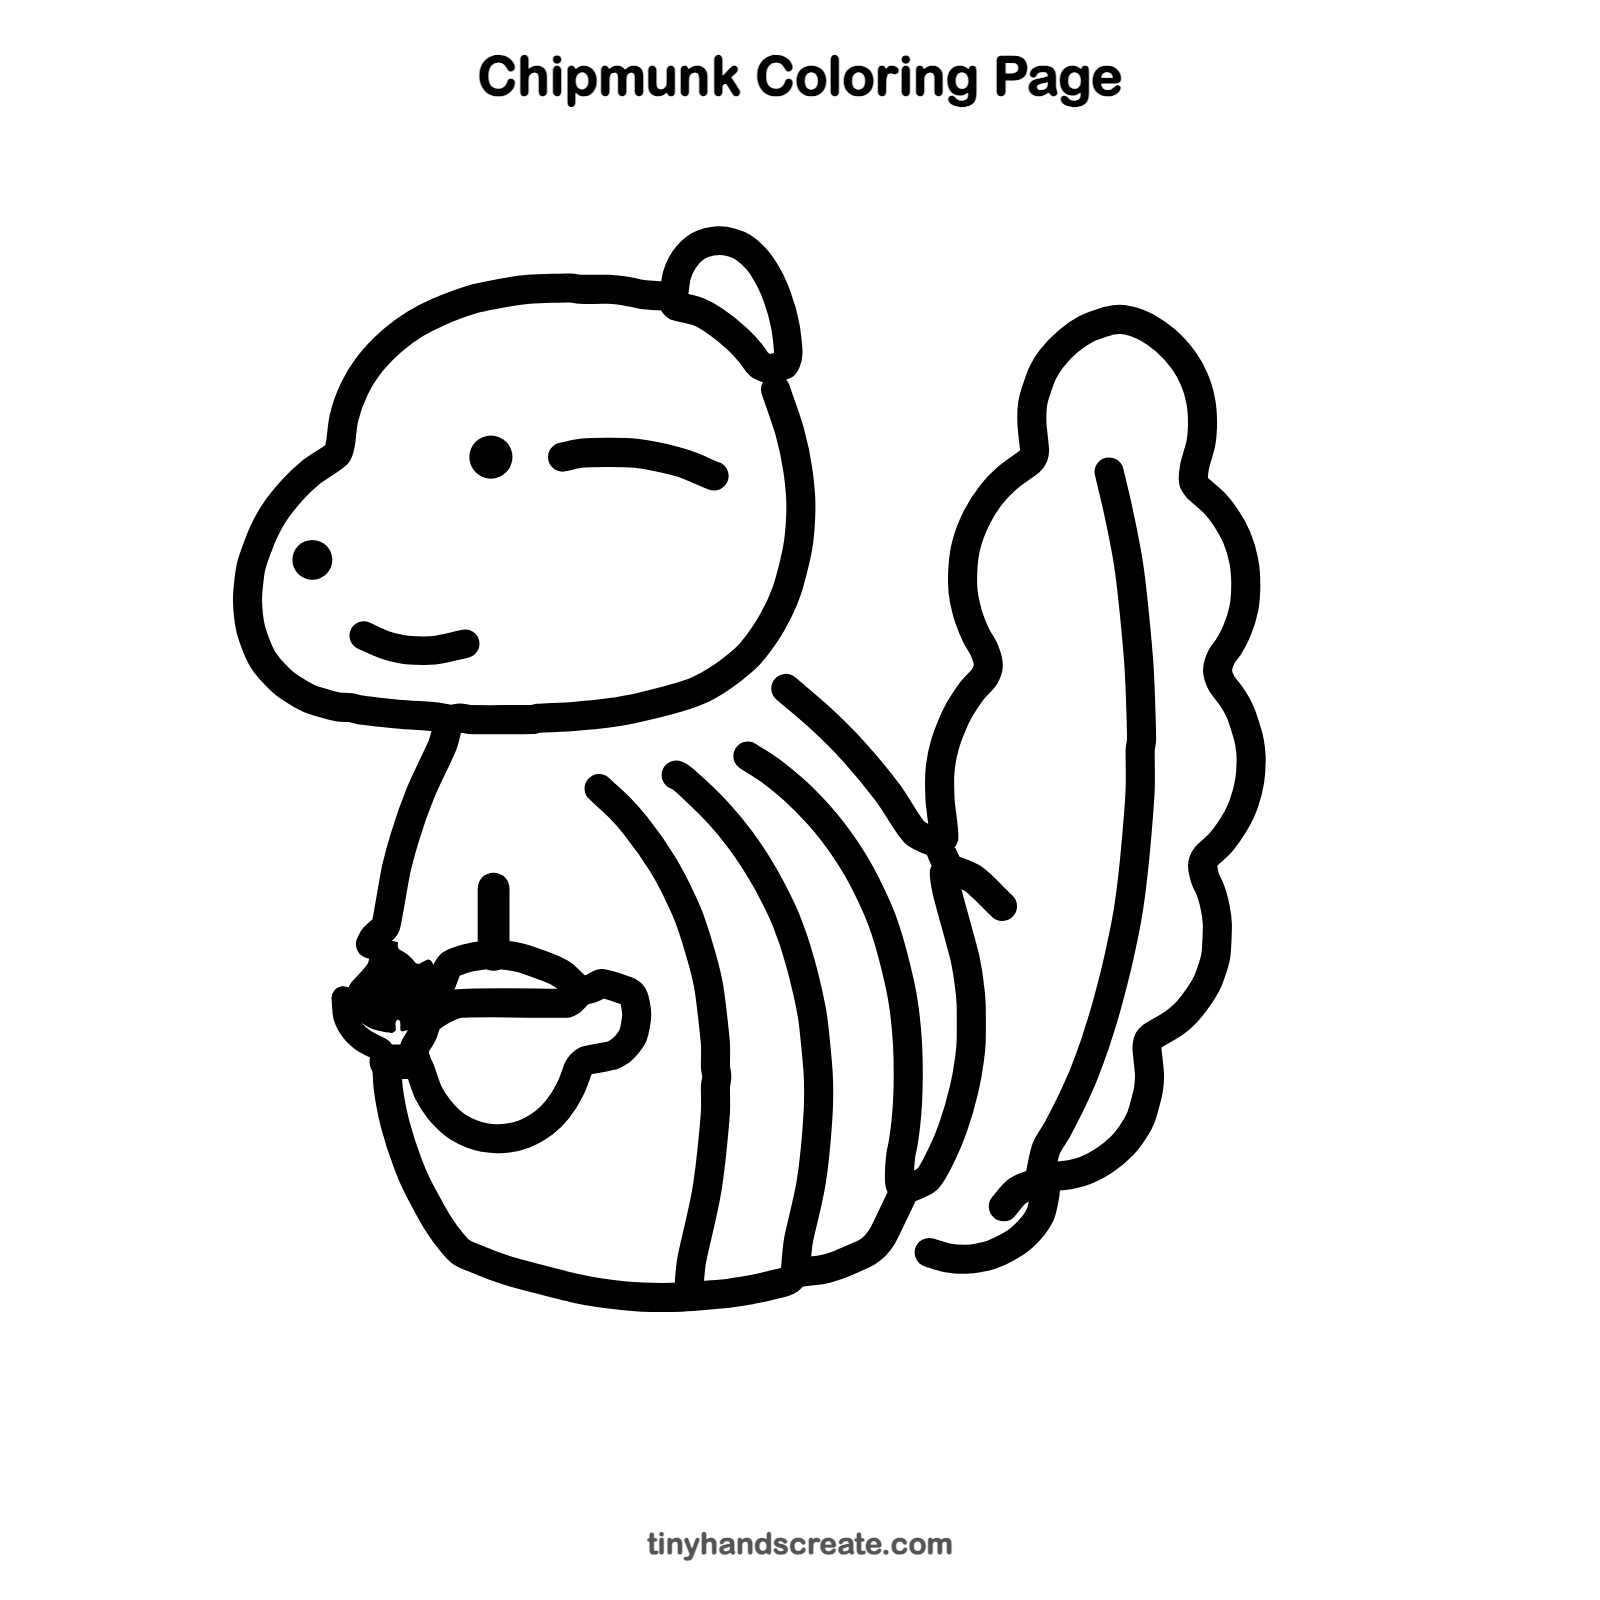
Want to go straight to coloring? Open this chipmunk coloring page at full size and print it. It is the same drawing you just learned, with clean lines ready for crayons or markers.
How to color your chipmunk drawing
Color the body warm brown with a tan tummy and dark brown stripes, and make the acorn golden. For a twist, give your chipmunk a tiny scarf or draw falling leaves around it.
Chipmunk fun fact for kids
Chipmunks have cheek pouches that stretch so they can carry lots of seeds and nuts back to their burrows.
Questions about drawing a chipmunk
What shapes do I need to draw a chipmunk?
You need a rounded shape for the head, a round shape for the body, and a bumpy cloud-like shape for the tail. Curved lines make the stripes, and a small shape with a cap makes the acorn.
How do I make my chipmunk look cuter?
Make the head big and the eye a little dot, and draw a small smile. A fluffy, oversized tail also makes it extra cute.
How do I draw the chipmunk's stripes?
Draw three long curved lines on the body, all bending the same way as the body. Keep them evenly spaced, side by side.