How to Draw a Christmas Otter (Easy Step by Step)
This post contains affiliate links. As an Amazon Associate I earn from qualifying purchases.
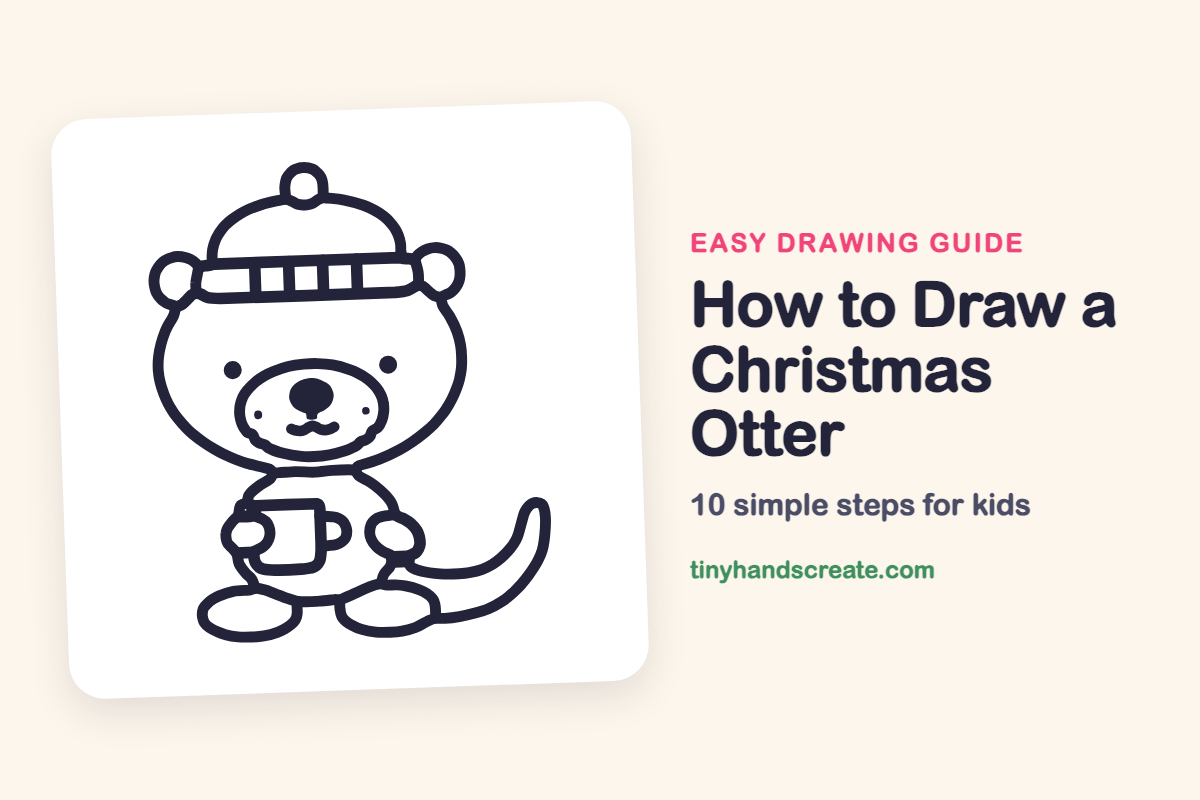
This Christmas otter wears a striped winter hat and holds a cozy mug. It is built from simple shapes: curves and ovals for the head, body and feet, circles for the ears and pompom, and a square for the mug. Kids can draw it one shape at a time and finish with a happy face.
- Easy
- 15 minutes
- 10 steps
You need: paper, a pencil, an eraser, and crayons or markers for coloring.
Start drawing
In this article (7 sections)
How to draw a Christmas otter step by step
How to Draw a Christmas Otter · tinyhandscreate.com
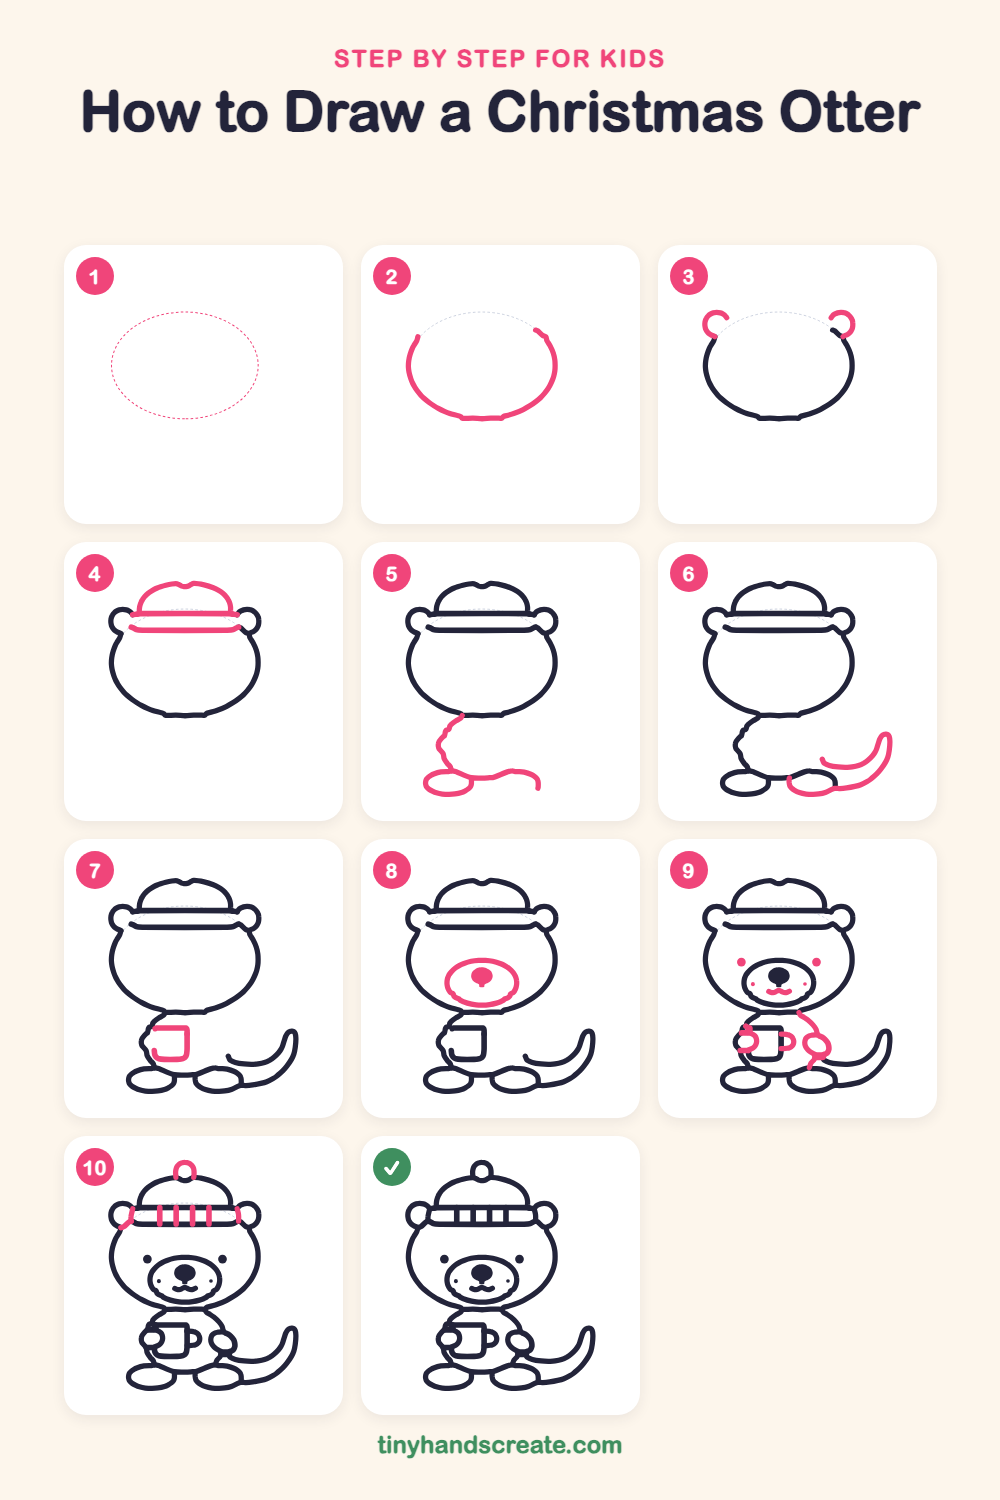
Step 1: Guide shapes
Lightly sketch this oval. It only shows where the big parts go, so press softly. You will erase it at the end.
Step 2: The head
Draw a big wide curve for the otter's head, like the bottom of an oval that is a little flat at the bottom. Leave the top open for now and leave room above it for a hat.
Step 3: Two round ears
Add a small curl on each side of the top of the head, like two little half circles. Make them match in size.
Step 4: The winter hat
Draw a long flat band across the top of the head, overlapping the ears a little. Then draw a dome shape sitting on top of the band, like half a circle.
Step 5: Body and first foot
Start under the left side of the head and draw a wobbly curve down for the side of the body. At the bottom, draw a flat oval for the left foot, then a long wavy line going out to the right.
Step 6: Tail and second foot
On the right, draw a small oval for the second foot. Then draw a long curved tail that sweeps out and up, with a second line beside it to make it thick and a rounded tip.
Step 7: The cozy mug
Draw a square with rounded bottom corners in front of the tummy, on the left side. Leave the right side open for now.
Step 8: Muzzle and nose
In the middle of the face, draw a wide oval for the muzzle. Then color in a rounded nose at the top of the muzzle, with a tiny line going down from it.
Step 9: Face, paws and handle
Add two round dots for eyes on the sides of the face and a little wavy smile under the nose. Add tiny dots on the muzzle, then draw two small ovals for paws and a curved handle on the right side of the mug.
Step 10: Pompom and stripes
Draw a small circle on top of the hat for the pompom. Then add short up-and-down lines across the hat band to make stripes.
All done!
Erase the guide shapes, go over your lines, then color it in.
Finished your Christmas otter? Keep the pencils out and learn how to draw a Christmas seal or how to draw a Christmas corgi next.
Tips for drawing a Christmas otter
- Draw the head wide and flat at the bottom. That gives your otter a friendly, round-cheeked look.
- Draw the ears first, then draw the hat band over them. The band overlaps the ears, so your lines will not get tangled.
- Draw the mug first and the paws after it. Overlapping the paws on the mug looks like the otter is really holding it.
Free Christmas otter coloring page
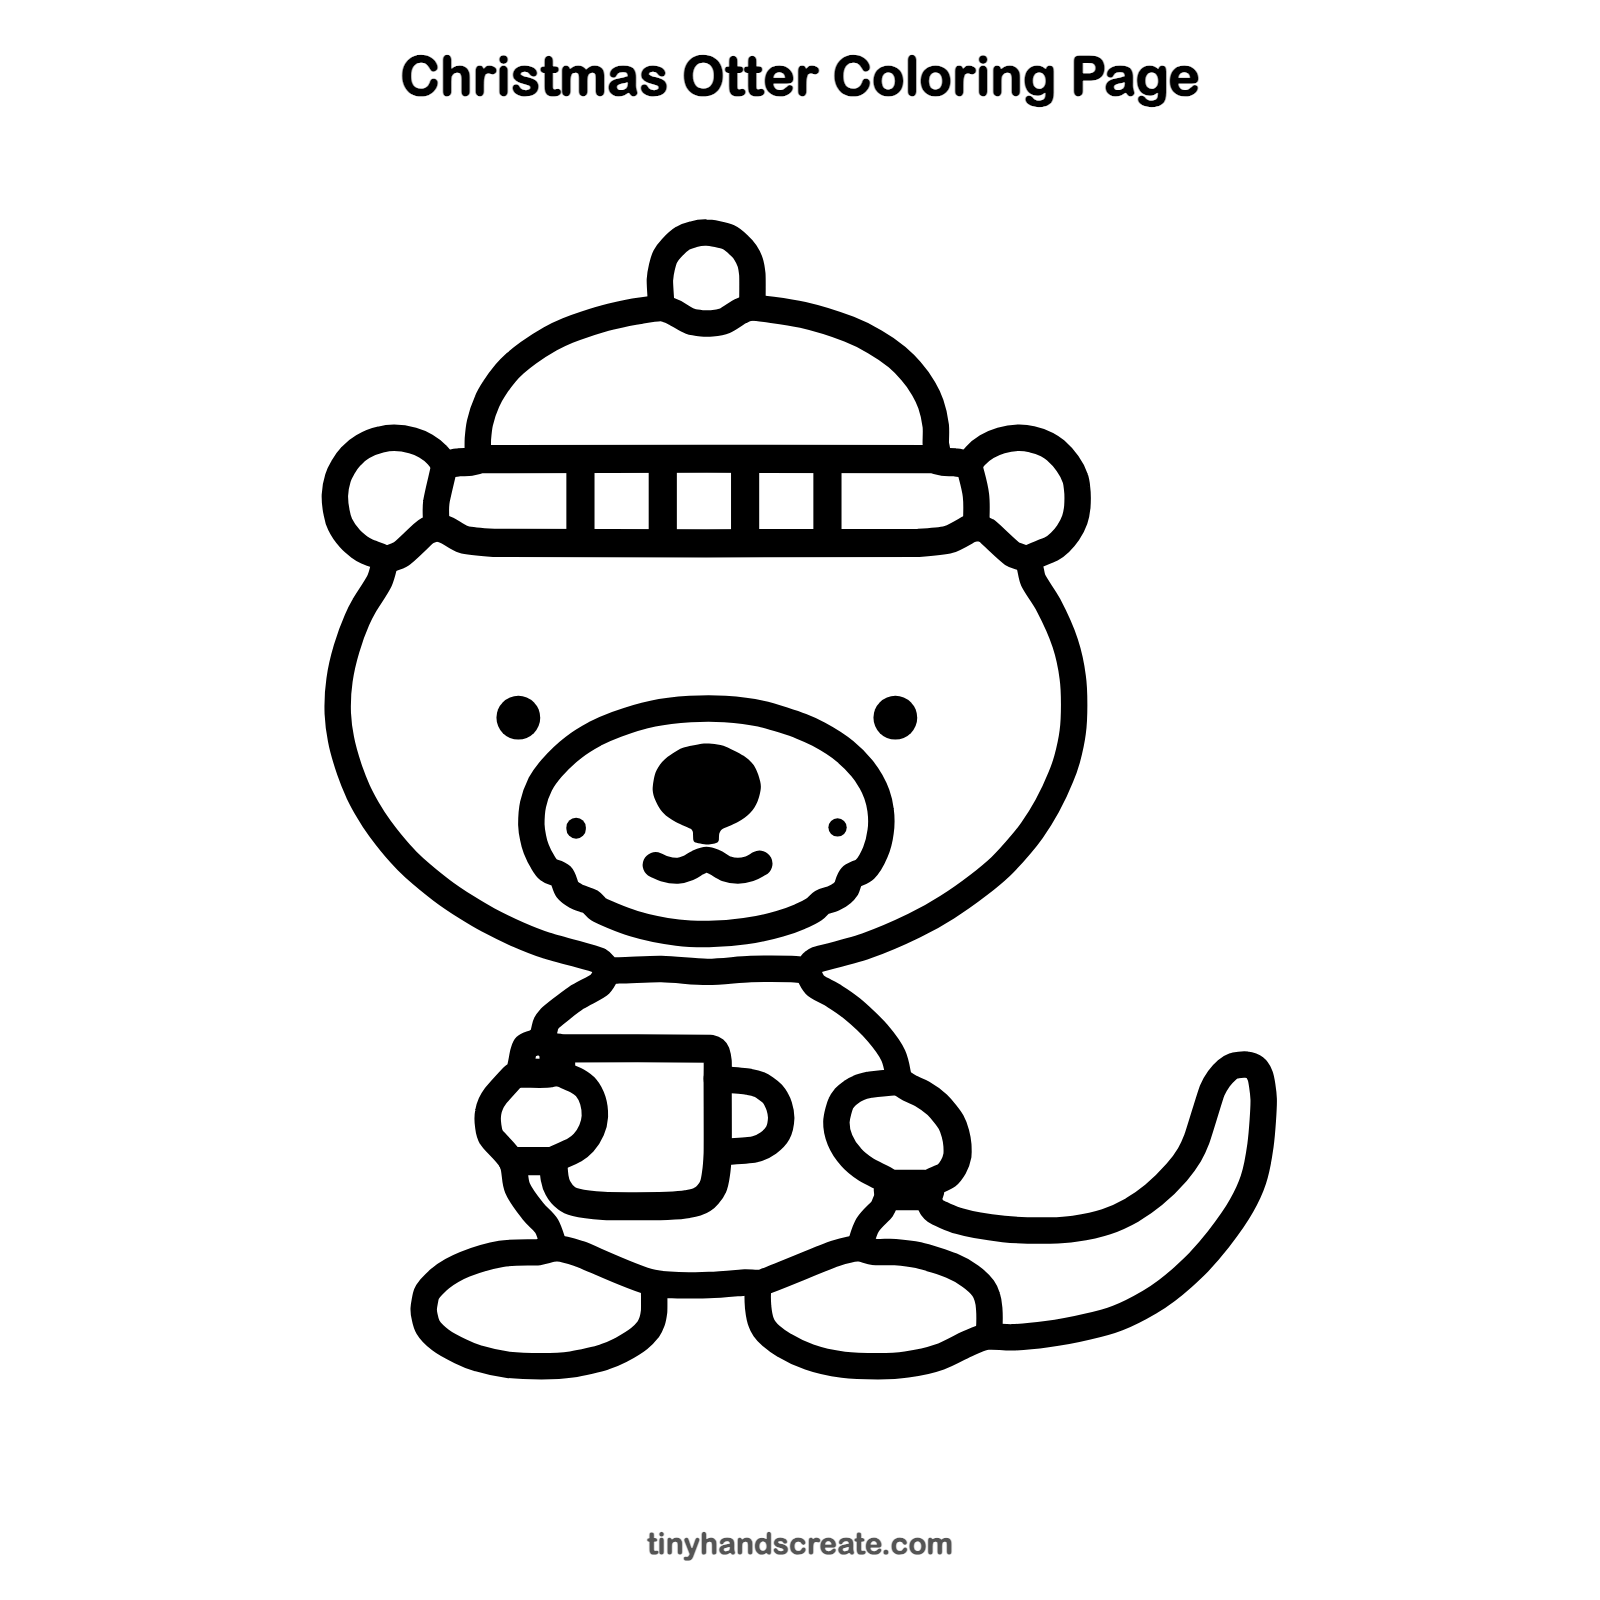
Want to go straight to coloring? Open this Christmas otter coloring page at full size and print it. It is the same drawing you just learned, with clean lines ready for crayons or markers.
How to color your Christmas otter drawing
Try warm brown for the otter, with a red and white hat and a tan muzzle. For a creative twist, add snowflakes in the background or color the mug like a candy cane.
Christmas otter fun fact for kids
Sea otters sometimes hold hands while they sleep so they do not drift apart. A group of sea otters resting together on the water is called a raft.
Questions about drawing a Christmas otter
What shapes do I need to draw a Christmas otter?
You need a big oval for the head, a muzzle oval, small ovals for the feet and paws, small circles for the ears and pompom, and a rounded square for the mug. The tail is one long curved shape.
How do I make my otter look cuter?
Place the eyes low and wide apart on the face, and keep the smile small. A big round nose and a fluffy pompom on the hat add extra charm.
How do I draw the otter's tail?
Draw a long curve that sweeps out and up from beside the body. Then draw a second line beside it to give the tail thickness, and round off the tip.