How to Draw a Snowy Mountain (Easy Step by Step)
You will learn how to guide your child through drawing a cheerful snowy mountain landscape using simple triangles, wavy snow lines, and easy facial details.
- Build the mountain and surrounding trees using basic triangle shapes.
- Draw a single wavy line across the peak to create the snowcap.
- Add a friendly face to the mountain with two simple dots and a curved smile.
- Introduce young artists to landscape drawing using easily identifiable shapes.
This post contains affiliate links. As an Amazon Associate I earn from qualifying purchases.
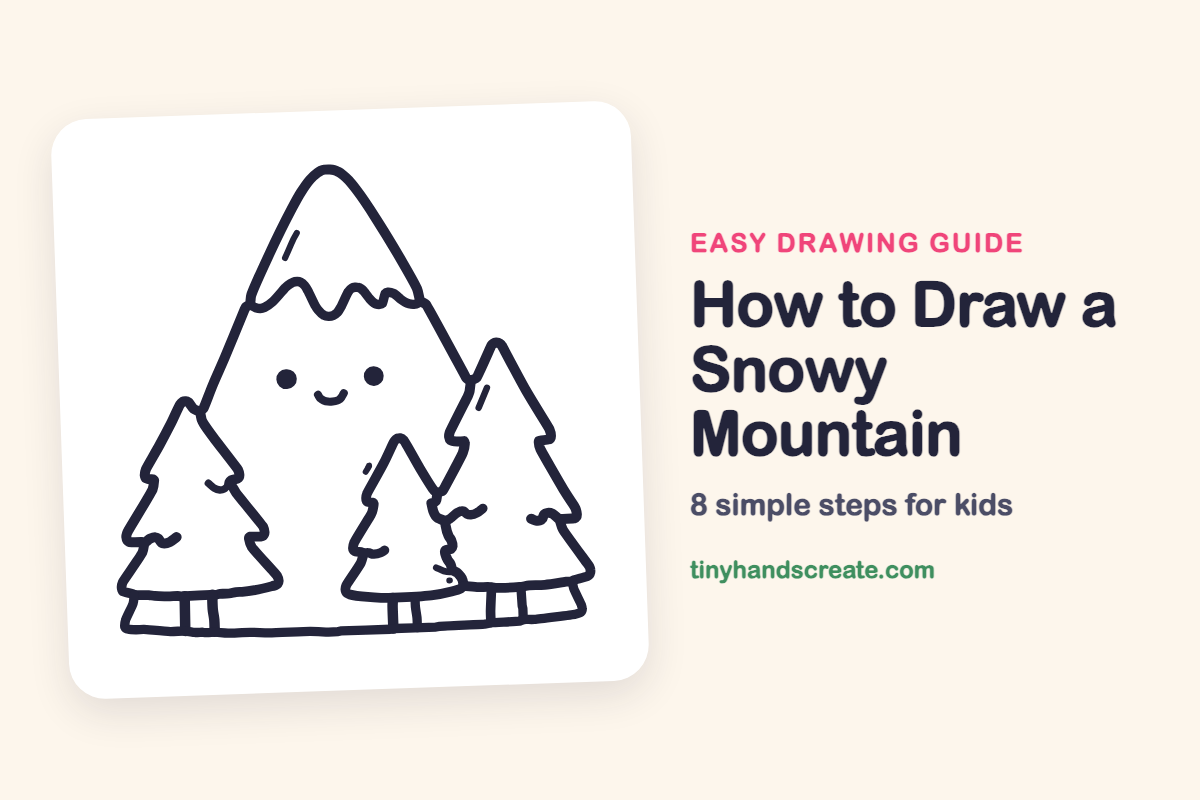
This snowy mountain has a happy face and three little trees standing in front of it. It is built from triangles, one wavy line for the snow, and two dots and a curve for the smile. It is a good first landscape because every part is simple and easy to name.
- Easy
- 15 minutes
- 8 steps
You need: paper, a pencil, an eraser, and crayons or markers for coloring.
Start drawing
In this article (7 sections)
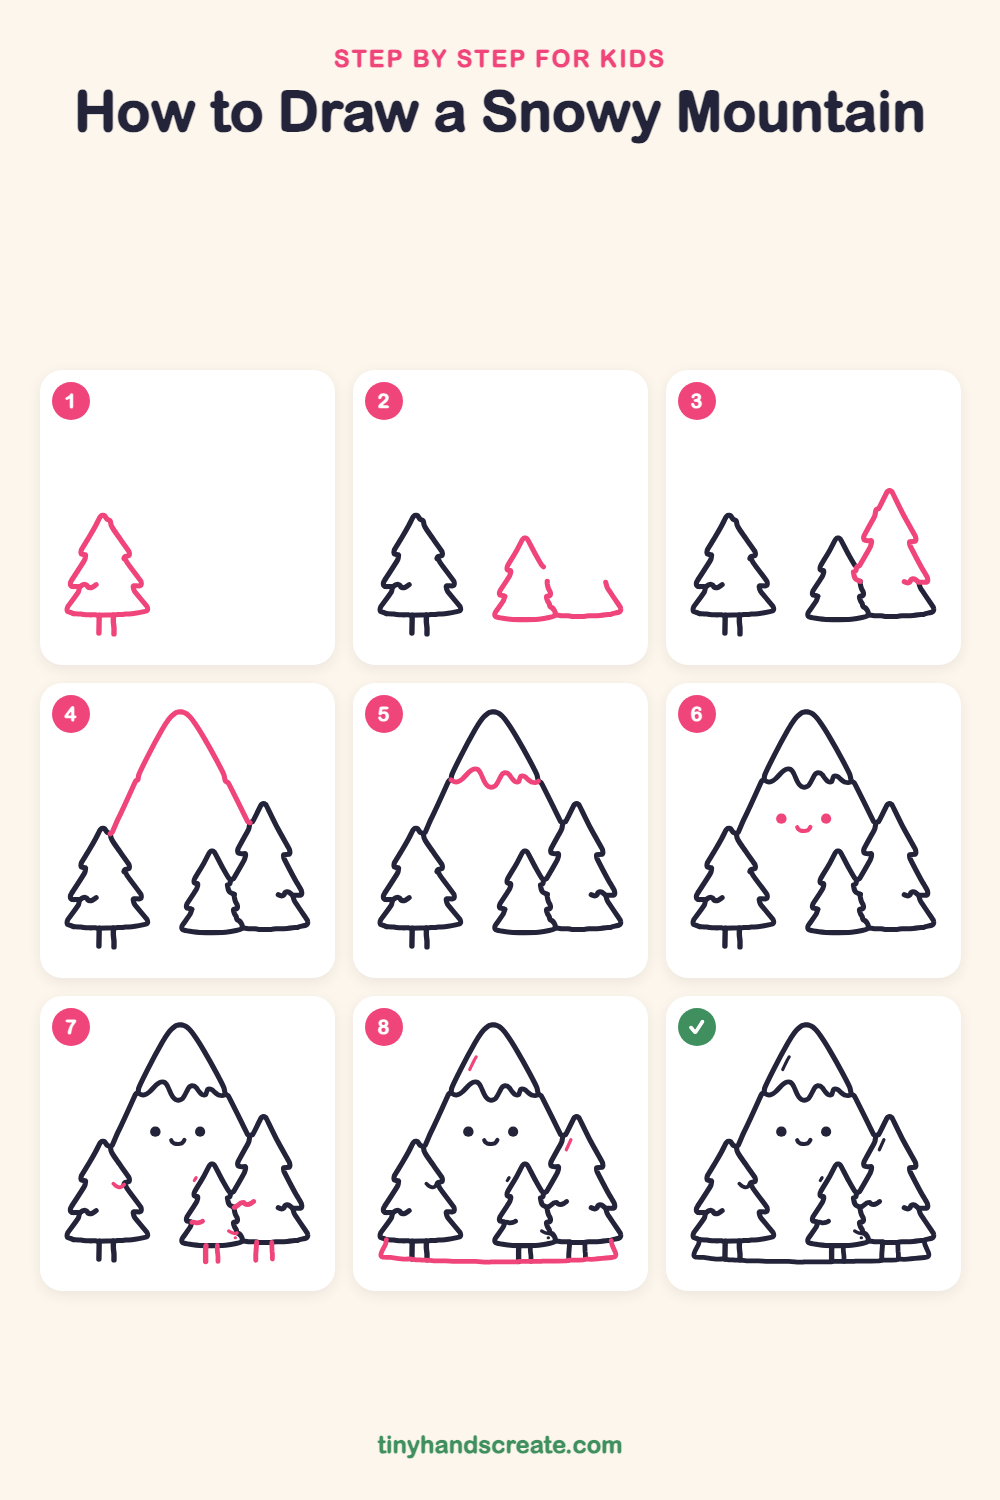
How to draw a snowy mountain step by step
How to Draw a Snowy Mountain · tinyhandscreate.com
Step 1: The left tree
Draw a tall pointy triangle with zigzag bumps down each side, like a stack of three skirts. Finish with two short straight lines hanging from the bottom for the trunk.
Step 2: The middle tree
Draw a smaller pointy tree to the right of the first one, starting with its top and zigzagging down its left side. Then draw a long curved line along the bottom that stretches out to the right.
Step 3: The tall tree
Draw the tallest tree on the right, starting at a high point and zigzagging down both sides. Stop its left side where it meets the middle tree, so the middle tree stays whole in front.
Step 4: The big mountain
Draw a big rounded peak in the middle with two long slanted sides. Stop each side when it touches a tree, so the trees stand in front.
Step 5: The snowy cap
Near the top, draw a wavy line from one side of the mountain to the other, with soft round drips like melting icing.
Step 6: A happy face
Draw two round dots for eyes in the middle of the mountain. Add a small smile curve between them.
Step 7: Trunks and snow tufts
Draw two short straight lines hanging from the bottom of the middle tree and two more under the tall tree for their trunks. Add a few small wiggly squiggles of snow on the branches of these trees.
Step 8: Ground and shine
Draw a long, gently curved ground line across the bottom, with the ends turning up a little, so every trunk stops when it touches it. Add a few little slanted shine marks, on the mountain and on the trees.
All done!
Go over your lines with a marker, then color it in.
Finished your snowy mountain? Keep the pencils out and learn how to draw a mushroom or how to draw a sunflower next.
Tips for drawing a snowy mountain
- Draw the trees first and stop the mountain lines where they touch a tree. This keeps the trees looking like they stand in front.
- Draw the middle tree's left side and bottom line first, then let the tall tree's left side stop where it meets the middle tree.
- Make the snow squiggles bigger than you think you need. Little marks are easy to miss, and a bold squiggle looks like real snow.
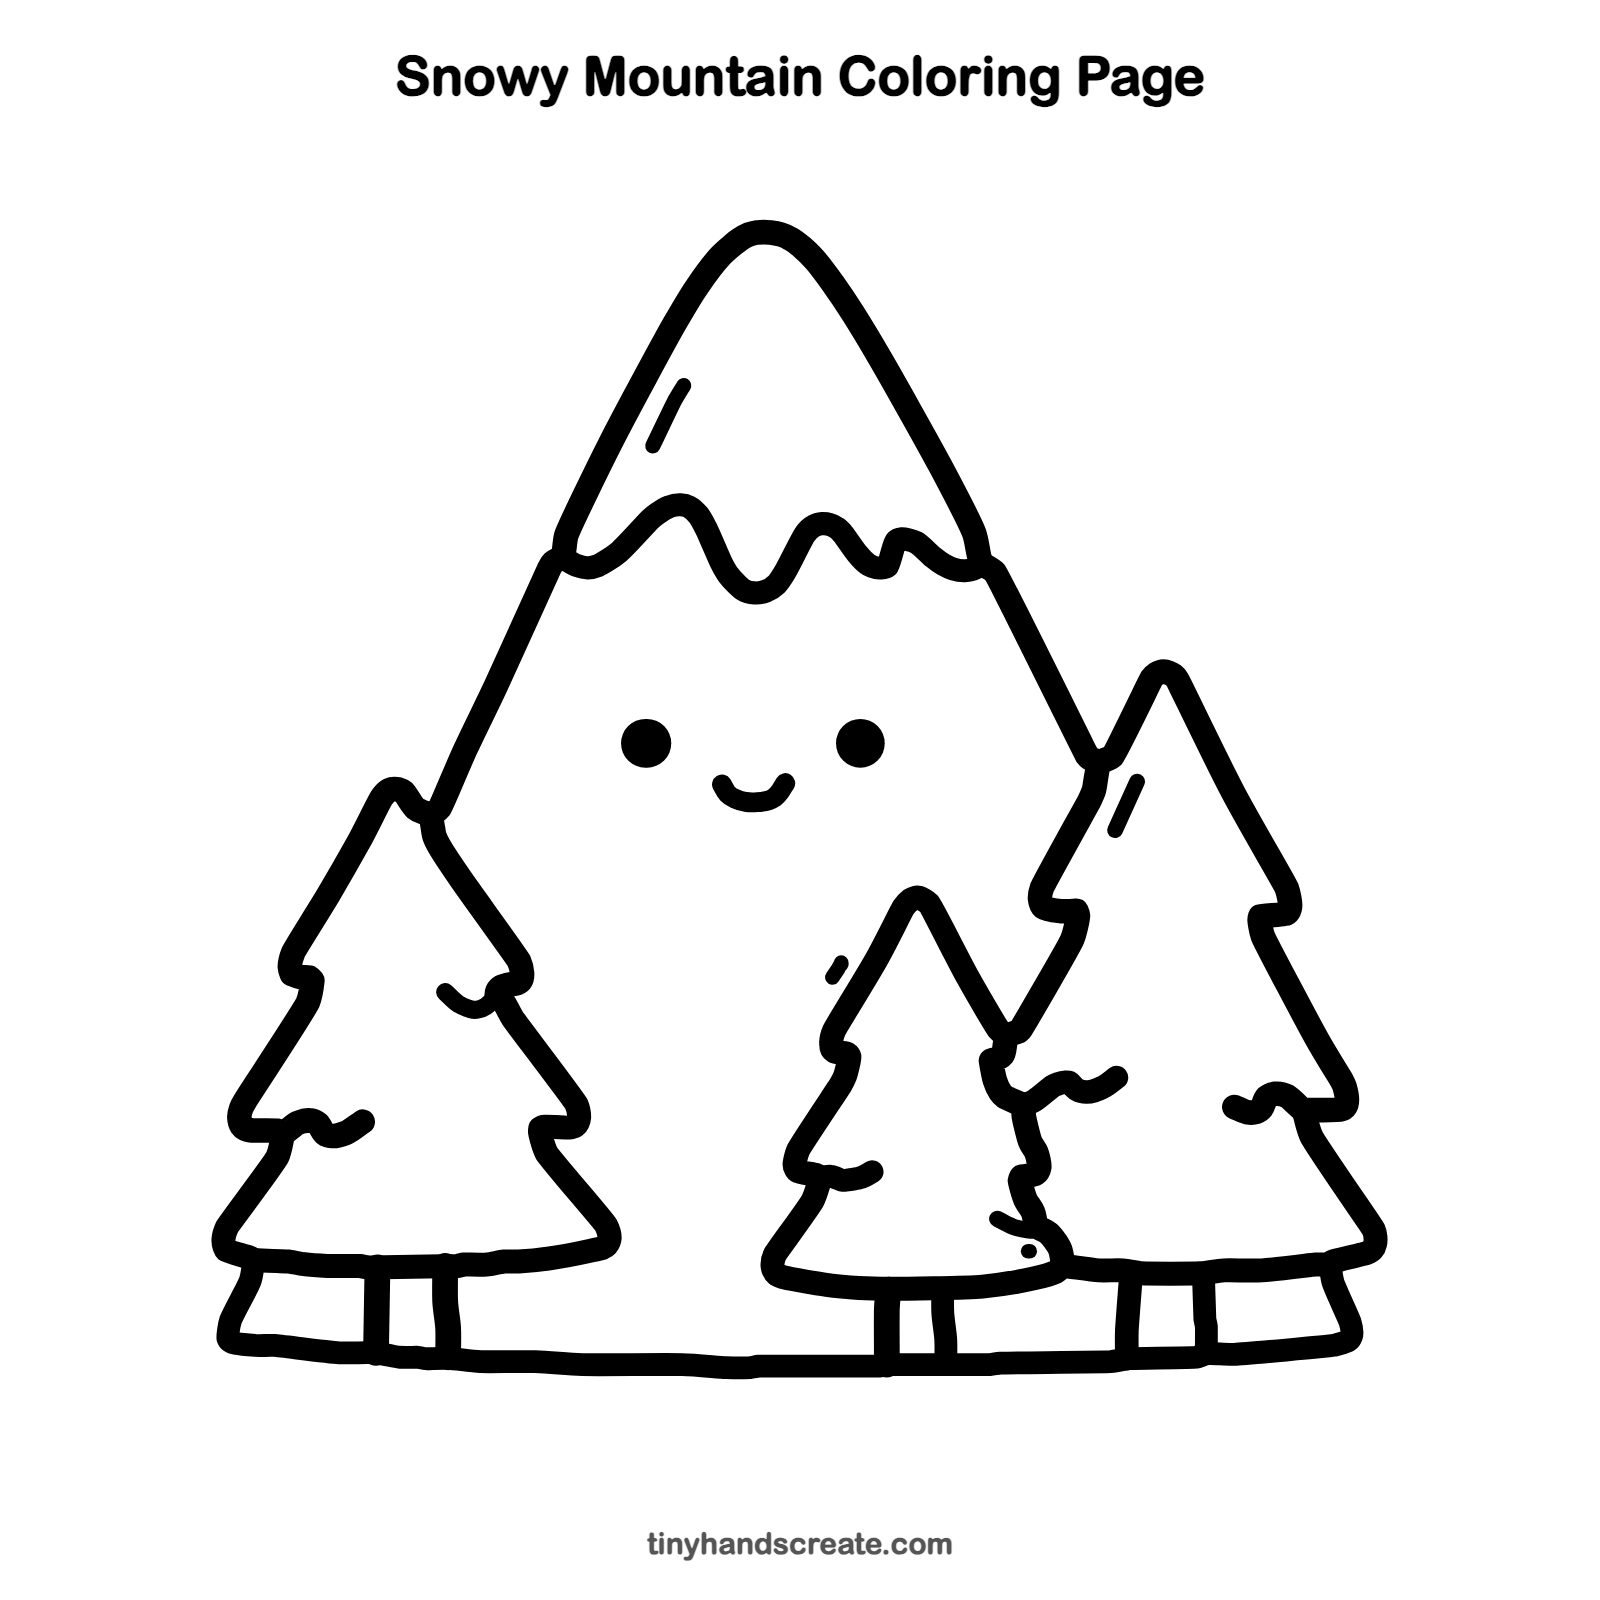
Free snowy mountain coloring page
Want to go straight to coloring? Open this snowy mountain coloring page at full size and print it. It is the same drawing you just learned, with clean lines ready for crayons or markers.
How to color your snowy mountain drawing
Color the mountain gray-blue and the trees deep green, and leave the snowcap white. For a twist, color the sky at sunset with pink and orange.
Snowy mountain fun fact for kids
Mount Everest, the highest mountain above sea level, is about 29,000 feet tall, and its top is covered in snow and ice all year.
Questions about drawing a snowy mountain
What shapes do I need to draw a snowy mountain?
You need triangles for the mountain and trees, a wavy line for the snow, and two dots and a curve for the face.
How do I make my mountain look snowy?
Draw a wavy line with round drips across the top, then leave everything above it white.
How do I make my trees look like they stand on the ground?
Draw two short trunk lines under each tree, then add the ground line so each trunk stops when it touches it.