How to Draw a Fall Mushroom (Easy Step by Step)
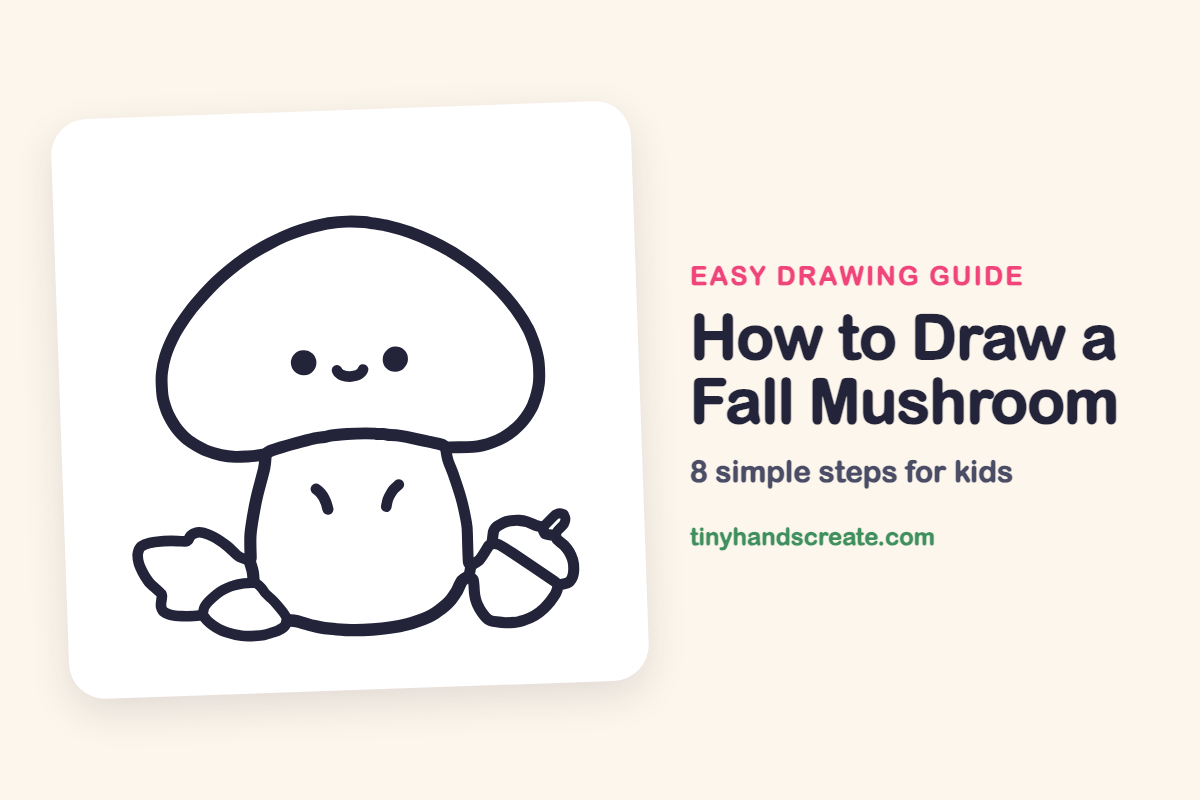
This little mushroom has a sweet smiling face and sits with an acorn and a leaf, which makes it feel just like autumn. It is built from simple shapes: a big dome for the cap, a rounded bump for the stem, an egg shape for the acorn and a wavy leaf. It is a friendly drawing for beginners because every part is soft and round.
- Easy
- 12 minutes
- 8 steps
You need: paper, a pencil, an eraser, and crayons or markers for coloring.
Start drawing
In this article (7 sections)
How to draw a fall mushroom step by step
How to Draw a Fall Mushroom · tinyhandscreate.com
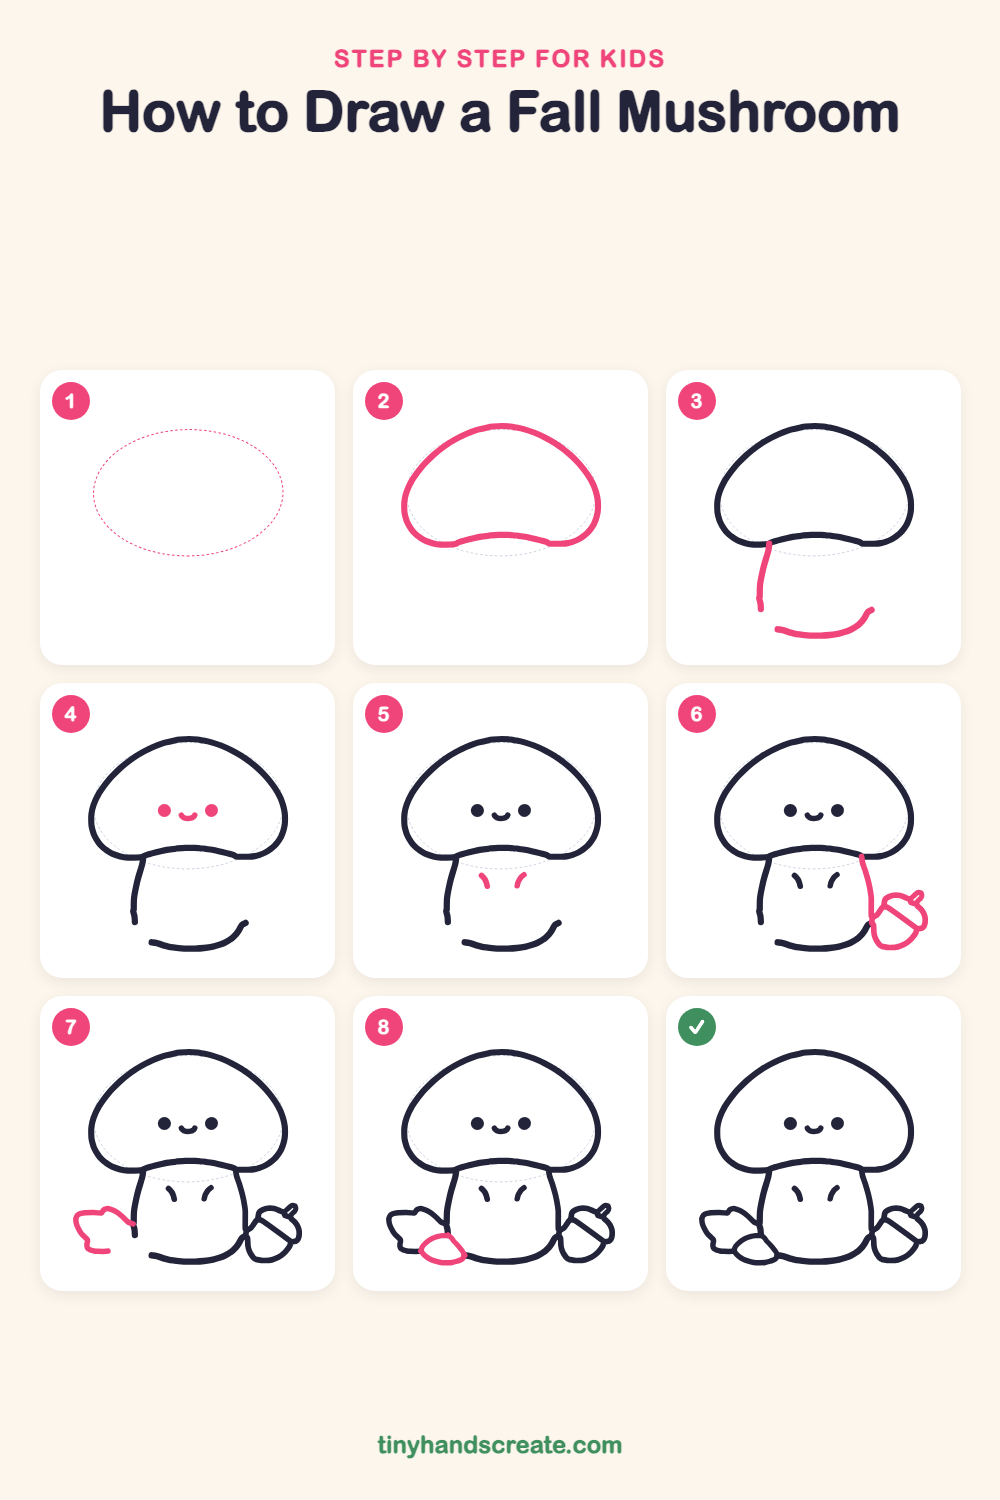
Step 1: Guide shapes
Lightly sketch this oval. It only shows where the big parts go, so press softly. You will erase it at the end.
Step 2: The mushroom cap
Draw a big wide dome like an upside-down bowl. Close the bottom with a gentle wavy line that dips up a little in the middle.
Step 3: Left stem and base
Start under the left end of the cap and draw a line curving down for the left side of the stem. Then draw a curved line near the bottom, shaped like a wide smile, for the ground under the mushroom.
Step 4: A happy face
Draw two round dots for eyes in the middle of the cap. Put a tiny smile, shaped like a little bowl, between them.
Step 5: Little stem marks
Add two short curved lines in the middle of the stem, one on each side. They bend toward each other like tiny parentheses.
Step 6: Right stem and acorn
Start under the right end of the cap and draw a line curving down to finish the right side of the stem. Next to it, draw a small acorn: an egg shape with a bumpy cap on top, a slanted line where the cap meets the nut, and a tiny stick on top.
Step 7: The leaf
On the left side, draw a wavy leaf shape that sticks out from the stem. Give its edges a few bumps and curves.
Step 8: A small rounded shape
Tuck a small rounded shape in front of the leaf, near the bottom of the stem. Close it with a curved line along the bottom so it looks like a little pebble sitting on the ground.
All done!
Erase the guide shapes, go over your lines, then color it in.
Finished your fall mushroom? Keep the pencils out and learn how to draw a mushroom or how to draw a sunflower next.
Tips for drawing a fall mushroom
- Sketch the cap as a light oval first, then draw the wavy bottom edge so the stem has a place to start.
- Start each stem line right under the cap edge so the two parts connect with no gaps.
- Draw the acorn as an egg first, then add the bumpy cap and the slanted line, so the shape stays neat and does not wobble.
Free fall mushroom coloring page
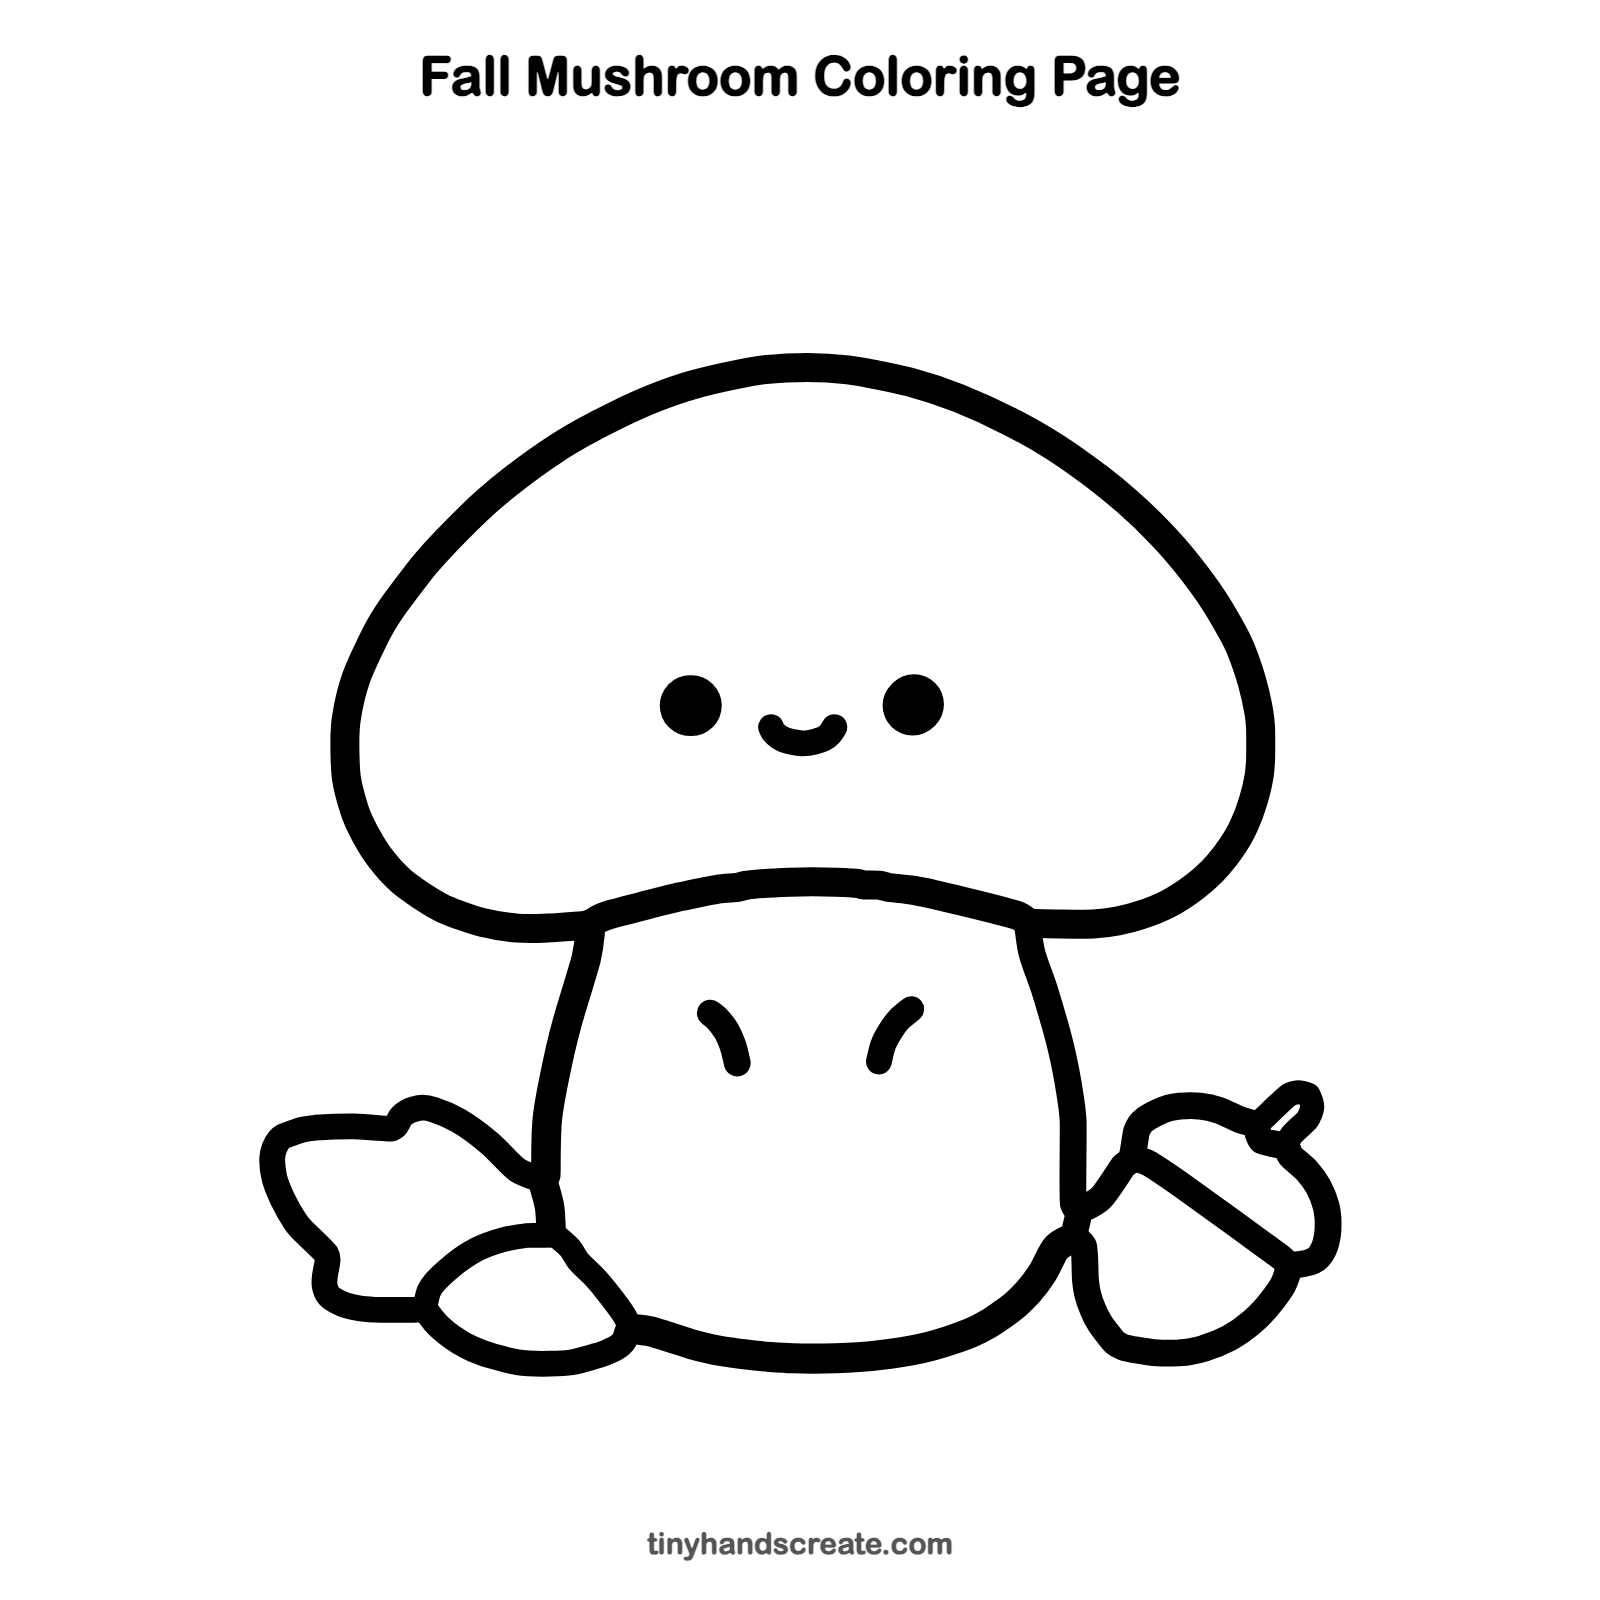
Want to go straight to coloring? Open this fall mushroom coloring page at full size and print it. It is the same drawing you just learned, with clean lines ready for crayons or markers.
How to color your fall mushroom drawing
Try a red or orange cap, a cream stem, a brown acorn, and a leaf in yellow, orange or green. For a creative twist, add white spots on the cap or color the leaf in rainbow stripes.
Fall mushroom fun fact for kids
Mushrooms are not plants. They belong to a group called fungi, and the part we see above ground is only a small piece of a much bigger web of tiny threads hiding in the soil.
Questions about drawing a fall mushroom
What shapes do I need to draw a fall mushroom?
You need a wide dome for the cap, a rounded bump for the stem, and an egg shape for the acorn. The leaf is a wavy shape with a few bumps, and there is a small rounded shape beside it.
How do I make my mushroom look cuter?
Place the eyes in the middle of the cap and keep the smile small. Round, soft lines and a little acorn friend add lots of charm.
Why is my mushroom stem crooked?
Try sketching a light oval for the stem first. Then draw both sides starting from under the cap so they match, and erase the sketch lines when you finish.