Apple Crafts and Activities for Kids: 15 Fall Projects to Celebrate Apple Season
Discover 15 apple crafts and activities for kids, perfect for using up extra fall fruit. You'll learn how to turn apples into paint stamps, science experiments, and more using common household supplies.
- Use firm apples for stamping and softer ones for science experiments.
- Gather basic supplies like apples, washable paint, paper, and craft tools.
- Start with classic halved-apple stamp prints for a simple, engaging activity.
- Slice apples stem-to-blossom to create unique flower-like stamp patterns.
Last September we drove forty minutes to an orchard that promised “the best apple picking in the county,” and my three-year-old picked exactly two apples — both from the ground, both bruised — before declaring she was “too tired to apple” and sitting down in the dirt between the rows. My five-year-old, meanwhile, filled an entire bag with apples he insisted were “the special ones” (they were not; they were just regular Honeycrisps he’d rubbed on his shirt). We came home with twelve pounds of apples, a kid covered head to toe in dirt, and absolutely no plan for what to do with all that fruit beyond the three pies I definitely was not going to bake.
What we did instead was turn apple season into a two-week craft unit, and it ended up being one of the best stretches of hands-on activities we’ve done all year. Apples are cheap, they’re everywhere from Labor Day through Halloween, and — this is the part that sold me — they’re one of the few “materials” you can turn into paint stamps, science experiments, and snack all in the same afternoon. If you’ve got a bowl of apples going soft on the counter and a kid who needs something to do that isn’t a screen, this list is for you.
Below are 15 apple-themed projects sorted roughly from “five minutes to set up, might get done before nap” to “save this for a Saturday afternoon.” Most use apples you already have plus craft supplies you probably have too. I’ve included age ranges, real mess warnings, and a few substitutions for when your produce drawer situation isn’t cooperating.
What You’ll Need: Apple Craft Supply Basics
You don’t need to buy anything special for most of this list, but here’s the running shopping list so you’re not digging through drawers mid-project.
| Category | Items | Notes |
|---|---|---|
| Apples | 4-6 firm apples, mixed colors if possible | Slightly bruised or “not pretty enough to eat” apples work great for stamping |
| Paint | Washable tempera or acrylic craft paint | Red, green, yellow, brown, white |
| Paper | Cardstock, construction paper, brown craft paper, paper plates | Cardstock holds up best to wet paint |
| Craft basics | Scissors, glue sticks, tape, yarn, googly eyes | The usual suspects |
| Extras | Tissue paper, cotton balls, pom-poms, contact paper, pipe cleaners | For texture and 3D projects |
| Kitchen tools | Butter knife (adult-only cuts), apple corer, small bowls | For the anatomy and science activities |
A quick note on apples for crafting: you want firm, not-too-ripe apples for stamping — a soft apple turns to mush the second you press it into paint. If your fruit bowl has gone past its prime, save those for the science experiments instead, where texture doesn’t matter as much.
Apple-Stamp Painting: The Classic (and Two Twists)
This is the project that started our whole apple kick, and it’s the one I’d tell a busy parent to try first if you only have ten minutes. It’s genuinely process art at its finest — the fun is entirely in the stamping, not in producing a masterpiece, which takes all the pressure off both of you.
1. Classic Halved-Apple Stamp Prints
Slice an apple in half through the middle (an adult job — the stem-to-blossom cut, not top to bottom) and let it air-dry cut-side up for about ten minutes so it’s not dripping juice into your paint. Pour a shallow puddle of paint onto a paper plate, press the cut side into the paint, and stamp away on cardstock or a canvas.
What kids love about this one is the pattern that shows up in the center — the little seed chamber creates a natural flower-like shape that looks intentional even when a toddler is the one stamping. Try:
- Red and green paint on white paper for a simple orchard scene
- Stamping in a ring to make a wreath shape (great for a fall front-door decoration)
- Layering colors — dip the same apple half in yellow, then dab a little red on top — for a more realistic gradient
Mess level: Moderate. Apple juice plus paint gets sticky. Cover the table and have a wet cloth ready.
2. Apple-Core Star Stamps
Slice the apple the other way — top to bottom, straight through the core — and you’ll get a five-pointed star pattern from the seed chamber. This one gets an actual gasp out of most kids because it feels like a secret trick. Stamp these in a cluster on dark blue or black paper with white and yellow paint for a nighttime sky scene, or use them as-is for a rustic, folksy look on cards.
If your child is old enough to understand a simple science tie-in, this is a nice moment to mention that the star pattern comes from the apple’s seed pods, arranged in a five-part symmetry that shows up in a lot of fruit — a preview of the anatomy activity later in this list.
3. Apple-Stamped Wrapping Paper and Cards
Once your kid is warmed up on stamping, roll out a length of plain brown craft paper or a stack of blank cards and let them go wild. This is a genuinely useful craft, not just a keep-them-busy one — apple-stamped wrapping paper is a sweet, low-cost way to wrap teacher gifts or birthday presents through the fall, and it pairs nicely if you’re already stocking up on DIY teacher gift ideas for the school year. Cards made this way also make a nice bridge into back-to-school crafts if you’re doing thank-you notes for a new teacher.
Let everything dry flat overnight before folding or rolling — apple stamps put down more paint than a typical foam stamp, and it takes longer to fully cure.
Paper and Paint Apple Trees
If stamping is the five-minute win, apple trees are the “we have a whole rainy Saturday” project. All three versions below use the same basic tree shape but completely different techniques, so you can pick based on your child’s age and how much sitting-still you’re working with.
4. Handprint Apple Tree
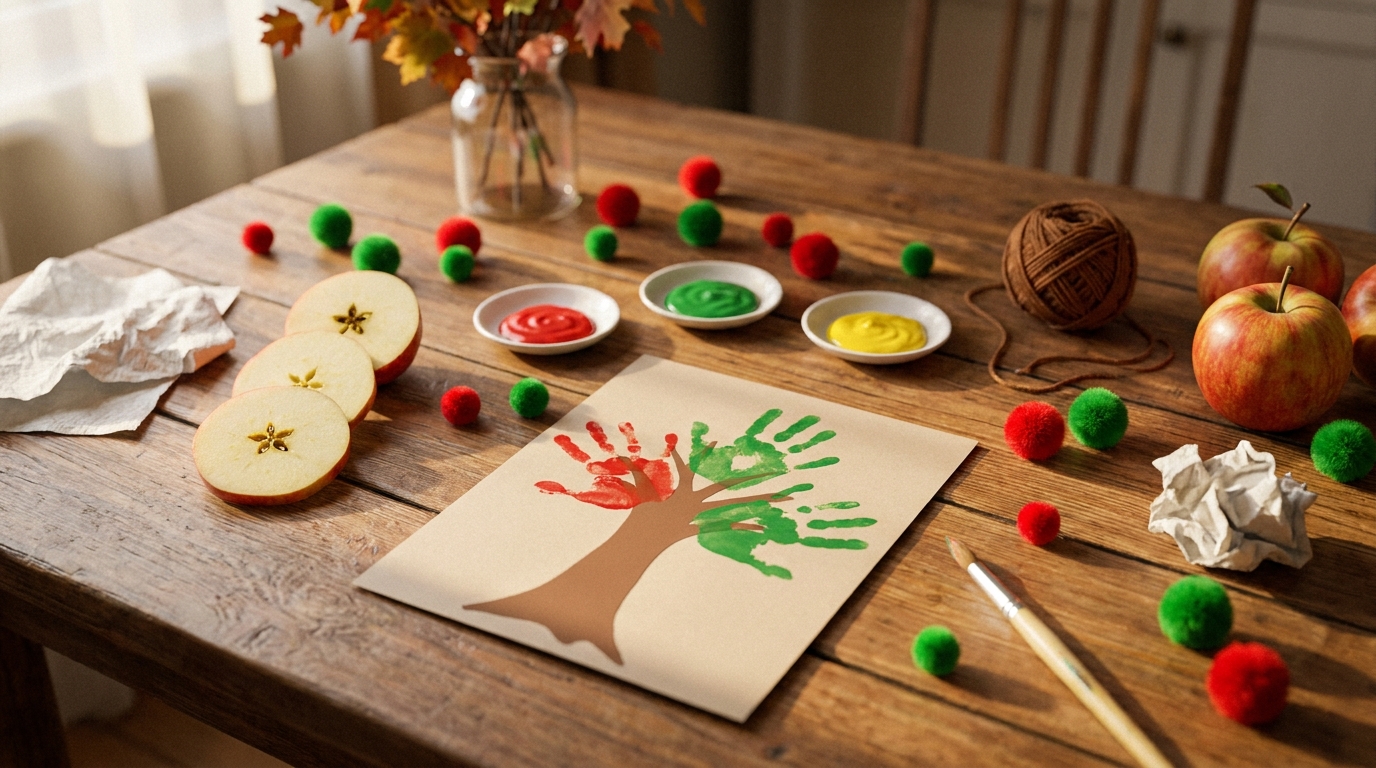
Paint your child’s palm and fingers brown, press it onto paper stem-down to make the trunk and branches, and let it dry. Then either fingerprint red and green paint “apples” onto the branches, or glue on pom-poms or small red paper circles once the handprint has dried. Babies and toddlers can do this one with help holding the hand steady; preschoolers can do the whole thing solo, including gluing on the fruit.
This is the project grandparents actually keep — I’d budget for a version on real watercolor paper if you want it to survive being framed.
5. Paper-Plate Tissue-Paper Apple Tree
Cut a paper plate in half. Use one half as the tree canopy (paint it green, or skip paint and just glue green construction paper on top) and roll the other half into a cone or strip for the trunk. Have your child scrunch small squares of red, yellow, and green tissue paper into balls and glue them across the canopy as apples. The texture that comes from three-dimensional tissue balls looks far more impressive than the effort involved, which is exactly the kind of trade I look for by 4 p.m. on a Tuesday.
This one also pairs well as a follow-up to fall leaf crafts — if you’ve already got a bag of pressed leaves from a nature walk, glue a few real leaves around the base of the tree for extra texture.
6. 3D Yarn-Wrapped Paper Apple Tree
For kids who’ve graduated past basic scissor skills (usually 5 and up), cut a trunk-and-branch shape from brown cardstock and let your child wrap yarn around the branches in whatever pattern they like — this builds real fine-motor control and hand-crank coordination. Once wrapped, glue small red pom-poms or felt apple shapes onto the branch tips. The yarn wrapping takes patience, so expect this to be a stop-and-start project over a day or two rather than a single sitting, especially for younger kids in the age range.
Apple Anatomy for Little Scientists
This is the section I didn’t expect to be a hit, and it ended up being the thing my kids talked about for days afterward. Cutting an apple open and actually looking at what’s inside turns a snack into a lesson, with zero lecturing required.
7. Apple Anatomy Cross-Section Model
Slice an apple in half (adult cut) and set it in front of your child alongside a simple diagram — you can sketch one freehand, it doesn’t need to be fancy. Point out and name the parts together as you find them:
| Part | What it looks like | What it does |
|---|---|---|
| Skin | Outer colored layer | Protects the fruit |
| Flesh | White, crunchy interior | Stores food/water for the seeds |
| Core | Tough center section | Holds and protects the seeds |
| Seeds | Small brown/black shapes | Would grow a new apple tree |
| Stem | Woody stick at the top | Connected the apple to the tree |
| Calyx | The little star/flower shape at the bottom | Leftover from the apple blossom |
Once you’ve named everything on the real apple, have your child recreate it as a craft: cut a circle of tan or white paper for the flesh, glue a smaller brown circle in the middle for the core, dot on black paper seeds, and add a green paper stem and a red or green paper skin ring around the edge. This “build your own apple” model is a genuinely good way to check whether a preschooler actually absorbed the vocabulary, because they have to place each piece correctly.
8. Sink-or-Float Seed Science
This one takes the leftover seeds from the anatomy activity and turns them into a two-minute experiment. Fill a clear cup or bowl with water and let your child drop in apple seeds, then a whole small apple, then a slice of apple. Ask them to guess before each drop: sink or float? (Whole and sliced apples float — about 25% of an apple’s volume is air, which surprises most adults too. Loose seeds usually sink.)
It’s a low-prep way to introduce the idea of density without ever using that word, and it’s a nice callback if you’ve already done balloon science experiments or kitchen science experiments this year and your kid is starting to expect a “why” behind the “what.”
Apple-Themed Sensory and Fine Motor Play
These three are less about the finished product and more about giving little hands something satisfying to do — good options for the sibling who’s too young for scissors, or for anyone who needs twenty quiet minutes.
9. Apple-Themed Sensory Bin
Fill a bin with dried red lentils, kidney beans, or even shredded red and green tissue paper as a base “orchard floor,” then add mini pom-poms as apples, a few real cinnamon sticks or wooden dowels as “trees,” small tongs, and a few plastic bowls for sorting. Kids scoop, sort, and dump — that’s the whole game, and it’s genuinely absorbing for toddlers and preschoolers alike. If you already keep a rotation of themed bins going, this slots right into a sensory bin collection without much extra buying.
Mess level: Contained if you keep it in the bin and set clear “bin stays on the table” rules. Expect some spillage regardless — a towel or shower curtain underneath saves you a lot of sweeping.
10. Apple Lacing Cards
Cut a simple apple shape out of cardstock or a paper plate, punch holes around the edge with a hole punch, and give your child a shoelace or yarn with a piece of tape wrapped around the end (instant “needle”). Lacing in and out of the holes is fantastic for the pincer grip and hand-eye coordination kids need before they’re ready to write. This is a great one to laminate or cover in clear contact paper so it survives being used over and over through the whole season.
11. Apple Counting and Color Sorting
Cut or print a batch of paper apples in red, green, and yellow, and mix in a set of numbered cards or a simple ten-frame. Younger kids sort by color into three piles; older preschoolers count out the right number of apples to match each numeral card. It’s an easy one to scale up or down depending on who’s playing — my three-year-old sorted by color while her brother built number sentences (“3 apples plus 2 apples”) with the same set of cutouts.
Apple Art Beyond Painting
Once you’ve stamped, painted, and sorted your way through apple season, these two projects give you a change of pace using texture and light instead of paint.
12. Torn-Paper Apple Mosaic
Draw a large apple outline on cardstock, then have your child tear (not cut) small pieces of red, yellow, and green construction paper or tissue paper and glue them inside the lines to fill in the shape. Tearing paper is its own fine-motor skill, different from cutting, and it produces a naturally textured, mosaic-like look that’s forgiving of imperfect edges — there’s no way to “mess up” a torn-paper piece, which makes it a good low-stress option for a kid who gets frustrated easily with scissors.
13. Apple Contact-Paper Suncatcher
Cut two apple shapes out of clear contact paper. Peel the backing off one, sticky-side up, and let your child press on small pieces of red and green tissue paper until it’s mostly covered, then press the second contact-paper apple on top (sticky sides together) to seal it. Trim the edges and tape it to a window. The light coming through turns it into a genuinely pretty stained-glass effect, and because it’s just tissue paper and contact paper — no paint, no glue, no drying time — it’s one of the least messy projects on this whole list.
Apple Pretend Play and Kitchen Crafts
These last two lean into imaginative and practical play rather than a finished art piece, and they’re a nice way to close out an apple-themed week.
14. DIY Pretend Apple Orchard or Apple Stand
Set up a corner of the living room or backyard as an “orchard”: hang a few paper or felt apples from a laundry-drying rack or a low tree branch for picking, and set up a small table as an apple stand with a cash box, paper bags, and play money. Kids take turns picking, bagging, “selling,” and “buying” apples. This kind of dramatic play builds vocabulary and social skills in a way that’s easy to underestimate — and it’s a great rainy-day rescue if you’d promised an orchard trip that got weathered out. It fits neatly alongside other rainy day indoor activities if the forecast doesn’t cooperate with your fall plans.
15. Apple-Stamped Tote Bag or T-Shirt
Take the stamping technique from project #1 and move it onto fabric instead of paper. Use fabric paint (regular craft paint will crack and wash out) on a plain canvas tote bag or an old white t-shirt, and heat-set according to the paint bottle’s instructions once it’s fully dry — usually a few passes with a warm iron over a thin cloth. Kids get genuinely excited about wearing or carrying something they made themselves, and a tote bag stamped with apples is a sweet, useful thing to actually take apple picking next year.
Matching Apple Crafts to Your Child’s Age
Not every project on this list fits every age, so here’s a quick guide for where to start based on who you’re working with.
| Age range | Best fits | Skip for now |
|---|---|---|
| 18 months–2.5 years | Handprint tree, sensory bin, torn-paper mosaic (with heavy help) | Lacing cards, seed science (choking risk with loose seeds) |
| 3–4 years | Apple stamping, paper-plate tree, counting/sorting, suncatcher | Yarn-wrapped tree, fabric stamping (needs more control) |
| 5–6 years | Anatomy model, seed science, lacing cards, mosaic, orchard pretend play | — most projects work with light supervision |
| 7 and up | Yarn-wrapped tree, fabric stamping, running the “apple stand” solo | — ready for nearly everything, can even help plan the session |
If you’ve got a spread of ages under one roof, the sensory bin and the pretend orchard are your best bets for genuine multi-age play — everyone can find their own version of “in” without one kid’s project depending on another’s pace.
Keeping the Mess (Mostly) Contained
I promised realistic mess expectations up top, so here’s the honest version: apple stamping is messier than a foam stamp because real fruit holds more paint and drips more juice, and cut apples brown quickly once they’ve been sitting out, which adds a slightly sticky, oxidized layer to your table by the end of a session. A few things that actually help:
- Prep apples right before you need them. Don’t slice a whole bowl an hour ahead — they’ll brown, get slippery, and stamp worse.
- Use a tray, not the open table. Corral paint and apple halves onto a baking sheet or large tray so drips have a boundary.
- Keep a damp cloth within arm’s reach, not across the kitchen. You will need it faster than you think.
- Smocks over “just this once.” Apple paint stains are avoidable ones, unlike genuine process-art paint that’s meant to end up everywhere.
If you’re looking for the truly low-mess end of apple season, lean on the suncatcher, lacing cards, and sensory bin — none of them involve wet paint at all. And if your household default is “let’s avoid a cleanup crisis today,” it’s worth browsing a broader list of mess-free art activities to round out your fall rotation on the days you just don’t have it in you.
Frequently Asked Questions
What’s the best age to start apple crafts with kids?
Most of these projects work from about 18 months onward with adult help, especially handprint art, sensory bins, and simple sorting. True independent stamping and cutting-based crafts are easier starting around age 3, and the science-focused activities (anatomy, seed sink-or-float) land best with kids 4 and up who can follow a simple explanation and ask their own questions.
Do I need special paint for apple stamping?
No — regular washable tempera or craft acrylic paint works fine on paper and cardstock. The only exception is fabric projects like the stamped tote bag, where you’ll want fabric paint specifically so the design survives washing and doesn’t crack once dry.
My apples went soft before we got to the crafts — are they still usable?
Soft apples don’t stamp well since they collapse under pressure instead of holding their shape, but they’re perfect for the sensory bin, the anatomy cross-section (texture doesn’t matter there), and the seed science experiment. Save your firmest apples for stamping and let the softer ones handle the activities where crispness isn’t the point.
How do I keep cut apples from browning during a longer craft session?
A quick dip or brush of lemon juice and water (roughly one part lemon juice to three parts water) slows browning for an hour or two, which is usually enough for one sitting. If you’re stamping over multiple days, just cut fresh apple halves each time rather than trying to preserve one set.
Are apple seeds safe for kids to handle?
Yes, for supervised activities like counting or the sink-or-float experiment — just don’t let very young children put them in their mouths, since apple seeds contain a small amount of a compound that’s mildly toxic in large quantities (you’d need to chew and swallow a large number of seeds for it to matter, but it’s still smart to supervise closely with toddlers who put everything in their mouths).
What can I do with all the leftover apples after a week of crafting?
Applesauce and baked apple slices are the easiest low-effort uses, and slightly bruised craft apples are perfectly fine for both since you’re cooking and mashing them anyway. If you’ve got a genuine surplus, apples also freeze well pre-sliced for smoothies or future baking.
How is this different from doing regular fall leaf crafts?
Apple crafts lean more into food-based science (anatomy, seeds, sink-or-float) and stamping techniques that leaf crafts don’t offer, while fall leaf crafts are better for nature walks and pressing/preserving real specimens. They pair well together as a two-week fall unit — leaves one week, apples the next — rather than competing for the same activity slot.
Wrapping Up Apple Season
However your apple haul happens this year — a full orchard trip, a farmers market bag, or a “these were on sale” grocery run — you’ve now got fifteen ways to turn it into an afternoon (or two weeks) of genuine hands-on fun. Start with whichever one matches your energy level today, keep a damp cloth close by, and don’t stress if the “finished” apple tree looks more like a Rorschach test than a Pinterest photo. That’s kind of the whole point of apple season: it’s messy, it’s seasonal, and it doesn’t last long enough to overthink it.