Balloon Science Experiments for Kids: 10 Mind-Blowing Activities Using Just Balloons
Discover 10 mind-blowing balloon science experiments using cheap household items to teach your kids physics, chemistry, and more. You'll learn how to make science fun and accessible, sparking wonder and real learning.
- Use cheap balloons to teach diverse science concepts.
- Observe instant visual feedback and hands-on learning.
- Spark wonder and connect science to the real world.
- Prioritize safety; supervise young children with balloons.
- Perform 10 experiments demonstrating physics, chemistry, and more.
You can spend a small fortune at the science supply store. You can order elaborate chemistry kits with tiny bottles that get lost behind the couch within a week. You can print out instructions for experiments that require materials you have never heard of and will never use again.
Or you can grab a bag of balloons from the dollar store and blow your kids’ minds.
Balloons are the single most underrated science supply in your house. A standard bag of latex balloons costs about a dollar, and with a few pantry staples you probably already own, you can demonstrate physics, chemistry, acoustics, air pressure, static electricity, and engineering concepts that even adults find genuinely impressive.
The best part? Kids do not see any of this as “learning.” They see a balloon inflating itself like magic. They see their hair standing straight up. They see a skewer piercing a balloon without popping it, and they lose their minds. That sense of wonder is the entire point. When a child’s jaw drops, their brain opens up. That is the moment real learning happens.
This guide contains 10 tested, parent-approved balloon experiments that range from simple enough for a 3-year-old to complex enough to fascinate a fifth grader. Every single experiment uses household materials, works on the first try (when you follow the instructions), and comes with a simple explanation of the science behind it so you can sound like an absolute genius to your kids.
Let’s pop into it. Well, actually, the whole point of several of these experiments is NOT popping. But you get the idea.
Why Balloons Are Perfect for Teaching Science
Before we dive into the experiments, here is why balloons are such a powerful teaching tool for kids of all ages.
They are cheap and accessible. A 50-pack of balloons costs next to nothing, meaning kids can experiment freely without anyone stressing about wasting expensive materials. Science should never feel precious.
They provide instant visual feedback. When a balloon inflates, flies across the room, or makes a funny noise, kids can SEE and HEAR the science happening in real time. Abstract concepts become tangible.
They are hands-on by nature. Kids have to stretch, inflate, tie, hold, and manipulate balloons. Every experiment involves active participation rather than passive observation.
They tap into excitement. There is something inherently exciting and slightly unpredictable about balloons. Will it pop? Will it fly? That mild suspense keeps kids engaged.
They connect to real-world science. Air pressure, chemical reactions, static electricity, and Newton’s laws are not just textbook concepts. They are forces that shape our everyday world, and balloons make them visible.
Safety Notes for Balloon Activities with Young Kids
Balloons are a choking hazard for children under 3. Uninflated balloons and pieces of popped balloons are especially dangerous. Always supervise young children closely during every experiment.
Here are a few ground rules to keep things safe and fun:
- Children under 3 should only participate with direct, hands-on adult supervision. Never leave a young toddler alone with balloons.
- Inflate balloons yourself for children under 5. Young kids can struggle with inflation and may accidentally inhale a balloon.
- Dispose of popped balloon pieces immediately. Gather them up right away and put them in the trash, not on the table.
- Have scissors nearby (for adult use) to quickly cut a tangled or stuck balloon rather than letting a child pull on it.
- Watch for latex allergies. If your child has a known latex allergy, use latex-free balloons (often labeled as “hypoallergenic” or made from mylar or nitrile).
- Keep balloons away from pets. Dogs especially love to chew on balloons, and the choking risk applies to them too.
With those safety guidelines in mind, let’s get experimenting.
Experiment 1: The Static Electricity Hair Raiser
Wow Factor Rating: 4 out of 5
This is the classic, and for good reason. Nothing gets a bigger laugh than watching someone’s hair stand straight up like they stuck a finger in a cartoon light socket.
Materials Needed
- 1 inflated balloon
- A head of clean, dry hair (your child’s works great)
- Optional: small pieces of tissue paper, aluminum cans, or a thin stream of water from a faucet
Step-by-Step Instructions
- Inflate a balloon and tie it off.
- Have your child rub the balloon vigorously against their hair for about 10 to 15 seconds. Use quick, firm strokes in one direction.
- Slowly pull the balloon away from their head while they stand still.
- Watch as their hair reaches up toward the balloon, standing on end.
- For extra fun, hold the charged balloon near small pieces of torn tissue paper on a table. The paper will jump up and stick to the balloon.
- Another variation: Turn on a faucet to produce a thin stream of water. Hold the charged balloon near (not touching) the stream. The water will bend toward the balloon.
The Science Behind It
When you rub the balloon on hair, electrons (tiny particles with a negative charge) transfer from the hair to the balloon. The balloon becomes negatively charged, and the hair becomes positively charged. Since opposite charges attract, the hair reaches toward the balloon. Each strand of hair also has the same positive charge, and since like charges repel each other, the individual hairs push away from one another, making them stand up.
The same principle works on tissue paper and water. The negatively charged balloon attracts the positively charged side of neutral objects, pulling them closer.
Age Adaptation Tips
- Ages 3-4: Keep it simple. Rub the balloon on their head, show them the hair trick, and let them try sticking the balloon to a wall (it will cling because of the static charge). Use the word “sticky” and “magic” to describe what they see.
- Ages 5-7: Introduce the tissue paper and water-bending variations. Use the words “positive” and “negative” and explain that tiny invisible particles called electrons are moving around.
- Ages 8-10: Discuss electrons, protons, and charge. Challenge them to figure out which materials create the best static charge (wool sweater vs. cotton shirt vs. polyester). Have them record results in a notebook.
Experiment 2: The Balloon Rocket Zip Line
Wow Factor Rating: 5 out of 5
This one is loud, fast, and feels like a real engineering project. Kids absolutely love it, and you can run it dozens of times without getting bored.
Materials Needed
- 1 balloon (long “rocket-shaped” balloons work great, but round ones work too)
- A drinking straw
- String or fishing line (about 10 to 15 feet)
- Tape
- 2 anchor points (chairs, doorknobs, or trees if you are outside)
Step-by-Step Instructions
- Thread the string through the drinking straw.
- Tie each end of the string to an anchor point so that the string is stretched tight and roughly level across the room. Two chairs pushed apart work perfectly.
- Slide the straw to one end of the string.
- Inflate the balloon but do NOT tie it. Pinch the neck shut with your fingers (or have a helper hold it).
- Tape the inflated balloon to the straw. Use two pieces of tape on top of the balloon so the straw is secured along the balloon’s length.
- When ready, release the balloon’s neck.
- Watch the balloon rocket zoom along the string to the other end.
The Science Behind It
This experiment demonstrates Newton’s Third Law of Motion: for every action, there is an equal and opposite reaction. When air rushes out of the balloon in one direction, it pushes the balloon in the opposite direction. This is the same basic principle that powers real rockets. Rocket engines expel hot gases downward, and the rocket moves upward in response.
Age Adaptation Tips
- Ages 3-4: Let them push the “launch button” (release the balloon). Talk about how the air pushes the balloon forward. Try different starting positions and let them say “3, 2, 1, blast off!”
- Ages 5-7: Have them experiment with different balloon sizes, different amounts of air, and angled strings (uphill vs. downhill). Which setup makes the balloon go the fastest or the farthest?
- Ages 8-10: Introduce variables and measurement. Use a measuring tape to mark how far the balloon travels with different amounts of air. Have them create a graph. Discuss how real rockets use this principle in space, where there is no air.
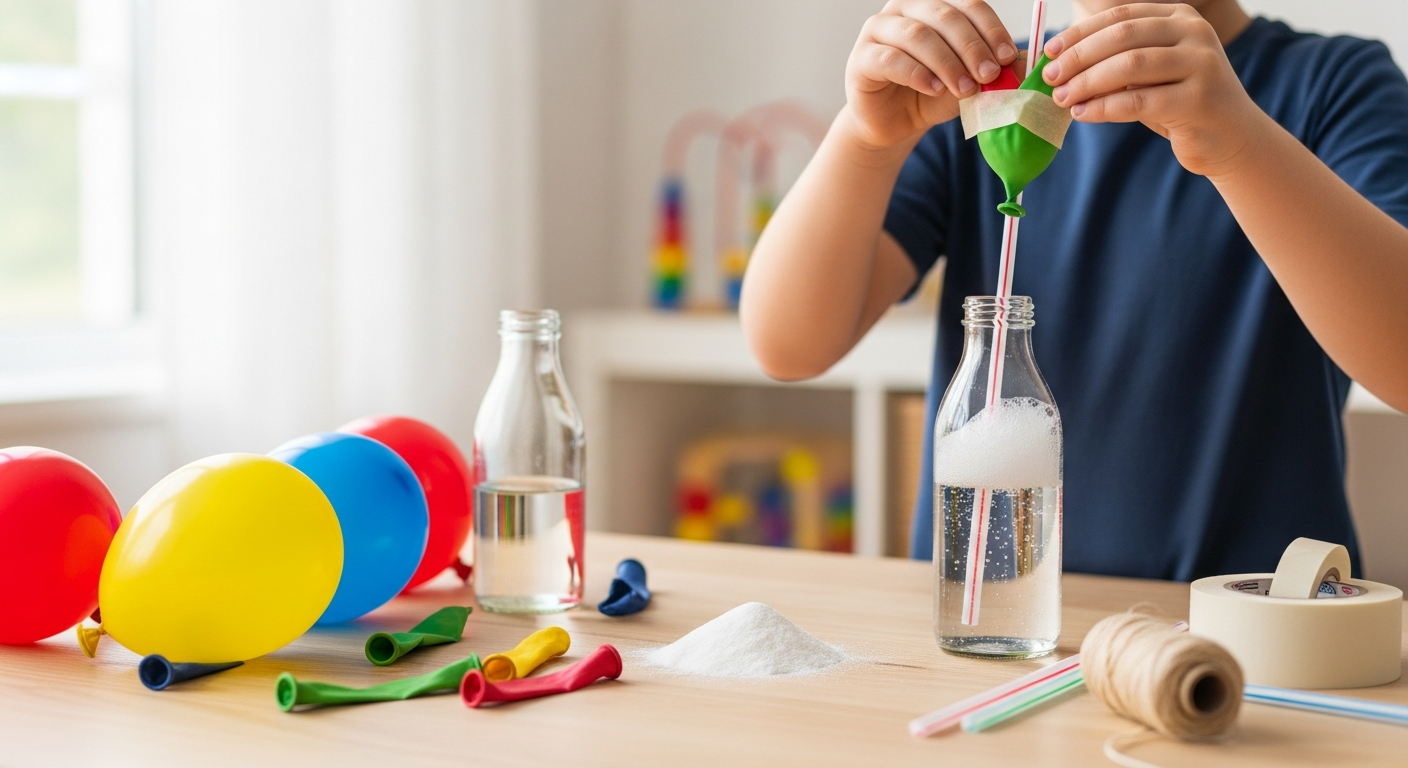
Experiment 3: The Self-Inflating Balloon
Wow Factor Rating: 5 out of 5
This is the experiment that makes kids gasp. A balloon inflates itself with absolutely no one blowing into it. It looks like pure sorcery, and the explanation is pure chemistry.
Materials Needed
- 1 balloon
- 1 empty plastic bottle (a 500ml or 16oz water bottle works perfectly)
- 3 tablespoons of white vinegar
- 1 tablespoon of baking soda
- A funnel (or a piece of paper rolled into a cone)
Step-by-Step Instructions
- Pour the vinegar into the empty plastic bottle.
- Use the funnel to add the baking soda into the deflated balloon. Stretch the balloon’s opening over the funnel and tap the baking soda through. Shake gently until the baking soda settles into the bottom of the balloon.
- Carefully stretch the mouth of the balloon over the top of the bottle. Let the balloon hang to the side so the baking soda stays inside the balloon and does not fall into the vinegar yet.
- When you are ready, lift the balloon upright so the baking soda falls down into the vinegar.
- Watch as the mixture fizzes and the gas produced inflates the balloon.
The Science Behind It
When baking soda (a base) meets vinegar (an acid), they undergo a chemical reaction that produces carbon dioxide gas, water, and sodium acetate. The carbon dioxide gas has nowhere to go except up into the balloon, which inflates as the gas fills it. This is the same type of gas that makes soda fizzy and is what you exhale when you breathe out.
Age Adaptation Tips
- Ages 3-4: Present it as “magic” and let them watch the balloon grow. Ask them to predict if a bigger balloon or a smaller balloon will work better. Let them help pour the vinegar with your guidance.
- Ages 5-7: Teach the word “chemical reaction.” Let them measure the baking soda and vinegar themselves. Ask what would happen if they used MORE baking soda. Try it and compare.
- Ages 8-10: Have them design a controlled experiment. Test different ratios of baking soda to vinegar and measure the balloon’s circumference with a string. Discuss how this relates to carbon dioxide in the atmosphere and in carbonated drinks.
Experiment 4: The Unbreakable Balloon Skewer
Wow Factor Rating: 5 out of 5
Push a wooden skewer straight through an inflated balloon without popping it. Yes, really. This experiment looks completely impossible, and your kids will want to try it over and over.
Materials Needed
- Several balloons (you will probably pop a few while learning the technique)
- Wooden bamboo skewers (the long ones used for grilling)
- A small amount of cooking oil or petroleum jelly
- Paper towels
Step-by-Step Instructions
- Inflate a balloon to about three-quarters of its maximum size. You want it firm but not stretched to its limit. Tie it off.
- Look at the balloon carefully. You will notice two spots where the rubber is thicker and less stretched: the dark spot at the very top (opposite the tied end) and the thick area right around the knot where you tied it.
- Dab a tiny bit of cooking oil or petroleum jelly on the tip of the skewer. This helps it slide through smoothly.
- Gently press the pointed end of the skewer into the thick rubber at the top of the balloon (the dark spot). Use slow, steady pressure with a slight twisting motion. Do NOT jab. Patience is everything.
- Once the skewer tip pierces through, continue pushing it gently and aim for the thick area near the knot on the other end.
- Push the skewer all the way through and out the other side.
- The balloon should remain inflated with a skewer running straight through it.
The Science Behind It
Balloons are made of polymer chains, which are long, stretchy molecules linked together. At the thickest points of the balloon (the top and near the knot), the polymer chains are not fully stretched. When you push a skewer through these areas slowly, the polymer chains can stretch around the skewer and form a seal, preventing air from escaping. If you push the skewer through the thin, fully-stretched sides of the balloon, the polymer chains cannot stretch any further, and the balloon pops.
Age Adaptation Tips
- Ages 3-4: This is an adult-performs, child-watches experiment due to the sharp skewer. Let them touch the “magic” skewer after it is through. Ask them to point to where they think the skewer went in.
- Ages 5-7: Explain that the balloon is thicker in some spots than others. Let them feel the thick top spot before you begin. After the demonstration, give them a balloon and a dull pencil eraser to find the thick and thin spots.
- Ages 8-10: Let them attempt the skewer themselves with supervision. Discuss polymers and molecular structure. Challenge them: can they get two skewers through the same balloon?
Experiment 5: The Balloon in a Bottle Trap
Wow Factor Rating: 3 out of 5
Try to inflate a balloon inside a bottle. It seems like it should be easy. It is not. This experiment beautifully demonstrates the invisible power of air pressure.
Materials Needed
- 1 balloon
- 1 empty plastic bottle (remove the cap)
- Optional: a thumbtack or small nail (for the reveal)
Step-by-Step Instructions
- Stretch the mouth of the balloon over the opening of the empty bottle so the deflated balloon hangs inside the bottle.
- Challenge your child to blow up the balloon while it is inside the bottle. Hand them the bottle and let them try.
- They will not be able to do it. No matter how hard they blow, the balloon barely inflates at all.
- Now for the reveal: use a thumbtack to poke a small hole in the bottom of the bottle. Cover the hole with your finger.
- Have your child try again. This time, the balloon inflates easily inside the bottle.
- While the balloon is inflated, cover the hole with your finger and take your mouth off the balloon. The balloon stays inflated without being tied because the air pressure holds it in place. Release your finger from the hole, and the balloon deflates.
The Science Behind It
The bottle looks empty, but it is actually full of air. When your child tries to inflate the balloon, the balloon pushes against the air already trapped inside the bottle. Since the air has nowhere to go, it pushes back and prevents the balloon from expanding. When you poke a hole in the bottom, the trapped air can escape through the hole as the balloon inflates, making room for the balloon to grow. Covering the hole after inflation traps the air pressure difference, keeping the balloon inflated.
Age Adaptation Tips
- Ages 3-4: Let them try to blow up the balloon in the bottle and experience the “impossible” feeling. Then show them the magic hole and let them try again. Talk about how air is invisible but takes up space.
- Ages 5-7: Before revealing the hole trick, ask them to hypothesize WHY the balloon will not inflate. Introduce the concept of air pressure and the idea that “empty” containers are full of air.
- Ages 8-10: Discuss atmospheric pressure, how barometers work, and why airplane cabins are pressurized. Have them predict what would happen with bottles of different sizes.
Experiment 6: The Balloon Hovercraft
Wow Factor Rating: 4 out of 5
Build a working hovercraft that glides across your kitchen table using a balloon, a CD, and a bottle cap. It is surprisingly smooth and endlessly entertaining.
Materials Needed
- 1 balloon
- 1 old CD or DVD (do not use one you want to keep)
- 1 pop-top bottle cap (the kind from a sports water bottle or dish soap that you can open and close)
- Hot glue gun or strong craft glue
- A smooth, flat surface (kitchen table, hardwood floor, or countertop)
Step-by-Step Instructions
- Glue the pop-top bottle cap over the center hole of the CD. Make sure the seal is airtight. Let the glue dry completely. The pop-top cap should be in the closed position while gluing.
- Once dry, close the pop-top cap.
- Inflate the balloon and twist the neck (do not tie it) to keep the air inside.
- While holding the twist, stretch the mouth of the balloon over the pop-top cap.
- Place the CD on a smooth, flat surface.
- Open the pop-top cap and give the CD a gentle push.
- Watch as the CD glides across the surface on a cushion of air.
The Science Behind It
When air escapes from the balloon through the cap, it flows out beneath the CD, creating a thin cushion of air between the CD and the surface. This air cushion dramatically reduces friction, the force that normally slows objects down when they slide across a surface. Real hovercrafts use the same principle with powerful fans instead of balloons. The reduced friction is why the hovercraft glides so smoothly with just a gentle nudge.
Age Adaptation Tips
- Ages 3-4: An adult should build the hovercraft. Let the child push it and chase it around. Talk about how it “floats” on air, like magic.
- Ages 5-7: Let them help with assembly (except the hot glue). Have them compare how the CD slides with and without the balloon. Introduce the word “friction” and ask them what other things have low friction (ice skating, sliding on a water slide).
- Ages 8-10: Challenge them to build hovercrafts of different sizes using different disc shapes. Measure how far each one glides. Discuss real hovercraft engineering and where friction reduction matters in transportation.
Experiment 7: The Sound Wave Balloon
Wow Factor Rating: 3 out of 5
Turn a balloon into a speaker that lets you FEEL sound waves vibrating against your fingertips. This sensory experiment is a favorite for kids who love music.
Materials Needed
- 1 balloon
- 1 empty can or plastic container (a Pringles can works great)
- Scissors
- Rubber band
- A phone or Bluetooth speaker to play music
Step-by-Step Instructions
- Cut the neck off the balloon with scissors so you have just the round body.
- Stretch the balloon tightly over the open end of the can or container like a drum skin. Pull it taut.
- Secure it with a rubber band so it stays stretched tight.
- Sprinkle a tiny pinch of salt, sugar, or small beads on top of the stretched balloon surface.
- Hold the open bottom of the can near a speaker that is playing music (bass-heavy music works best).
- Watch the salt or sugar grains bounce and dance on the balloon surface as the sound waves hit it.
- For another variation, skip the salt and just hold the balloon drum gently against your child’s cheek or fingertips while music plays nearby. They will feel the vibrations.
The Science Behind It
Sound travels in waves, which are vibrations moving through the air. When those vibrations reach the stretched balloon, they cause it to vibrate too. The salt or sugar grains bounce because the balloon surface is moving up and down rapidly with each sound wave. Louder, lower-pitched sounds create bigger vibrations, which is why bass-heavy music makes the grains dance more dramatically. This is the same principle used by speakers, which have a flexible cone that vibrates to produce sound.
Age Adaptation Tips
- Ages 3-4: Focus on the sensory experience. Let them feel the vibrations on their fingertips and cheeks. Play different types of music and ask if the vibrations feel different. Use words like “buzzy” and “tingly.”
- Ages 5-7: Have them watch the salt dance and ask why louder music makes bigger jumps. Let them experiment with different types of music (classical vs. hip-hop vs. rock) and describe what they observe.
- Ages 8-10: Introduce the concept of sound waves, frequency, and amplitude. Have them test which frequencies make the biggest vibrations. Discuss how microphones work (they convert sound vibrations into electrical signals, essentially the reverse of a speaker).
Experiment 8: The Balloon-Powered Car
Wow Factor Rating: 5 out of 5
Build a car that drives itself using nothing but the air escaping from a balloon. This is engineering, physics, and pure fun rolled into one project.
Materials Needed
- 1 balloon
- 1 plastic bottle or small cardboard box (for the car body)
- 4 bottle caps or round lids (for wheels)
- 2 wooden skewers or straight straws (for axles)
- Tape
- A drinking straw (for the balloon nozzle)
- Scissors
- A thumbtack or nail (to make holes for the axles)
Step-by-Step Instructions
- Take the plastic bottle or small box. This is your car body. Lay it on its side.
- Poke two pairs of holes on opposite sides near the front and back of the car body for the axles to pass through. The holes should be directly across from each other.
- Push a skewer or straw through each pair of holes to create front and rear axles.
- Attach a bottle cap wheel to each end of each axle. Use tape, hot glue, or push the skewer through a small hole in each cap. The wheels need to spin freely.
- Insert the drinking straw about 2 inches into the neck of the balloon and tape it securely so no air leaks around the seal.
- Tape the balloon and straw assembly on top of the car body with the straw pointing out the back of the car.
- Blow through the straw to inflate the balloon. Pinch the straw to hold the air in.
- Set the car on a smooth floor, release the straw, and watch it go.
The Science Behind It
This experiment demonstrates Newton’s Third Law again, just like the balloon rocket. Air rushes out of the straw in one direction, and the car moves in the opposite direction. But this experiment adds new engineering challenges: the car needs wheels that spin freely, axles that are aligned, and a body that is light enough for the balloon’s thrust to move it. It is a fantastic introduction to how engineers have to balance multiple design factors at once.
Age Adaptation Tips
- Ages 3-4: An adult builds the car while the child watches and helps with tape. Let the child inflate the balloon (with help) and release the car. Celebrate each run with enthusiasm. Talk about how the air “pushes” the car.
- Ages 5-7: Let them build as much of the car as they can with guidance. When the car does not go straight (and it probably will not on the first try), talk about WHY and let them figure out adjustments. This problem-solving is as valuable as the physics lesson.
- Ages 8-10: Challenge them to design the fastest or farthest-traveling balloon car. Test different car body shapes, wheel sizes, and straw lengths. Measure results. Discuss aerodynamics, wheel friction, and weight distribution.
Experiment 9: The Balloon Magnifying Glass
Wow Factor Rating: 3 out of 5
Fill a balloon with water and it transforms into a magnifying lens that actually works. This quick experiment is a wonderful demonstration of how light bends.
Materials Needed
- 1 clear or light-colored balloon (transparent works best, but pale yellow is fine)
- Water
- A faucet or water bottle
- A newspaper, book page, or printed text
Step-by-Step Instructions
- Stretch the balloon a few times to loosen the rubber.
- Fill the balloon with water from a faucet. Do NOT overinflate. You want a relatively small, round water balloon, roughly the size of a tennis ball or slightly larger. The rounder the shape, the better the lens effect.
- Tie off the balloon.
- Hold the water balloon over printed text, about 1 to 3 inches above the page.
- Look through the balloon at the text below. Slowly move the balloon up and down until the text comes into sharp focus.
- The letters will appear magnified, just like looking through a magnifying glass.
The Science Behind It
The water-filled balloon acts as a convex lens. When light passes from air into the curved water surface, it bends (refracts). The round shape of the balloon focuses the light rays toward a single point, making objects viewed through it appear larger. This is the same principle used in magnifying glasses, eyeglasses, cameras, and even the lens in your eye. Your eye itself is essentially a small ball of clear fluid that bends light to focus images on your retina.
Age Adaptation Tips
- Ages 3-4: Fill the balloon yourself and let them hold it over a picture book with large images. Ask them what looks different when they look through the “water ball.” Keep it playful and exploratory.
- Ages 5-7: Let them help fill the balloon and explore magnifying different objects: leaves, their fingerprints, fabric textures. Introduce the word “magnify” and compare it to an actual magnifying glass.
- Ages 8-10: Discuss refraction, how lenses work, and how the human eye uses the same principle. Ask them to test whether the size or shape of the water balloon changes the magnification. Research how telescopes and microscopes use multiple lenses together.
Experiment 10: The Fireproof Balloon
Wow Factor Rating: 5 out of 5
Hold a balloon over a candle flame. It pops instantly. Now fill a balloon with water and hold it over the same flame. It does not pop. This dramatic demonstration of heat transfer absolutely stuns kids and adults alike.
Materials Needed
- 2 balloons (same size and color for dramatic comparison)
- Water
- A candle
- A lighter or matches
- A safe, non-flammable surface (kitchen sink area or outdoor table)
- Safety goggles (optional but recommended for nervous experimenters)
Step-by-Step Instructions
- Inflate the first balloon with just air and tie it off.
- Fill the second balloon with about a half cup of water, then inflate it with air the rest of the way and tie it off. The balloon should have water sloshing in the bottom.
- Light the candle and place it on a safe surface.
- First, hold the air-only balloon several inches above the candle flame and slowly bring it closer. It will pop quickly when the heat thins the rubber. (Do this over a sink or easy-to-clean area.)
- Now hold the water balloon over the flame. Hold it so the water-filled portion is directly above the flame. The balloon will NOT pop. You can hold it there for 15 to 20 seconds or more.
- You may notice the bottom of the balloon turning black with soot, but it stays intact.
The Science Behind It
Water is an extraordinary heat absorber. When the flame’s heat reaches the water balloon, the water inside absorbs the heat energy and distributes it throughout the water instead of letting it concentrate on one spot of the rubber. The rubber never reaches its melting point because the water keeps carrying the heat away. In the air-only balloon, the air cannot absorb heat nearly as efficiently, so the rubber quickly heats past its limit and pops. This is the same reason water is used in cooling systems for car engines and power plants.
Age Adaptation Tips
- Ages 3-4: This is a watch-from-a-safe-distance experiment. Pop the air balloon first (warn them it will be loud), then show them the “fireproof” water balloon. Explain in simple terms that water “drinks up the heat” so the balloon stays safe.
- Ages 5-7: Let them help fill the water balloon and make predictions before each test. Ask: “What do you think will happen?” Write down their predictions and compare them to results. Introduce the idea that water absorbs heat.
- Ages 8-10: Discuss heat transfer, thermal conductivity, and specific heat capacity. Explain why water is used as a coolant in so many real-world applications. Ask them to predict what would happen with other liquids (vegetable oil, for example, has a lower specific heat capacity).
How to Turn These Experiments into a Home Science Fair
Why stop at doing experiments one at a time? Turn a weekend afternoon into a full-blown science fair that your kids will talk about for weeks.
Set Up Experiment Stations
Arrange 4 to 6 experiments around your kitchen or living room like stations at a fair. Put all the materials at each station with a simple printed instruction card. Kids rotate through stations either solo or in pairs.
Create a Lab Notebook
Give each child a blank notebook or stapled sheets of paper. At each station, they write or draw:
- The question: What are we trying to find out?
- My prediction: What do I think will happen?
- What happened: What actually happened?
- Why: Why do I think it happened?
For younger kids who cannot write yet, let them draw pictures of what they observed. The notebook becomes a keepsake they can show to grandparents, teachers, or friends.
Award Certificates
Print or hand-write silly award certificates. “Best Hair Raise,” “Fastest Balloon Rocket,” “Most Dramatic Reaction.” Every child gets recognized for something.
Invite Friends
Balloon experiments are perfect for playdates and birthday parties. They require minimal setup, the materials are cheap, and every kid wants to try everything. A science-themed party with balloon experiments, lab coats (white button-up shirts from the thrift store), and safety goggles is memorable and unique.
Document the Fun
Take photos and videos. These experiments produce genuinely impressive visuals that grandparents love to see and kids love to rewatch. A short video of the self-inflating balloon or the fireproof balloon is social media gold if you are into sharing.
How to Extend the Learning
Once your kids are hooked on balloon science, here are ways to keep the momentum going.
Ask “what if” questions. After every experiment, ask what would happen if you changed one thing. What if you used a bigger balloon? What if you used lemon juice instead of vinegar? What if you added more baking soda? These questions teach the scientific method naturally.
Start a hypothesis journal. Encourage your child to write down questions and predictions before each experiment. Over time, they will develop the habit of thinking scientifically: predicting, testing, observing, and reflecting.
Connect to real-world applications. After the balloon rocket, talk about how NASA rockets work. After the hovercraft, look up real hovercraft videos. After the fireproof balloon, discuss how water cooling works in computers and car engines. These connections show kids that science is not just a school subject; it is everything around them.
Explore related experiments. If your child loved the baking soda and vinegar experiment, try a baking soda volcano. If they loved the static electricity experiment, explore how Van de Graaff generators work. Let their interests guide the direction.
Visit a science museum. After doing hands-on experiments at home, a science museum trip becomes so much richer. Your child will recognize the principles they have already explored and feel proud of their knowledge.
Read science books. There are excellent children’s books on the topics covered in these experiments. Ask your local librarian for recommendations on physics, chemistry, or engineering for your child’s age level.
Tips for Making Balloon Science Stress-Free for Parents
Let’s be honest. Running 10 science experiments with kids sounds fun in theory, but in reality, vinegar can spill, balloons can pop unexpectedly, and someone will definitely cry at least once. Here are tips for keeping it smooth.
Prep materials in advance. Before your child sits down, measure out the baking soda, cut the straws, and inflate test balloons. The fewer tasks competing for your attention during the experiment, the more you can focus on your child’s experience.
Do experiments in the kitchen or outside. These experiments are not living room activities. Kitchen counters clean up easily, and outdoor experiments have the bonus of no mess anxiety at all.
Have extra balloons. Things pop. Things break. Having a big bag of extra balloons means you can always try again without frustration.
One experiment at a time. Unless you are doing a full science fair, choose one experiment per session. Kids absorb more when they are not rushed, and you will enjoy it more when you are not multitasking.
Embrace imperfection. The balloon car will probably veer left. The skewer might pop the first balloon. The hovercraft might not glide very far. That is all part of the process. When something does not work, ask your child why they think it failed and what they could change. The failures teach more than the successes.
Let kids lead. Once you have demonstrated an experiment, let your child take over. Let them pour, hold, push, and release. Their hands learn what their eyes cannot.
Crafty Mama
Crafty Mama is a former elementary art teacher turned stay-at-home parent who believes every child is creative — they just need the right invitation. She develops age-appropriate activities, crafts, and projects that spark imagination while keeping mess (and parent stress) to a minimum.
Frequently Asked Questions
What age is best for balloon science experiments?
Most of these experiments work for kids aged 3 to 10, with adjustments for each age group. Younger children (3 to 4) benefit from watching demonstrations and participating in simple steps like pouring or releasing. Kids aged 5 to 7 can handle most of the hands-on work with supervision. Children 8 to 10 can do the experiments more independently and dig deeper into the science concepts. Always supervise children under 6 closely due to the choking hazard that balloons present.
Are balloon experiments safe for toddlers?
Balloon experiments require very close supervision for children under 3 because uninflated balloons and popped balloon pieces are a serious choking hazard. Toddlers should only participate as observers with an adult performing all balloon handling. If you have a toddler in the house while doing experiments with older siblings, keep all balloon pieces off the floor and dispose of popped balloons immediately.
Do I need special balloons for these experiments?
Standard latex party balloons work for every experiment in this guide. You do not need specialty science balloons. That said, for the balloon rocket and balloon car, longer “rocket-shaped” balloons (sometimes called modeling balloons) produce more thrust and are worth picking up. For the magnifying glass experiment, clear or light-colored balloons give the best visibility. Avoid metallic or mylar balloons as they do not stretch the same way.
What if the balloon skewer experiment keeps popping the balloon?
This is the trickiest experiment to get right on the first try. Make sure you are only inflating the balloon to about three-quarters full, not maximum capacity. Use plenty of oil on the skewer tip. Push slowly with steady, gentle pressure at the thickest points (the dark spot at the top and the area near the knot). If it keeps popping, try a different brand of balloons. Some are thicker than others, and thicker balloons are more forgiving.
Can I use these experiments for a school science fair project?
Absolutely. The self-inflating balloon, balloon rocket, and balloon car are particularly strong for school science fairs because they lend themselves to controlled experiments with measurable variables. For example: “How does the amount of baking soda affect how much the balloon inflates?” or “How does the length of the straw affect how far the balloon car travels?” These questions can be tested systematically, measured, and presented with data.
How do I explain the science to kids without confusing them?
Match your explanation to your child’s age and interest level. For young kids, simple cause-and-effect language works best: “The air pushes out this way, so the balloon moves that way.” For older kids, introduce proper scientific vocabulary one term at a time. The most powerful technique is to ASK your child to explain what they think happened before you tell them. You will often be surprised by how close they get, and their own reasoning helps them understand the concept far better than a lecture would.
What should I do if my child is scared of balloons popping?
Fear of balloons popping is very common in young children, and it is completely valid. Never force a child to participate. Start with experiments that do not involve popping (the hovercraft, magnifying glass, and static electricity experiments are pop-free). Let them watch from a distance during experiments where popping is possible. Over time, as they see that balloons are predictable and controllable, many kids outgrow the fear naturally. Earplugs or noise-cancelling headphones can also help during popping experiments.
Can these experiments be done outdoors?
Most of these experiments work great outdoors, and some are even better outside. The balloon rocket and balloon car benefit from long, smooth surfaces like driveways or patios. The fireproof balloon is safer outdoors where there is more space around the candle. The static electricity experiment works less well outdoors on humid days because moisture in the air dissipates the charge. Choose a dry day for that one.
Let the Experiments Begin
Here is what I love most about balloon science experiments: they require almost no money, almost no preparation, and almost no cleanup, but they produce moments of genuine wonder that your kids will remember.
When your child watches a balloon inflate itself for the first time, or sees their hair stand on end, or watches a skewer slide through a balloon without popping it, they are experiencing science the way it is supposed to be experienced. Not as a textbook chapter or a worksheet, but as something real, tangible, and absolutely thrilling.
You do not need a degree in physics to give your kids an incredible science education. You need a bag of balloons, some baking soda, and the willingness to say, “Let’s find out what happens.”
So grab those balloons and get experimenting. Your kids’ jaws are about to drop.