30 Crafts for 2-Year-Olds to Do at Home (No Special Supplies)
This post contains affiliate links. As an Amazon Associate I earn from qualifying purchases.
Last month, around 3:40 on a Tuesday afternoon, my two-year-old niece was standing at my kitchen cabinet with the pasta bin open, handing me rigatoni one piece at a time like she was paying a toll. I had a “real” craft planned: a themed, Pinterest-looking, six-supply situation. It stayed in its bag. We threaded that pasta onto a shoelace instead, and she wore the necklace for two full days, including in the bath, which I do not recommend.
That’s the thing about crafts for 2-year-olds at home: the fancy supplies are almost never the point. At this age, a craft is a handful of sensory experiences with a little “I made that!” sprinkled on top. They want to squish, tear, scribble, stick, dump, and carry the result around like treasure. Your pantry, your recycling bin, and the junk drawer already hold everything you need.
So this page is organized differently from most craft lists. Instead of themes or holidays, it’s sorted by what you already have on hand. Open the cabinet, see what’s there, and find the craft. Bookmark it as your “start here” page for this age. Further down is a material-to-craft matcher chart you can copy, screenshot, or print straight from this page.
A heads-up on expectations: the mess is real. Glue will end up on the dog. Paint will end up on a surprising number of surfaces. Nobody will make a recognizable bunny. All of that is normal and not a sign anything went wrong.
In this article (12 sections)
- What a “Craft” Actually Means at Age Two
- The Material Matcher Chart (Copy This One)
- Crafts From Paper and Junk Mail
- Crafts From Cardboard and Recycling
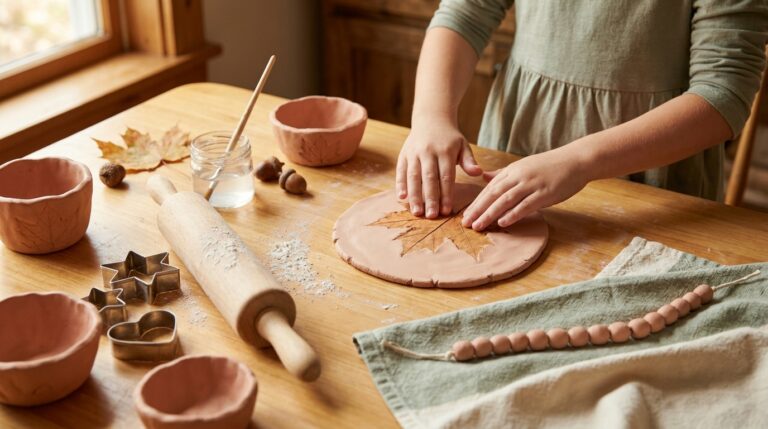
- Crafts From the Pantry
- Crafts From the Fridge and Produce Drawer
- Crafts With Tape, Stickers, and Contact Paper
- Crafts With Nature and Everyday Odds and Ends
- Setup, Mess, and Safety for Craft Time With a 2-Year-Old
- A Week of Crafts From What You Already Have
- Frequently Asked Questions
- You Don’t Need the Perfect Craft
What a “Craft” Actually Means at Age Two
Before the ideas, let’s reset what success looks like, because it saves a lot of frustration.
A typical 2-year-old:
- Works in short bursts. Five to ten minutes of focused crafting is a win. Fifteen is a miracle.
- Cares about the doing, not the result. Your child may paint a gorgeous page and then immediately paint the table. Both were equally satisfying.
- Is still building hand strength. Pinching, tearing, and squeezing are real workouts. (If you want to dig into that side of things, our guide to fine motor activities for toddlers pairs well with this list.)
- Puts things in their mouth. Even sometimes at age two and a half. This shapes everything about the materials we pick.
- Wants to “do it myself.” The best crafts leave room for a toddler to be in charge, even if the outcome looks like abstract chaos.
This is the same philosophy behind play-based learning for 2-year-olds: the process is the learning. When your child tears paper into 400 pieces, they’re building finger strength, practicing cause and effect, and learning what “sticky” means. You don’t need to add a lesson.
Your role (it’s smaller than you think)
You are the setup person and the narrator. You prep the materials, you handle anything involving scissors or heat, and you describe what you see: “You’re pressing so hard!” “Look, the blue went on top of the yellow.” You do not need to draw the sun for them or fix the glue puddle. Hands off the artwork, whenever you can stand it.
The Material Matcher Chart (Copy This One)
Here’s the on-page cheat sheet. Open your pantry, find what you’ve got, and pick a craft. The numbers match the numbered crafts below. You can copy it into your notes app, screenshot it for the fridge, or print this page and tape the chart where you’ll see it.
| If you have… | Try this craft | Mess level | Mouth-risk note |
|---|---|---|---|
| Scrap paper + glue stick | 1. Scrunch Collage, 2. Torn Paper Mosaic | Low | Low |
| Junk mail or old magazines | 4. Magazine Tear Collage | Low | Low |
| Coffee filters + washable markers | 5. Coffee Filter Rainbows | Medium (water) | Low |
| Toilet paper tubes | 6. Tube Flower Stamps, 10. Tube Binoculars | Medium | Low |
| Cardboard box | 7. Paint-a-Box House, 9. Cereal Box Puzzle | Medium | Low |
| Egg carton | 8. Egg Carton Color Mixing | Medium | Low |
| Flour + salt + water | 11. Kitchen Dough Creations | Medium | Salty (not for eating) |
| Rice + food coloring | 12. Colored Rice Collage | High | Choking: supervise |
| Dry pasta + shoelace or yarn | 13. Pasta Necklace, 14. Pasta Glue Art | Low | Choking: supervise |
| Rolled oats + glue | 15. Oat Sheep | Medium | Low |
| Cornstarch + food coloring | 16. Cornstarch Finger Paint | High | Taste-safe-ish |
| Cooled tea or coffee | 17. Tea and Coffee Painting | Medium | Low |
| Potato, celery, bell pepper | 18. Veggie Stamping | Medium | Low |
| Plain yogurt + food coloring | 19. Yogurt Paint | High | Taste-safe |
| Kitchen utensils | 20. Kitchen Tool Printing | Medium | Low |
| Ice cube tray + food coloring | 21. Ice Painting | Medium (water) | Low |
| Painter’s or masking tape | 22. Tape Resist Art, 25. Tape Bracelet Walk | Low | Low |
| Clear contact paper | 23. Window Sticky Collage | Low | Low |
| Paper bags + stickers | 24. Sticker Bag Puppet | Low | Stickers: supervise |
| Crayons + leaves | 26. Leaf Rubbings | Low | Low |
| Sticks and dirt or water | 27. Stick Painting | High (outdoors) | Low |
| Kitchen sponge + paint | 28. Sponge Shape Painting | Medium | Low |
| A paintbrush + sidewalk | 29. Water Painting | Low | Low |
| Washable paint + hands | 30. Handprint Sun | High | Low |
How to read the chart
“Mess level” is my honest estimate for a two-year-old working independently, not what the photo-perfect version looks like. “Mouth-risk note” is a reminder of where you should be sitting right next to your child instead of making coffee across the room. When in doubt, supervise anything small, round, or dry and hard.
Crafts From Paper and Junk Mail
Paper is the great equalizer of toddler crafts. You probably have some of it within ten feet of where you’re sitting right now. If you want a deeper dive on tearing, scrunching, and paint-free approaches, our post on mess-free art for toddlers goes further.
1. Scrunch Collage
You need: scrap paper, a glue stick, one big sheet of paper (a cereal box flattened out works).
How: Show your child how to scrunch a piece of scrap paper into a ball. Then press the ball onto the glue-stick-covered base. Repeat until everything is a lumpy landscape.
Why it works: Scrunching is a huge hand-strength builder, and the glue stick is much more forgiving than liquid glue. You’ll get a “bumpy picture” that toddlers love running their fingers over.
Mess reality: Nearly none. Scraps on the floor, which is a problem for future you, not present you.
2. Torn Paper Mosaic
You need: colored paper (or the colorful inserts from catalogs), a glue stick or diluted white glue, a sheet of paper.
How: Tear paper into bits. Two-year-olds are fantastic at this, because ripping is fun and loud. Then stick the bits down anywhere. Tell your child it’s confetti, a rainbow, or “a big mess of colors.”
Tip: If your child is tearing frantically but not sticking, that’s fine. Let them tear for the whole session, then do the gluing together at the end.
3. Scribble and Sticker
You need: crayons (the chunky kind if you’ve got them), a stack of stickers, paper.
How: Scribble. Add stickers. Scribble more. That’s the whole craft. Peeling stickers is a surprisingly tough fine motor challenge for this age, so offer to start the corner of each one.
Why it’s on the list: Because sometimes the best craft is the one that takes zero setup and gets you through the witching hour.
4. Magazine Tear Collage
You need: old magazines, catalogs, or junk mail; glue stick; paper.
How: Let your child flip through and tear out whatever grabs them. Faces, flowers, and food pictures are always winners. Glue it all onto a page. Name things as you go: “Oh, a red car! A dog!”
Bonus: This doubles as vocabulary practice, since you’re naming real pictures together.
5. Coffee Filter Rainbows
You need: coffee filters, washable markers, a spray bottle or a small cup of water and a spoon.
How: Your child scribbles all over a flattened coffee filter with markers. Then you drizzle or spray a little water on top and watch the colors bleed together. Let it dry, then pinch it in the middle and fan it out like a butterfly.
Mess reality: Wet hands, damp table, a little color transfer onto fingers. Use washable markers and a placemat.
Crafts From Cardboard and Recycling
If you’ve got a stack of boxes by the door right now, you’re sitting on a craft supply closet. Our post on cardboard box crafts for kids has plenty of bigger projects for when your toddler gets older. For age two, the simplest versions are the best.
6. Tube Flower Stamps
You need: an empty toilet paper tube, washable paint on a plate, paper.
How: Pinch one end of the tube into a rounded heart shape (an adult job, but it only takes a second). Dip the pinched edge in paint and stamp. Stamp several in a circle and you’ve got a flower. Or just stamp randomly. Randomly is great.
Tip: Use a paper plate as a “paint palette” so your child has a flat spot to dip, rather than a messy bowl.
7. Paint-a-Box House
You need: a medium cardboard box, washable paint or markers, brushes or sponges.
How: Set the box on a washable tablecloth or old towel. Hand over the brush and let your child paint the outside however they like. Cut a door or window yourself ahead of time if you want a house, or leave it plain and call it “a box,” which toddlers find perfectly acceptable.
Why it works: Painting a big vertical or flat surface uses the whole arm, which is good for gross motor control and way more satisfying than a tiny sheet of paper. Bonus: the finished box becomes a toy.
8. Egg Carton Color Mixing
You need: an empty egg carton, washable paint in 2 to 3 primary colors, a small paintbrush or cotton swab.
How: Put a dab of two different colors in neighboring cups. Show your child how to swirl with a brush and watch the colors blend. Don’t narrate the science; just say “Look, you made green.”
Mess reality: A little. Egg cartons absorb paint, which also means they’re not great for repeated use. Plan for this to be a one-time craft, then recycle it.
9. Cereal Box Puzzle
You need: an empty cereal box, scissors, crayons or markers.
How: Cut the front panel off the box. Let your child scribble or color on the plain back. Then cut it into 2 or 3 big pieces (just a wavy cut or two for age two). Mix them up and put them back together.
Why it works: Toddlers love puzzles they’ve decorated themselves, because “I made that!” lands twice.
10. Tube Binoculars
You need: two toilet paper tubes, tape, stickers, crayons.
How: An adult tapes the tubes together side by side. Your child decorates them with stickers and scribbles. Then go on a “bird hunt” around the house.
Bonus: The craft turns straight into pretend play, which is the best possible outcome.
Crafts From the Pantry
This is where things get fun, and a little messier. Everything in this section starts in the kitchen. A few of these involve small dry items like rice and pasta, so stay close and keep them away from mouths.
11. Kitchen Dough Creations
You need: flour, salt, water, a bowl, cookie cutters or kitchen tools.
Quick version: Mix 2 cups flour, 1 cup salt, and about 1 cup of water until it forms a soft dough. Add water a tablespoon at a time if it’s crumbly, or flour if it’s sticky.
How: Let your child poke, roll, squish, and stamp. Press in a spoon, a fork, a cookie cutter. If you want to keep the creations, let them air-dry for a day or two. (If you’d like a softer, longer-lasting option, we’ve collected homemade playdough recipes that parents actually trust.)
Note: This dough is salty, so it isn’t food, but a tiny taste won’t hurt. Do keep an eye on any kiddo who wants to snack on it.
12. Colored Rice Collage
You need: uncooked rice, food coloring, white vinegar, a zip bag or jar, glue, cardboard.
How: Put a cup of rice in a zip bag. Add a teaspoon of vinegar and a few drops of food coloring. Squish the bag until the rice is coated, then spread it on a baking sheet to dry. (Your toddler loves doing the squishing.) Once dry, brush glue on a piece of cardboard and sprinkle the rice on.
Mess reality: High. Rice goes everywhere. Work on a baking sheet or in a high-sided tray, and plan to vacuum afterward. Supervise closely since rice is small and can end up in mouths.
13. Pasta Necklace
You need: large tube pasta like rigatoni or penne, a shoelace or piece of yarn with a taped tip.
How: Tie a big knot at one end of the lace so pasta can’t slide off. Help your child feed pasta onto the string. Tie the ends together once it’s full and let them wear it.
Why it works: Threading is excellent for hand-eye coordination, and big pasta is much more forgiving than beads.
Safety note: Supervise, and take the necklace off for naps and car seats.
14. Pasta Glue Art
You need: assorted dry pasta shapes, white glue, cardboard or heavy paper, a small paintbrush.
How: Brush glue on the cardboard (or let your toddler do it with a finger). Press on pasta pieces. Shells, wheels, and bowties are all fun. Let it dry flat, which can take a day.
Variation: Paint the pasta first with watered-down paint, let it dry, then glue it down.
15. Oat Sheep
You need: rolled oats, white glue, paper, a black crayon or marker.
How: Draw a simple sheep head and legs, leaving the body as a big blank oval. Your toddler brushes glue on the body and sprinkles oats all over it. Shake off the extras into a tray.
Mess reality: Medium. Oats are lightweight, so a tray or a baking sheet under the paper helps a lot.
16. Cornstarch Finger Paint
You need: 1/2 cup cornstarch, 2 cups cold water, food coloring, a small saucepan.
How: An adult mixes the cornstarch and water in a pot and heats it gently, stirring, until it thickens like pudding. Cool it completely. Divide into cups and stir in a different color of food coloring in each. Paint away with fingers.
Tip: Use a tray or a washable placemat. Food coloring can stain, so dress your child in clothes you don’t love.
Taste note: Because it’s made of cornstarch and water, a little taste is generally fine, but it’s not food. Skip it if your toddler is still in the “everything goes in” phase.
17. Tea and Coffee Painting
You need: cooled strong tea or coffee, paintbrushes, paper.
How: Pour a little cooled tea or coffee into small cups. Hand your child a brush. Watch brown swirls appear on the page. The paper will wrinkle a bit as it dries, and that’s part of the charm.
Why it’s on the list: It’s a calm, smelly, low-effort craft that feels grown up. Use decaf if your child tends to taste test.
Crafts From the Fridge and Produce Drawer
Fruit and veggie stamping is one of the oldest toddler art tricks, and it’s still one of the best. These crafts also give you a perfect excuse to use up the half-wrinkly produce you’ve been avoiding.
18. Veggie Stamping
You need: a potato (cut in half), a celery stalk, a bell pepper (cut in half), washable paint, a plate.
How: Pour paint on a plate. Dip the flat cut side of a veggie and press onto paper. Celery makes little rose shapes, bell pepper makes a funky rounded square, and a potato makes a chunky print. Offer a different veggie for each color.
Tip: Pat the cut surface dry before dipping so the paint sticks. Also, make sure the cut edge is safe and not sharp.
19. Yogurt Paint
You need: plain yogurt, food coloring, small cups, paper or a tray.
How: Spoon yogurt into cups and stir in a different color of food coloring in each. Hand over a spoon or let your child finger paint right on a high chair tray or a cookie sheet.
Why it works: It’s taste-safe, which relieves a lot of parent stress. It’s also deliciously squishy.
Mess reality: High. Do this one in the bath, outdoors, or in the high chair with a drop cloth underneath.
20. Kitchen Tool Printing
You need: a potato masher, a whisk, a fork, a spatula, washable paint on a plate, paper.
How: Dip each tool in paint and press or drag it across paper. Each tool leaves a different mark. Talk about it: “Bumpy dots from the masher! Stripes from the fork!”
Bonus: Toddlers love using real kitchen tools. It feels like a grown-up job.
21. Ice Painting
You need: an ice cube tray, water, food coloring, craft sticks or a spoon, paper.
How: The night before, fill the tray with water and a few drops of food coloring in each cell. Stick a craft stick or spoon handle into each for a handle and freeze. Next day, hand your child a frozen cube on a stick and let them glide it over paper. The ice melts into soft pastel streaks.
Mess reality: Wet but not messy. Great for hot days. Use a baking sheet under the paper to catch drips.
Crafts With Tape, Stickers, and Contact Paper
These are the crafts for parents who really hate cleanup. All of them involve sticky stuff that stays where it’s put (mostly).
22. Tape Resist Art
You need: painter’s tape or masking tape, washable paint, a brush, paper.
How: Before your child starts, stick strips of tape on the paper in crisscrosses or zigzags. Let your child paint over the whole thing. When dry, peel off the tape to reveal white stripes. Toddlers think this is magic.
Tip: Press the tape down firmly so paint doesn’t seep under.
23. Window Sticky Collage
You need: clear contact paper, tissue paper scraps, torn paper, leaves, or feathers.
How: Tape a sheet of contact paper to a window with the sticky side facing out (corners taped down is enough). Hand your child bits of tissue paper and other lightweight scraps to stick on. Sun shines through the finished piece like a stained glass window.
Why it works: Zero glue. Zero mess. Zero drying time. This is my emergency craft.
24. Sticker Bag Puppet
You need: a small paper lunch bag, stickers, crayons.
How: Lay the bag flat with the folded bottom flap facing up (that’s the “head”). Let your child decorate the bag with stickers and scribbles. Slip your hand inside and make it talk. Expect a long conversation about the puppet’s day.
Safety note: Stay close while stickers are in use, since small ones can end up in mouths.
25. Tape Bracelet Nature Walk
You need: masking tape, a short walk outdoors.
How: Wrap a strip of tape around your child’s wrist, sticky side out. Take a short walk and let them collect leaves, petals, and tiny sticks by pressing them to the tape. Back home, peel the bracelet off and stick it on paper to display it.
Why it’s great: It turns a walk into a mission, and toddlers love having a job.
Crafts With Nature and Everyday Odds and Ends
Some of the best supplies are free and growing outside. Take these out to the yard or the back steps and let the weather do some of the work. If your child loves this approach, our process art for toddlers post has twenty more ways to focus on the doing.
26. Leaf Rubbings
You need: fresh leaves, peeled crayons, thin paper.
How: Place a leaf vein-side up on the table. Cover it with a sheet of paper. Show your child how to rub the side of a crayon back and forth until the leaf pattern appears. They may not do it the “right” way, and that’s okay. Even a vigorous scribble reveals a hint of leaf.
Tip: Peel the paper off a crayon and use it sideways for the best results.
27. Stick Painting
You need: a few sticks from the yard, washable paint, a paper plate, big paper or cardboard.
How: Squirt paint on the plate. Dip the end of a stick in paint and use it like a brush. Try fat sticks and skinny ones. Every stick makes a different mark.
Mess reality: High, but if you’re outdoors, it doesn’t matter. The hose is your cleanup crew.
28. Sponge Shape Painting
You need: a clean kitchen sponge, scissors, washable paint, paper.
How: Cut a sponge into a few simple shapes (squares, rectangles, a rough circle). Dip into paint on a plate and press onto paper. A clothespin works as a handle if your toddler’s fingers get too paint-covered.
Tip: Sponges hold a surprising amount of paint, so squeeze out the extra before the first stamp.
29. Sidewalk Water Painting
You need: a paintbrush or a clean paint roller, a bucket of water, concrete or a wooden fence.
How: Fill a bucket and let your child “paint” the sidewalk, the fence, or the side of the house with plain water. It darkens and then dries and disappears, so they can paint it over and over.
Why it’s here: This is the ultimate zero-cleanup, zero-supply craft. It also works beautifully in winter if you’ve got an inside tile floor and a cup of water.
30. Handprint Sun
You need: washable paint (yellow or orange), a paper plate or paper, a damp washcloth nearby.
How: Paint your child’s palm and fingers, then press their hand firmly onto the paper. Repeat in a circle for sun rays, or just make a pile of handprints. Let it dry, then add a smiley face with a marker.
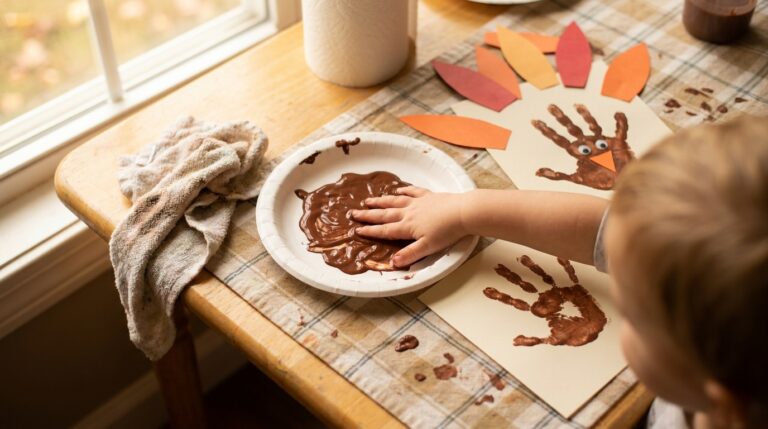
Tip: Keep the washcloth within arm’s reach and wipe hands right away. A bath after this one is not a bad idea. (If you want a seasonal twist, check our handprint turkey craft.)
Setup, Mess, and Safety for Craft Time With a 2-Year-Old
The craft itself is half the work. The other half is setting the stage so everyone stays happy.
The five-minute setup
- Pick the spot. A high chair tray, a kitchen floor, a bathtub, or a backyard patch are all easier to clean than a carpeted living room.
- Lay down a drop cloth. An old shower curtain, a flattened cardboard box, or a vinyl tablecloth all work.
- Dress for the occasion. An old t-shirt or just a diaper, depending on how adventurous you’re feeling.
- Set out only what you need. One or two materials at a time. Too many choices overwhelm toddlers.
- Keep wipes and a damp cloth nearby. Before you start, not after.
Safety basics
- Supervise every craft. Two-year-olds can put almost anything in their mouths in a split second.
- Skip small parts if your child still mouths things. That includes beads, dry rice, tiny pasta, googly eyes, and buttons. Swap in larger items.
- Choose washable, non-toxic paint and markers. Look for labels that say non-toxic and washable.
- Handle scissors, hot stovetops, and anything sharp yourself. Your child’s job is the sticking and squishing.
- Know your child’s allergies. Flour, oats, and yogurt are common allergens, so think twice about hands-on contact with a child who has a known allergy.
What to do when your toddler eats the craft
It happens. Stay calm, remove what’s left, and check the label of whatever was involved. If you’re worried about something your child swallowed, contact your pediatrician or poison control right away. Then, next time, pick a taste-safe option like yogurt paint.
When your child wants no part of it
Some days a toddler just isn’t into it. Don’t push. Leave the supplies out where your child can discover them, and sit nearby doing your own scribbling. Curiosity often sneaks in on its own schedule.
A Week of Crafts From What You Already Have
Not sure where to start? Here’s a gentle plan for a week, with a different material every day. Swap any day for something else on the matcher chart.
| Day | Craft | Time | Prep |
|---|---|---|---|
| Monday | 3. Scribble and Sticker | 10 min | None |
| Tuesday | 13. Pasta Necklace | 10 min | Tie a knot in the lace |
| Wednesday | 23. Window Sticky Collage | 15 min | Tape up contact paper |
| Thursday | 18. Veggie Stamping | 15 min | Cut the veggies |
| Friday | 29. Water Painting | 20 min | Fill a bucket |
| Saturday | 11. Kitchen Dough Creations | 20 min | Mix the dough |
| Sunday | 26. Leaf Rubbings | 15 min | Collect leaves |
For rainy afternoons when you need to rotate quickly, pair these with busy bags for toddlers so you’ve always got something ready to grab.
Frequently Asked Questions
What are the best crafts for 2-year-olds at home?
The best crafts for 2-year-olds are simple, sensory, and open-ended. Torn paper collage, sticker art, finger painting, veggie stamping, and window contact paper collages are all popular because they use everyday supplies and don’t require following steps. Look for activities where the process is the fun part, since most toddlers care much more about squishing and sticking than about the finished product.
How long should a craft activity last for a 2-year-old?
Plan on about five to fifteen minutes. Many toddlers will do a burst of intense focus and then walk away, and that’s totally normal. If your child leaves early, don’t worry about it. Leave the materials available and they may come back later. Shorter, more frequent craft sessions usually work better than one long one.
Is it safe to give a 2-year-old glue, paint, and food coloring?
Look for washable, non-toxic products labeled for children, and always supervise. Glue sticks are the easiest to manage at this age. For paint, taste-safe options like yogurt paint or cornstarch paint are good choices for kids who still mouth things. Food coloring can stain skin and clothes temporarily, so dress accordingly. If your child swallows something you’re worried about, call your pediatrician or poison control.
My 2-year-old just wants to dump everything out. Is that okay?
Yes, and it’s actually a very typical way for toddlers to explore. Dumping, pouring, and mixing are part of how children learn about volume, weight, and cause and effect. Give your child a tray or shallow bin to contain the mess, and let the dumping be part of the craft. You can offer a spoon or scoop to move things around, which adds a fine motor workout.
How do I keep craft time from taking over my whole house?
Pick a contained spot (high chair tray, bathtub, a baking sheet, or outside), use a drop cloth, and limit the supplies to one or two items at a time. Stick-based crafts like tape or contact paper are very low-mess. Keep a damp cloth within reach before you start. And lower your expectations: a little mess is part of the deal at this age.
What if my child doesn’t like getting their hands messy?
Some toddlers are sensitive to sticky or wet textures. That’s perfectly fine. Offer tools instead of hands: brushes, sponges, spoons, or craft sticks. Try dry crafts like stickers and tape first, and let your child build comfort slowly. Never force hands into something they’re resisting. Over time, many sensitive kids warm up on their own terms.
Do I need to buy craft supplies for a 2-year-old?
Not at all. This whole list is built around pantry, recycling, and household items. If you do want a few extras, a pack of washable paint, chunky crayons, and a couple of glue sticks go a long way. For gift ideas when you do want to buy something, our roundup of art supplies by age is a good place to start.
You Don’t Need the Perfect Craft
If you take just one thing from this page, let it be this: your two-year-old doesn’t need a themed, supply-heavy, picture-perfect project. They need you sitting nearby, a few interesting materials, and permission to make a mess. A handful of pasta, a roll of tape, and a sheet of paper will carry you farther than any craft kit.
Pick one idea from the chart today. Set it up in five minutes. Let your toddler lead. And when the table is covered in rice and glue and your child is beaming at a lumpy, wonderful, utterly unrecognizable creation, take a breath and enjoy it. That’s the whole point.