Easy Clay Crafts for Kids to Make at Home (No Kiln Needed)
This post contains affiliate links. As an Amazon Associate I earn from qualifying purchases.
My daughter’s first clay pinch pot lasted four days before the dog knocked it off the windowsill. She called the pieces “clay confetti,” cried for ninety seconds, then asked to make a bigger one.
I put off buying clay for years because I assumed it meant a kiln. It doesn’t. Air-dry clay hardens at room temperature in 24-72 hours. This guide covers which clay to buy, 8 simple projects for ages 3-6, and how to stop cracks.
Already have clay? Jump to the 8 projects, listed easiest first.
Safety firstClay is not food. Supervise closely any child who still mouths things, and keep small add-ons away from kids under 4. The full safety checklist is in the supplies section below.
In this article (11 sections)
- Air-Dry Clay vs Polymer vs Ceramic Clay
- Air-Dry Clay Brands Compared: Dry Time, Cracking, and Price
- What You Actually Need to Get Started
- Getting Little Hands Ready: A 5-Minute Warm-Up
- Easy Air-Dry Clay Projects for Kids (Ages 3-6)
- How to Keep Air-Dry Clay From Cracking
- Painting and Sealing Finished Clay Pieces
- Storage, Cleanup, and Keeping Clay Fresh Between Sessions
- Age-by-Age Guide: What to Actually Expect
- Frequently Asked Questions
- Where to Start
Air-Dry Clay vs Polymer vs Ceramic Clay
There are three totally different materials that get lumped together under “kid clay,” and mixing them up is the fastest way to end up disappointed.
- Air-dry clay — natural clay (or a clay-like compound) that hardens at room temperature over 24-72 hours, no oven or kiln required. This is what we’re using for every project in this guide.
- Polymer clay (Sculpey, Fimo) — a PVC-based compound that stays soft until an adult bakes it in a home oven, as the package directs, in a ventilated room. It isn’t edible, the tools never go back to food use, and it asks for more patience than most 3-year-olds have.
- Ceramic/stoneware clay — the pottery-wheel kind that has to be fired in a kiln, so it’s not a home project.
Air-dry clay sits in the sweet spot for this age range because there’s no oven to preheat, no burn risk, and no trip to a studio kiln. You pinch, you shape, you set it somewhere to dry, and a couple of days later you have a real, permanent object your kid made with their hands.
For a preschooler, that permanence is a big deal. Playdough and homemade dough recipes are wonderful for open-ended squishing and rolling, but they get smooshed back into a ball at cleanup time. Air-dry clay is the first material most kids encounter where what they made stays made.
Air-Dry Clay Brands Compared: Dry Time, Cracking, and Price
Not all air-dry clay is the same. The cheapest option at the craft store isn’t always the easiest for tiny hands.
This comparison is based on manufacturer package guidance and typical user reports, not a lab test. The figures are approximate. Prices and sizes vary by store, and some clays are labeled 3+ or 8+, so check the age label before you buy.
| Brand | Dry Time (small piece, ~1/2″) | Cracking Risk | Price (approx.) | Best For |
|---|---|---|---|---|
| Crayola Air-Dry Clay | 24-48 hrs | Low to moderate. Thick pieces can get hairline cracks. | ~$6 for 2.5 lb | Beginners. Widely available and soft to knead. |
| Activa Plus | 24-36 hrs | Low. Smooth working texture. | ~$8 for 5 lb | A good first buy for its soft texture. Good value. |
| DAS Air-Hardening Clay | 24-72 hrs (dries denser, slower) | Very low if kept under 1/2″ thick. | ~$9 for 2.2 lb | Detail work and the older end of the range (5-6). |
| Craft Smart (Michaels store brand) | 24-48 hrs | Moderate. Thicker pieces are more likely to crack as they dry. | ~$5 for 1.5 lb | A budget backup, not a first pick. |
| Jovi Modelling Clay | 24-48 hrs | Low. Stays pliable for a while before drying starts. | ~$10 for 1.1 lb | Kids who need extra working time before it sets. |
Two things matter more than the price tag. Softer clays like Activa Plus are easier for small hands to knead. And cracking depends mostly on thickness, not brand. Any clay rolled thicker than about 1/2 inch, roughly a pinky finger, can split as it dries.
If you only buy one, Activa Plus is a good first buy. Its soft texture feels close to playdough, and it still hardens into something durable.
One more note before you buy: skip anything labeled “modeling clay” without “air-dry” or “air-hardening” on the package. That’s usually oil-based clay like Plastilina, which never hardens.
What You Actually Need to Get Started
You don’t need a craft closet for this. Here’s the short list.
- Air-dry clay. One 1-5 lb block covers several sessions (see the comparison above).
- A rolling pin or a clean glass jar for flattening clay.
- A butter knife or plastic craft knife. Dull is fine. Kids don’t need sharp.
- A drinking straw or blunt plastic tool for poking holes in ornaments and anything that needs to hang. An adult makes the holes.
- Cookie cutters in simple shapes. These are a big confidence booster for a 3- or 4-year-old, who can press a perfect star or heart with no sculpting skill at all.
- A small cup of water for smoothing seams and gluing clay pieces to each other.
- A placemat or silicone baking mat to protect the table and make cleanup a one-wipe job.
- Non-toxic acrylic paint labeled for kids, and a paintbrush for once pieces have dried. Optional but recommended (see the painting section below).
That’s it. No kiln, no pottery wheel, no special gloves.
If you’ve got a craft bin from loose parts play or nature collecting, you probably have half of this already. Big leaves and whole large pinecones press nicely into wet clay for texture. Shells and acorn caps are for ages 4 and up, with an adult close, and only for kids who no longer mouth objects.
Safety firstCheck the age label before you buy. If it says 8+ or lists a warning, don’t use it with a 3-6 year old. The AP (Approved Product) seal means non-toxic when used as directed, not safe to eat or right for every age. Don’t sand or crumble dried clay, since the dust shouldn’t be breathed in.
Before every session:
- Buttons, beads, shells and other small add-ons stay away from children under 4 and any child who still mouths objects.
- An adult handles sharp tools and sealers, chooses any paint pens, and does any polymer-clay baking.
- An adult stays close while kids work.
- Everyone washes hands after play.
Getting Little Hands Ready: A 5-Minute Warm-Up
Clay is denser than playdough, and the first time a 3-year-old tries to knead a cold block straight from the package, it can feel like squeezing a brick. Skip the frustration with a quick warm-up before the “real” project starts:
- Wet hands first. Damp hands (not soaking) keep the clay from dragging and cracking as it’s worked.
- Roll a snake. Have your child roll a piece of clay between flat palms into a long rope. This is a great fine-motor warm-up, and it loosens the clay at the same time.
- Squish it flat, then roll it back into a ball. Repeating this two or three times softens even a stiff block significantly.
- Poke it all over with one finger. It’s oddly satisfying, and it finishes softening any dry edges.
After all four steps, the clay is warm from body heat and soft enough for a 3-year-old to pinch without help.
It also helps to set expectations out loud: “The clay might feel cold and stiff at first. That’s normal, we’ll warm it up together.” Kids who know it will feel different handle it better than kids expecting playdough.
Easy Air-Dry Clay Projects for Kids (Ages 3-6)
These are ranked roughly easiest to most involved. Skip around based on your kid’s age and patience. Our free Air-Dry Clay Project Card Pack has printable step cards. Once these feel easy, find more ideas in our air-dry clay projects for preschoolers post.
| Project | Best age | Active time | Difficulty | Special supplies / adult help |
|---|---|---|---|---|
| 1. Cookie-cutter shapes | 3+ | 10 min | Easy | Cookie cutters, straw |
| 2. Handprint keepsake | 3+ | 10 min | Easy | Straw for the hanging hole |
| 3. Leaf-print pinch pot | 4+ | 15 min | Easy-medium | Real leaf |
| 4. Clay beads | 4+ with close supervision (3 = large pendants) | 20 min | Medium | Adult makes the holes |
| 5. Clay pumpkins | 4+ | 15 min | Easy | Orange paint (optional) |
| 6. Coil snakes and rings | 3+ (rings 5+) | 15 min | Easy-medium | Adult helps with rings |
| 7. Nature-print tiles | 3+ | 15 min | Easy | Under 4: large, flat items only |
| 8. Clay animals | 5-6 (younger with help) | 25 min | Medium | Water for slip and score |
A 3-year-old will enjoy the first three and lose interest by the fifth. A 6-year-old can often work down the whole list in one longer session.
1. Cookie-Cutter Shapes (the easiest possible starting point)
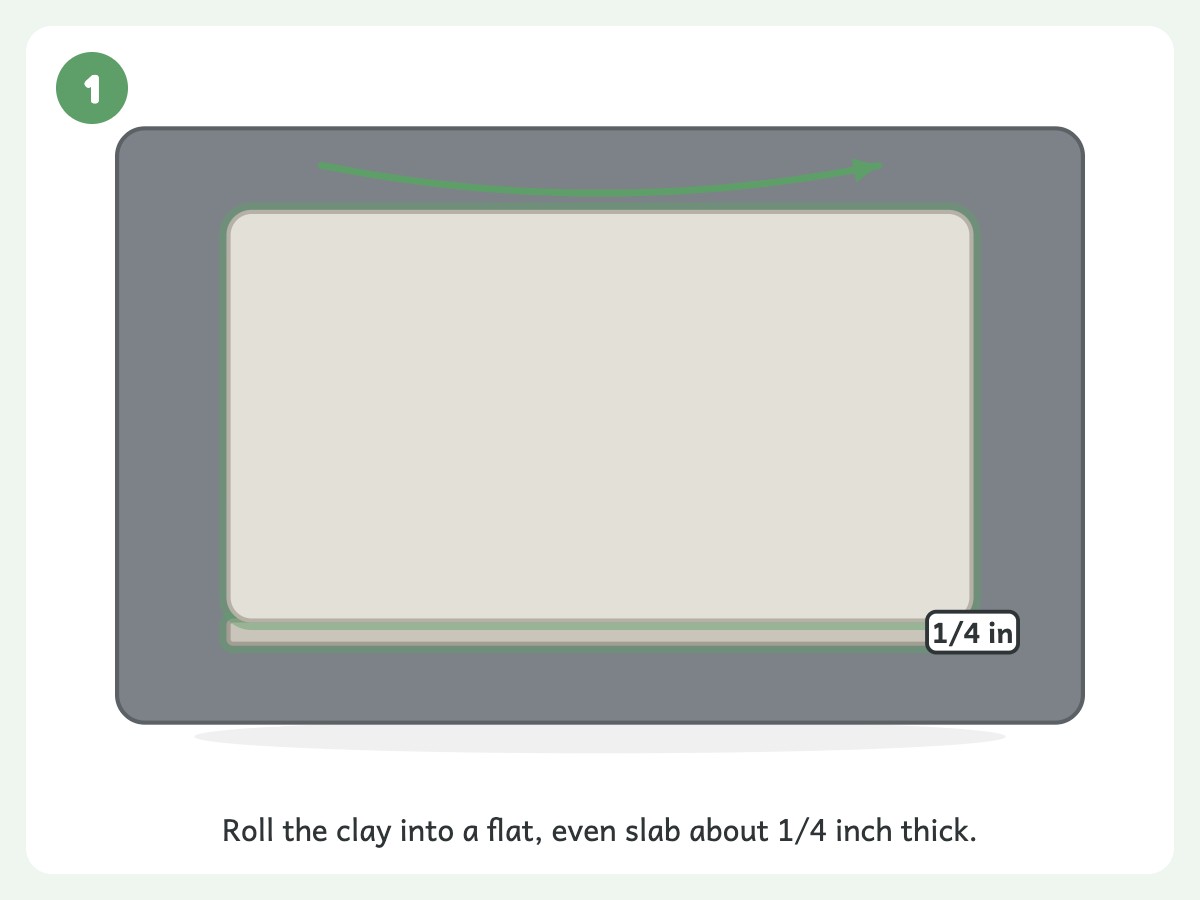
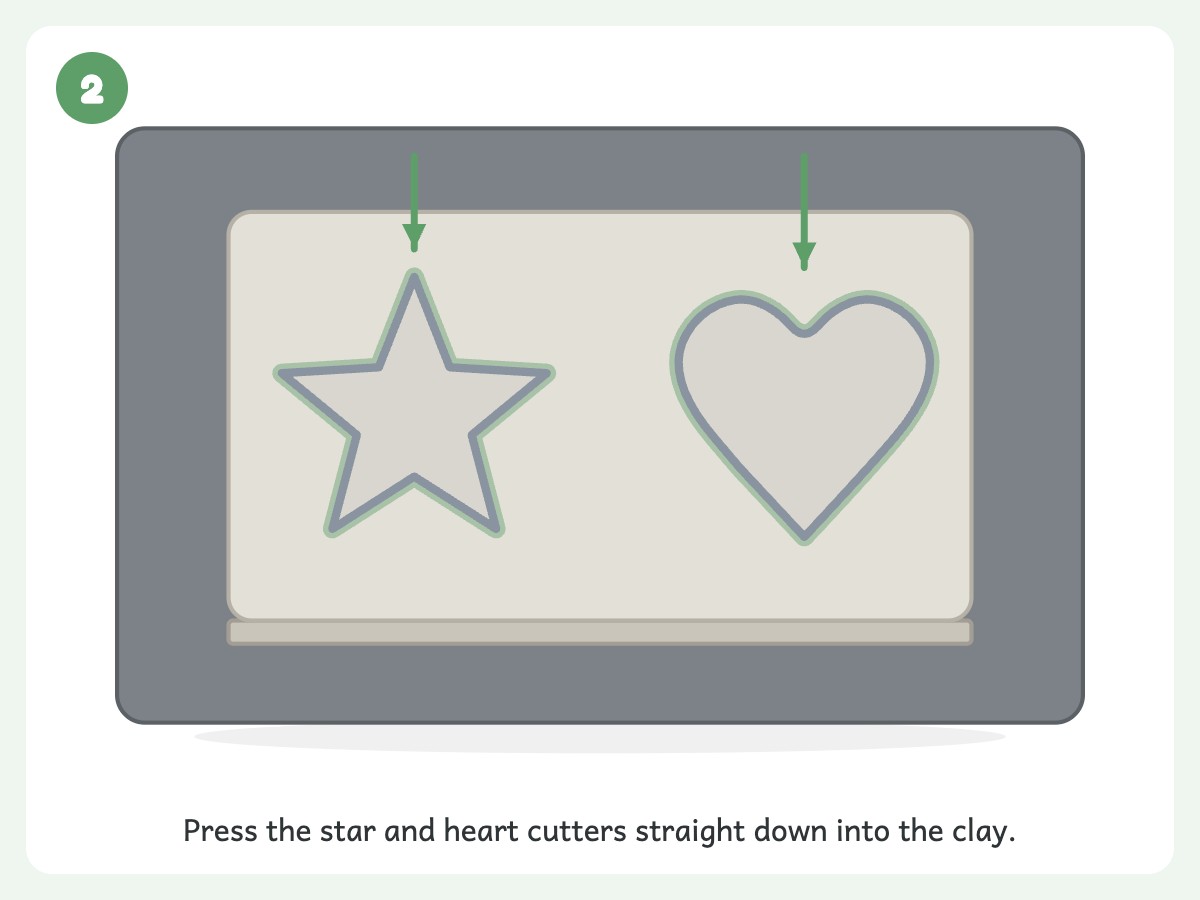
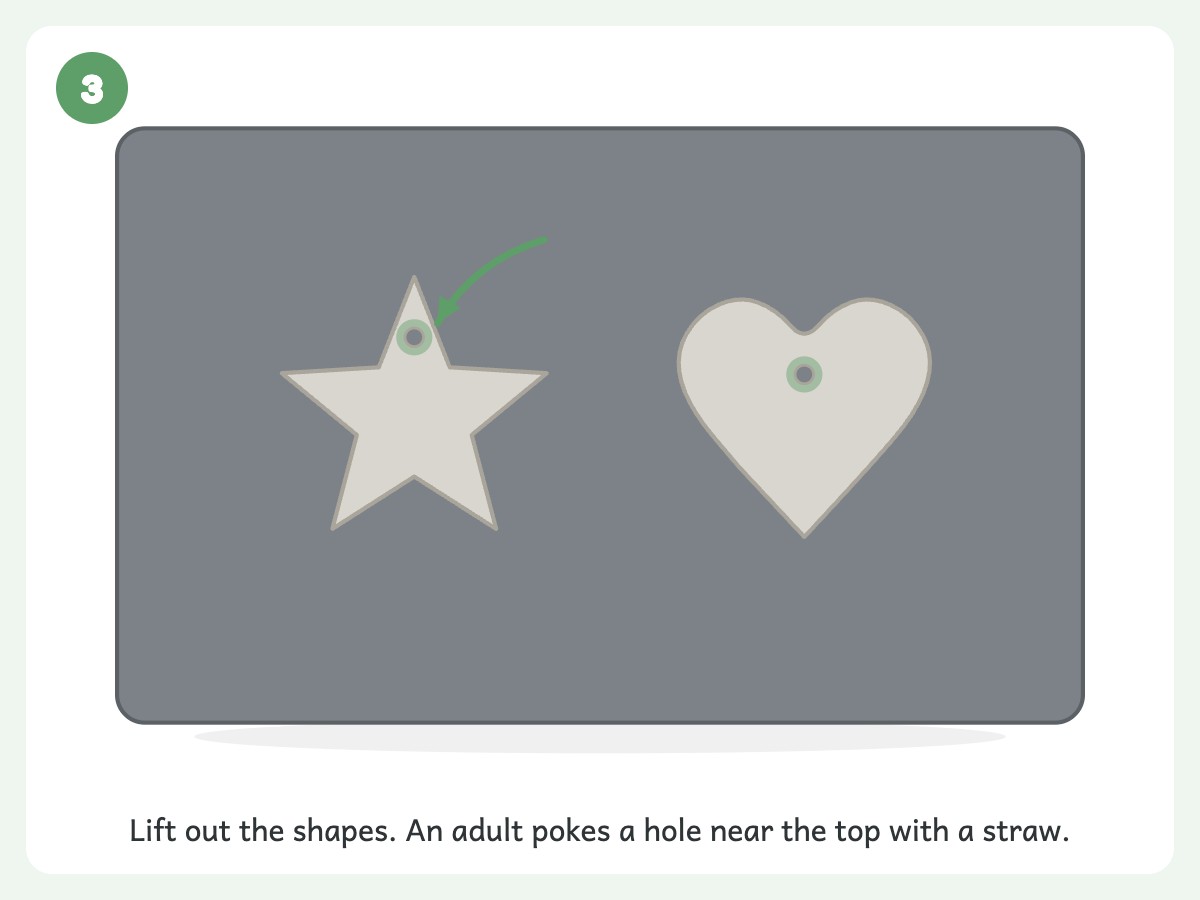
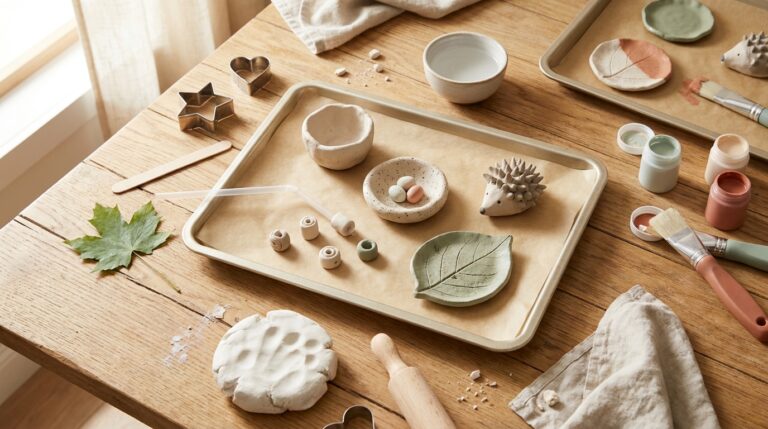
Roll clay flat with a rolling pin to about 1/4 inch thick, press cookie cutters straight down, and lift the shapes out. Poke a hole near the top edge with a straw before it dries if you want to hang them as ornaments or a garland later. This is the lowest-skill project on the list. A 3-year-old gets a result that looks just like they intended, which matters a lot at this age.
Fair warning: our first batch stuck to the rolling pin and came up in shreds. A sheet of parchment paper laid over the clay before rolling fixes that.
TipFor 3-year-olds, pre-roll the clay flat yourself and let them do the pressing and lifting. By age 5-6, they can manage the rolling pin too.
2. Fingerprint and Handprint Keepsakes
- Roll. Flatten a ball of clay into a circle about 1/2 inch thick.
- Press. Push your child’s whole hand, or just their fingertips in a row, firmly into the surface.
- Poke. An adult makes a hanging hole near the top edge with a straw before the clay dries.
- Date it. Write the date on the back with a dull pencil while the clay is still soft.
Don’t skip the date. I left it off our first one, and now I can’t tell you whether that hand was three or four.
This is the project that ends up in a frame or on a shelf for years, and it costs well under a dollar of clay to make.
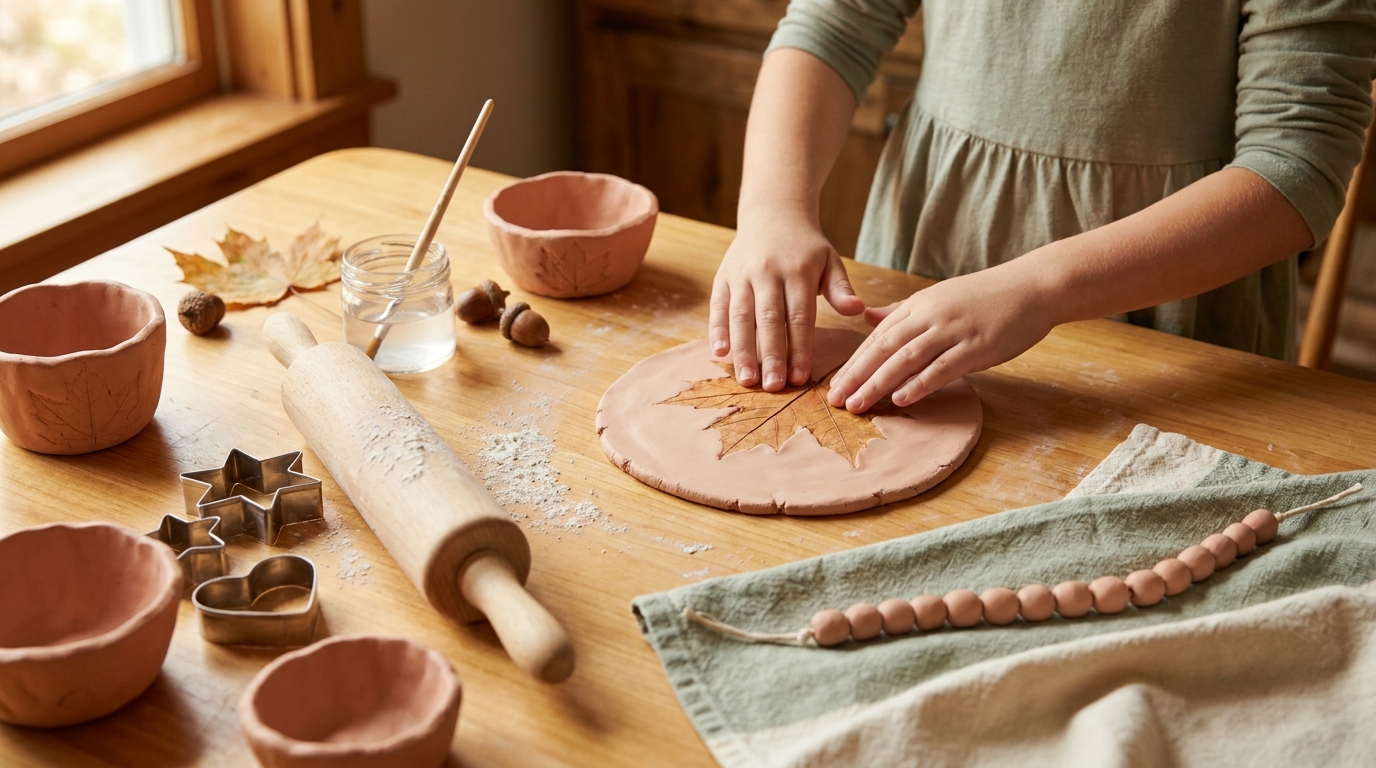
3. Leaf-Print Pinch Pots
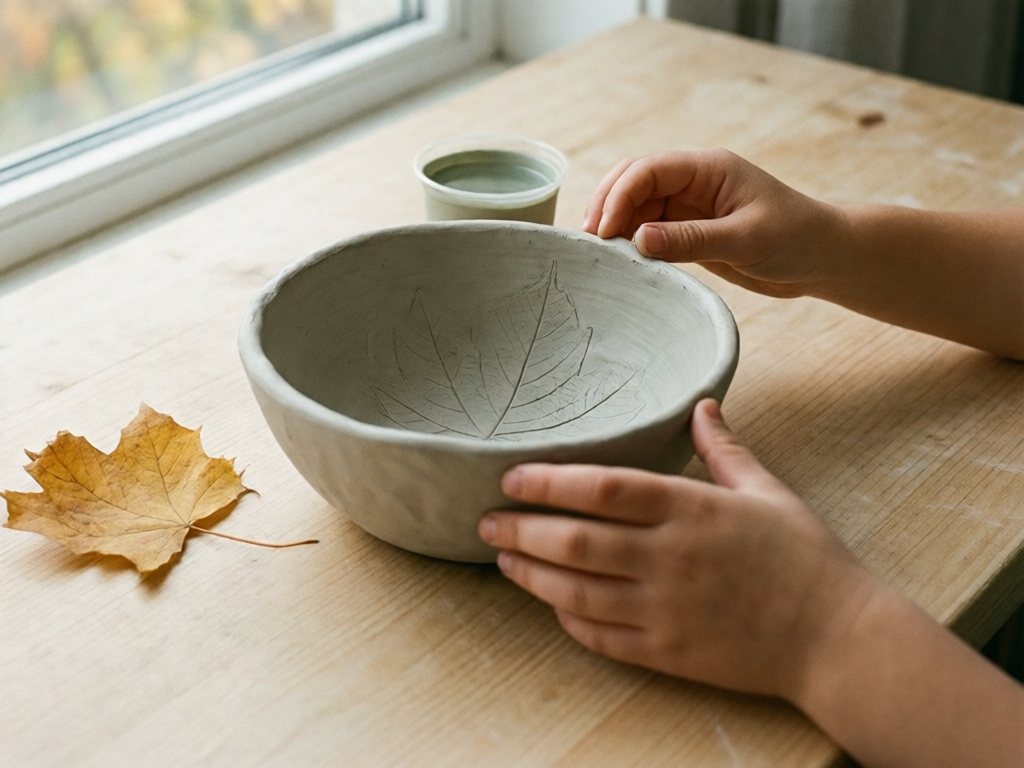
- Flatten. Press a ball of clay into a pancake shape.
- Print. Press a real leaf firmly into the surface, ribbed side down for the clearest print.
- Peel. Lift the leaf away to reveal the vein pattern.
- Shape. Gently fold the sides up into a shallow bowl while the clay is still soft, pinching the edges to seal the seams.
This pairs naturally with a fall nature walk. We did ours the same afternoon as a batch of fall leaf crafts, and the leftover leaves made this one nearly free.
TipKeep the pinch pot walls no thicker than about 1/2 inch, roughly a pinky finger. Thicker walls are the top cause of cracks in this project.
4. Clay Bead Necklaces
Safety firstSmall beads are a choking hazard under age 4. Three-year-olds make large flat pendants instead, well over 1.5 inches across and too sturdy to bite into pieces. From age 4, kids roll beads only with an adult sitting close. An adult makes the holes with a straw or blunt tool, never a sharp skewer. String beads on elastic or a short breakaway cord, and keep necklaces for supervised play and wear only.
For ages 4 and up, roll small balls of clay with an adult close by. The adult pokes a hole through the center, twirling the tool gently to widen it. Clay shrinks as it dries, so a hole that looks generous when wet is often just right once dry.
Let beads dry fully, laid on their sides so the hole doesn’t close up. Then string them once hard.
TipRolling perfectly round beads is tricky for little hands, so celebrate “lumpy bead necklace” as its own style. By 5-6, kids can usually roll rounder beads between flat palms.
5. Clay Pumpkins (a natural fit for fall)
Start with a ball of clay. For orange clay, an adult kneads in a drop of non-toxic kids’ acrylic paint before shaping, and ends up with orange hands. Or leave it plain and paint the pumpkin once it’s dry.
Use a pencil or the back of a butter knife to press vertical ridge lines around the sides, pumpkin-style. Hollow the base a little with a thumb so it dries evenly, then press a tiny coil of clay into the top for a stem. Skip twigs for kids under 4, since small add-ons are choking and poking hazards.
These sit right alongside a batch of pumpkin crafts for a seasonal table display, and unlike a real pumpkin, they don’t rot on the porch in November.
6. Coil Snakes, Rings, and Bracelets
Roll a long clay rope, the same skill as the warm-up. Leave it as a snake with pressed-on eyes, or wrap it around a cardboard tube or small jar to make a ring or bracelet. Let it dry on the form, never on a person. This is a great one for siblings at different skill levels. A 3-year-old rolls a lumpy short snake while a 6-year-old coils theirs into a spiral pot.
Safety firstNever put clay on a child’s finger or wrist. It can dry and tighten. Shape rings and bracelets around a tube or jar only.
7. Nature-Print Tiles
Flatten clay into a square or circle about 1/4 inch thick. Press natural objects into the surface to leave an imprint, then lift them out before the clay dries. For ages 4 and up, shells, acorn caps and small pinecones all leave clear prints.
Safety firstFor kids under 4, or any child who still mouths things, an adult chooses only large, flat items such as big leaves or the edge of a large cookie cutter. Put shells, acorn caps, small pinecones and twigs away before you start, and stay close the whole time.
This is process art with a permanent result. Pressing and exploring texture matters more than the finished tile, which is the idea behind process art for toddlers.
8. Simple Clay Animals
Start with three basic shapes: a ball, an oval, and a small cone. Let your child combine them into an animal. A ball body with a smaller ball head makes a convincing owl or bear. An oval with four short coil legs and a pinched tail makes a passable turtle or dog.
Add eyes, a mouth, or fur lines with a blunt tool. Kids use a dull pencil or plastic stylus. An adult handles any pointed tool, such as a toothpick.
Join pieces with “slip and score,” a trick borrowed from real pottery. It keeps an arm attached instead of popping off as it dries.
- Score. Scratch light lines into both surfaces with a dull pencil.
- Dab. Add a little water to both scored spots.
- Press and smooth. Push the pieces together and smooth the seam with a damp fingertip.
- Hold. Keep gentle pressure on the join for a slow count of 10.
How to Keep Air-Dry Clay From Cracking
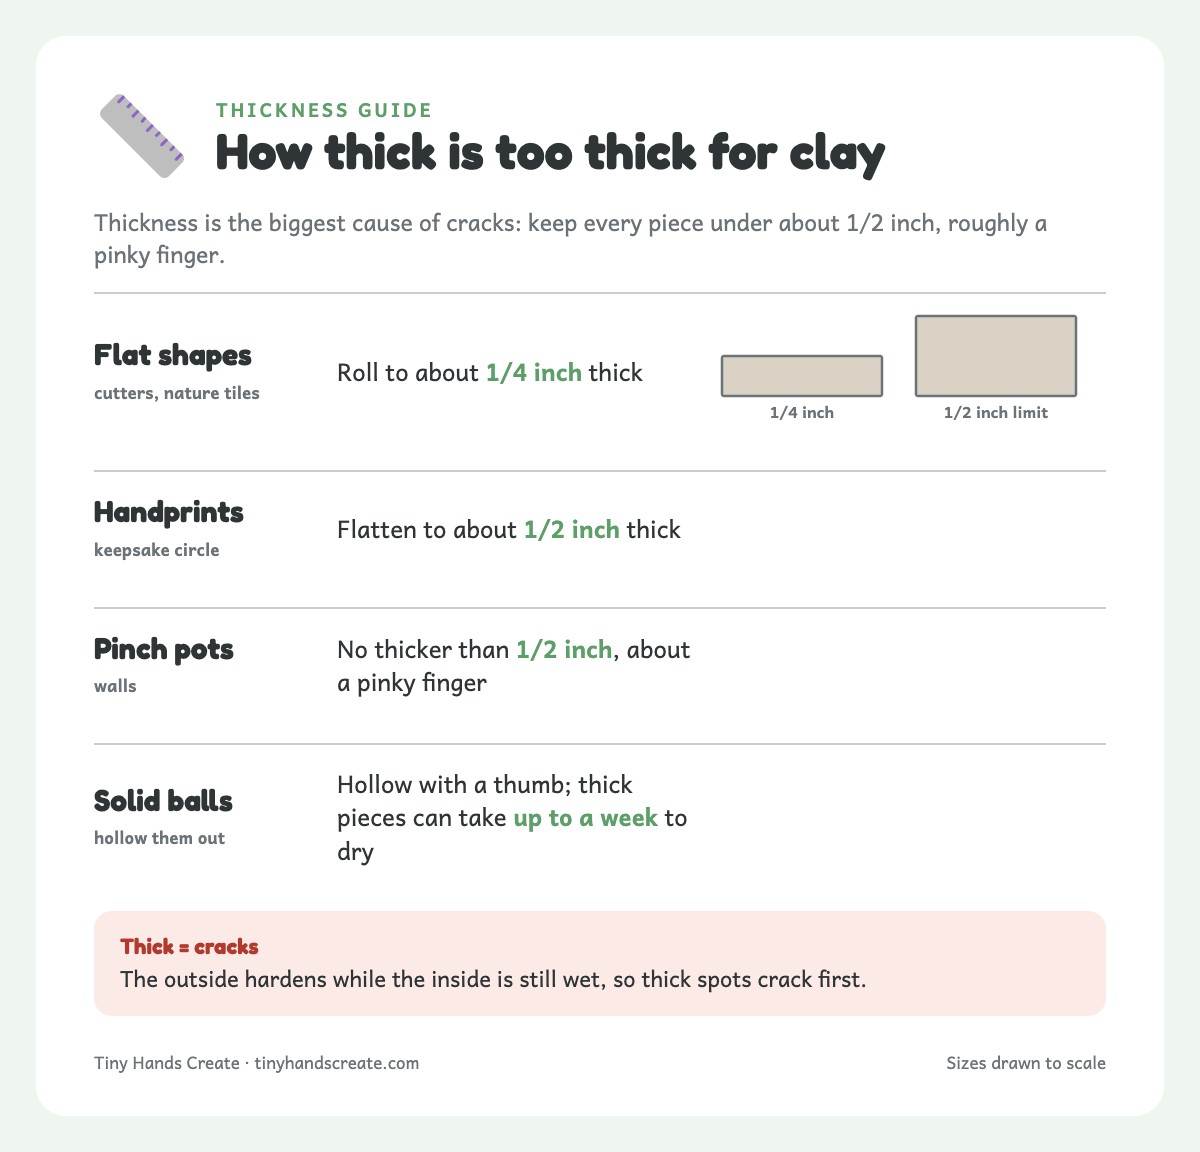
Cracking is the most common complaint with air-dry clay, and almost all of it comes down to four fixable causes.
| Cause | What it looks like | Fix |
|---|---|---|
| Thickness (the big one). | Cracks across thick spots. The outside hardens while the inside is still wet. | Keep walls under about 1/2 inch. Hollow out solid balls with a thumb. Thick pieces can take up to a week to dry, and longer in humid weather. |
| Drying too fast. | Surface cracks on pieces dried in the sun or near heat. The outer layer dries before the inside catches up. | Dry at room temperature, out of direct sun. A kitchen counter away from a heating vent works better than a windowsill. |
| Joining wet clay to dry clay. | A seam pulls apart, or an ear or tail drops off. The two pieces shrink at different rates. | Keep all pieces of one project equally moist. Slip and score every join, as in the clay animals project. |
| Trapped air bubbles. | A small bubble or pop on the surface, mostly on balls and beads. | Press and knead well before shaping. Poke a small hole in the bottom of larger solid pieces to let air escape. |
If something cracks anyway, and eventually something will, rub a tiny bit of water into the crack with a fingertip and let it dry again. That often fills hairline cracks. Deeper cracks need slip: mix a little fresh clay with water into a paste, press it into the gap, smooth it, and let it dry again.
Painting and Sealing Finished Clay Pieces
Paint only fully dry pieces. Light-colored clays turn paler as they dry, but that only shows the surface is dry. The piece should also feel light, hard and room temperature all the way through. Thick pieces need extra time.
Non-toxic acrylic labeled for kids, with the AP seal, is the best choice. It’s opaque, dries fast, and comes in every color. Tempera works in a pinch but rubs off with handling, so save it for keepsakes that go straight into a memory box.
- The piece is light, hard and room temperature all the way through.
- Paint is kid-labeled acrylic with the AP seal.
- An adult handles any sealer, in a ventilated room.
A few things that help:
- Paint in thin layers. Clay is porous and soaks up the first coat unevenly. Let it dry for about 20-30 minutes, then add a second thin coat. That gives much more even color than trying for full coverage in one pass.
- Seal it if it’ll get handled a lot. An adult can brush on a clear coat of Mod Podge or a matte acrylic sealer after the paint dries, in a ventilated room. Sealed pieces must dry fully before kids handle them. Skip this step for a keepsake going straight onto a shelf. It only matters for things kids will play with, like the animals or beads.
- Paint pens are a shortcut for ages 5+. An adult should choose and hand over the pen. It gives more control than a loaded brush for dots, lines and faces. Skip glitter pens, since glitter is a mouthing hazard.
Storage, Cleanup, and Keeping Clay Fresh Between Sessions
Unused air-dry clay dries out in open air. Good storage lets one block last across several sessions. Expect clay dust, water rings and a slightly sticky tabletop along the way.
Good to knowNever seal or box clay pieces that haven’t fully dried. Trapped moisture can cause mold. Give pieces the full dry time on the package, uncovered, before boxing them up. A dry piece feels light, hard and room temperature all the way through.
- Wrap leftover clay tightly in plastic wrap, then seal it in a zip-top bag, pressing out as much air as possible. Wrapped well, most stay workable for a few weeks, though it varies by brand, so check the package. Keep a partly used block in the bag rather than its original box.
- If clay starts to feel stiff, knead in a few drops of water at a time until it softens. This usually revives clay that’s starting to dry, but not clay that’s gone completely hard.
- Throw out clay that has mold or smells sour. Keep kids from handling moldy clay, and wash hands after touching it.
- Cleanup is easy compared to paint or slime. Dried clay dust wipes up with a damp cloth, and wet clay comes off skin and most surfaces with plain water — no special cleaner needed. Don’t rinse clay-covered hands over a drain, since clay can clog pipes quickly. Wipe hands with a paper towel first, then rinse in a basin. Let the water settle and put the sludge in the trash, not down the drain or onto the ground.
Age-by-Age Guide: What to Actually Expect
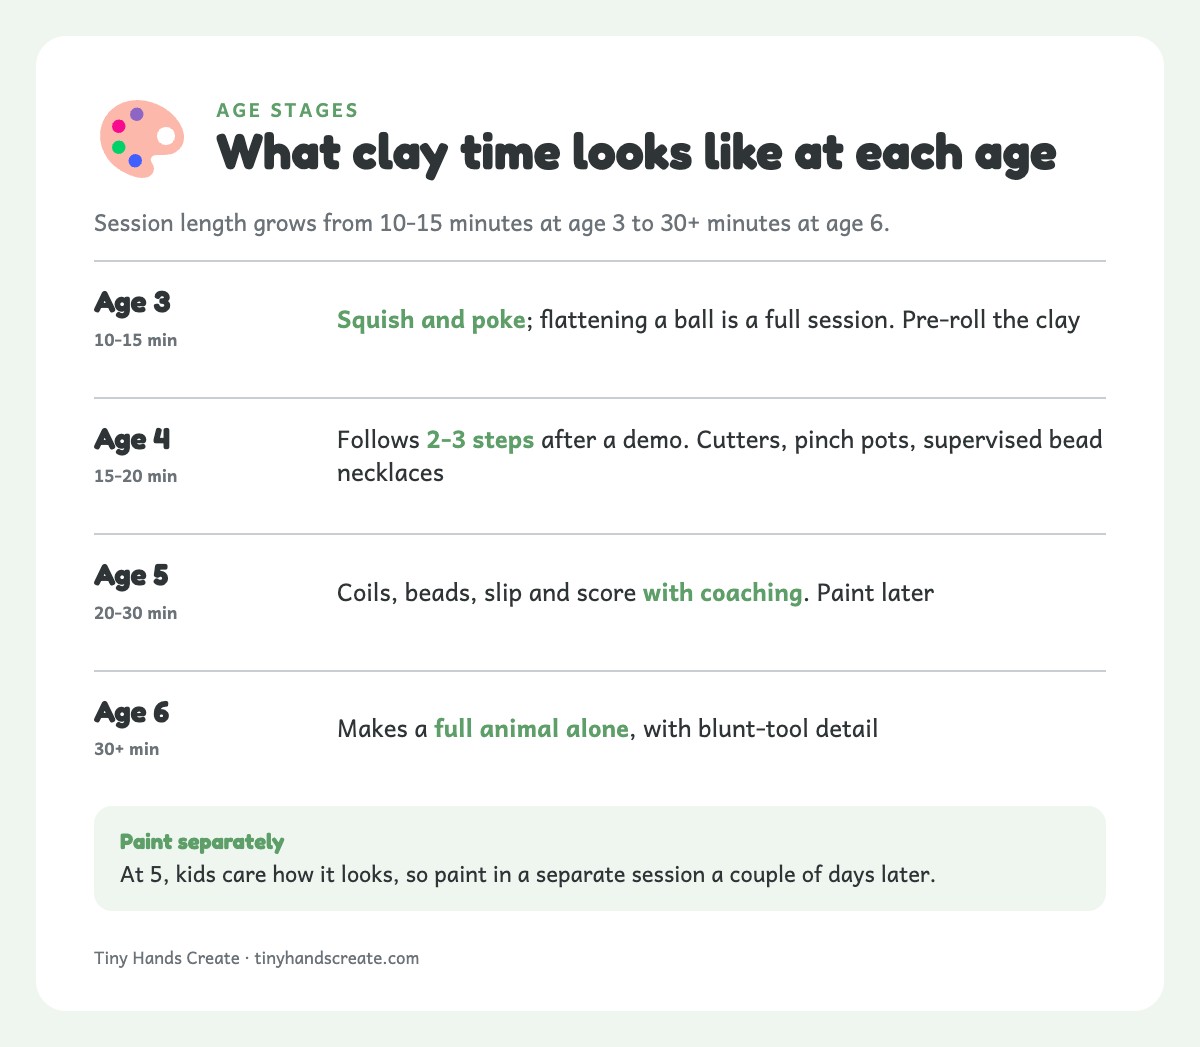
Clay feels very different to a 3-year-old than to a 6-year-old. Here’s what’s typical.
| Age | What to expect | Session length | Best projects |
|---|---|---|---|
| 3 | Squishing and poking more than sculpting. Flattening a ball over and over is a complete session. Pre-roll the clay. | 10-15 min | Cookie-cutter shapes, handprints |
| 4 | Follows 2-3 steps after a demo. Cutters and simple pinch pots click. Bead necklaces only with close supervision. | 15-20 min | Handprint keepsakes, leaf-print pinch pots |
| 5 | Coil snakes, rolled beads and slip-and-score joining with coaching. Cares how it looks, so paint in a separate session a couple of days later. | 20-30 min | Coils, beads, pumpkins |
| 6 | Can manage a full animal alone, including joining and detail with a blunt tool. Curious about how clay hardens as water evaporates. | 30+ min | Clay animals, nature-print tiles |
Frequently Asked Questions
Is air-dry clay safe for toddlers and preschoolers?
Check the age label and the ACMI AP (Approved Product) seal on the package, and read the ingredient list for allergens. Some clays are labeled 3+ or 8+, and an 8+ label or warning means skip that clay for a 3-6 year old. The AP seal means non-toxic when used as directed, not edible. Clay is not food, so supervise closely any child who still mouths things, and wash hands after play. Don’t sand or crumble dried clay, since the dust can be an inhalation concern. If your child has eczema or a known skin condition, ask their doctor before heavy handling.
Can you speed up the drying time?
You can, a little, by placing pieces near (not on top of) a fan or in a well-ventilated room. Resist the urge to use a hair dryer or oven, since fast, uneven drying is the top cause of cracking. If you’re working against a deadline (a gift, a school event), plan for the full 24-72 hours the package recommends rather than trying to rush it.
What if my kid’s project cracks after it dries?
Water rubbed into a hairline crack with a fingertip, then dried again, often fills it. For a deeper crack, mix a little fresh clay with water into a thick paste, press it into the gap, smooth the surface, and dry it again. Cracked clay is usually repairable.
Do you have to paint air-dry clay, or does it dry a nice color on its own?
Most air-dry clay dries to a matte gray-white or terracotta color depending on the brand, which looks perfectly nice on its own for a rustic, natural finish. Painting is entirely optional — some pieces, like the leaf-print pinch pots, look better unpainted, letting the texture and natural clay color do the work.
How is air-dry clay different from the playdough we already have at home?
Playdough stays soft and is meant to be reshaped over and over, so it’s the better choice for daily open-ended play. Our homemade playdough recipes are a good place to start. Air-dry clay hardens permanently in 24-72 hours. That makes it the right pick when you want a keepsake or finished object rather than reusable dough.
Can finished clay pieces go outside or get wet?
Unsealed air-dry clay is not weatherproof — it will soften and eventually break down if left outside or exposed to regular moisture, so keep finished pieces indoors. A coat of clear acrylic sealer adds some water resistance for occasional splashes. Even sealed pieces aren’t meant for permanent outdoor display the way a resin or ceramic piece would be.
How much clay do I actually need for one craft session?
Less than you’d think. A 1 lb block comfortably covers a handprint keepsake, a small pinch pot, and a few cookie-cutter shapes for one child in a single session. A 2-5 lb block will last several sessions if stored properly. Sizes vary by brand and store.
Where to Start
Start with one cookie-cutter shape or one handprint keepsake, and see how your kid takes to the texture. For more ideas, try our air-dry clay projects for preschoolers. Whatever comes out of that first session, even if it ends up as clay confetti on the kitchen floor like ours did, it’ll have been worth the mess.