DIY Playdough Recipes for Kids: 10 Homemade Doughs Parents Actually Trust
Discover trusted DIY playdough recipes, including a 5-minute no-cook option. You'll learn the key differences between no-cook and cooked dough to choose the best method for your family's needs.
- Understand the fundamental split between no-cook and cooked playdough.
- Choose no-cook dough for quick fixes; it's ready in about 5 minutes.
- Opt for cooked dough for smoother texture and 2-3 month shelf life.
- Use the 5-minute no-cook recipe for immediate playdough needs.
My daughter was eighteen months old the first time she tried to eat a chunk of store-bought playdough, and I found myself reading the ingredient list on that little plastic tub while she screamed for it back. Sodium something, mineral oil, a preservative I couldn’t pronounce, and a smell that lingered on her hands for an hour after I finally pried it away. That was the afternoon I decided we were making our own from now on, and four years and approximately nine million batches later, I’ve got a stack of index cards taped inside a kitchen cabinet with the recipes that actually survive contact with a three-year-old.
Here’s the thing nobody tells you when you Google “homemade playdough recipe”: there are dozens of versions floating around, and most of them are either too fussy for a Tuesday afternoon or fall apart into crumbs within a week. Some need the stove, some don’t, some are safe for a baby sibling who’s still in the mouthing-everything phase, and some are genuinely better than what you’d buy in a store. This is the guide I wish I’d had that first week — ten recipes I’ve actually made, with the troubleshooting notes that come from real batches that went wrong before they went right.
No-Cook vs. Cooked Playdough: Which One Do You Actually Need?
Before you flour your countertop, it’s worth understanding the fundamental split, because it determines everything about how the dough behaves, how long it lasts, and how much patience you need on a given day.
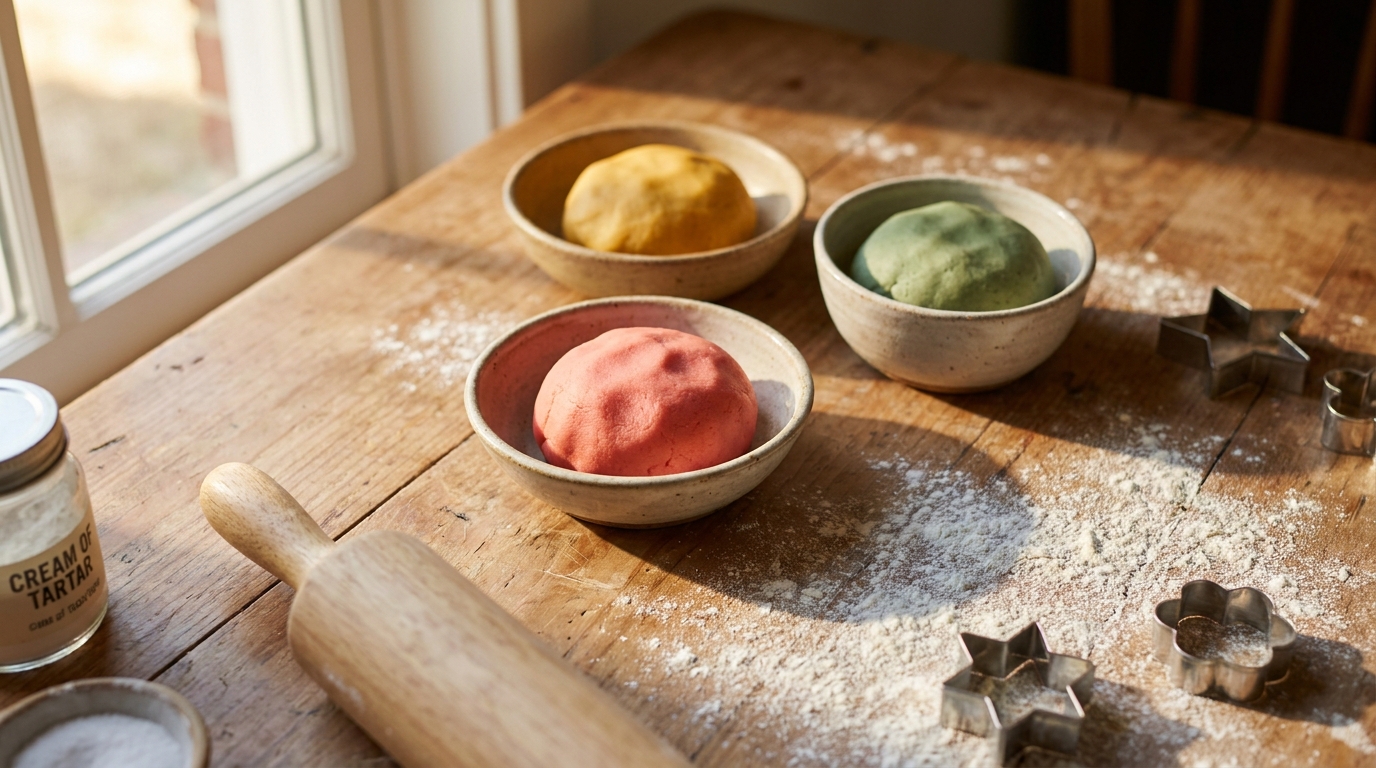
No-cook playdough mixes flour, salt, oil, water, and cream of tartar (or sometimes just extra salt as a substitute) directly in a bowl, kneading until it comes together. It’s ready in about five minutes, which makes it the go-to for “I need something for them to do RIGHT NOW” moments. The tradeoff is texture and shelf life — no-cook dough tends to be a little more crumbly out of the gate and doesn’t hold up quite as long in storage, though it’s still perfectly fine for a week or two of regular play.
Cooked playdough, on the other hand, involves heating the same basic ingredients in a saucepan until the mixture pulls away from the sides and forms a ball. It takes ten to fifteen minutes including cooling time, but the payoff is real: cooked dough is smoother, stretchier, and can last two to three months in an airtight container if you store it right. Once you’ve made a proper cooked batch, it’s genuinely hard to go back to the no-cook version for everyday use — the texture difference is noticeable the second you pick it up.
| No-Cook Dough | Cooked Dough | |
|---|---|---|
| Time to make | 5 minutes | 10-15 minutes |
| Texture | Slightly grainy, softens with kneading | Smooth, elastic, “store-bought” feel |
| Shelf life (airtight container) | 1-2 weeks | 2-3 months |
| Best for | Spontaneous play, quick fixes, letting kids help mix | Long-term dough you’ll use weekly, gifting, classroom batches |
| Stovetop required | No | Yes |
| Cream of tartar needed | Optional (improves texture) | Recommended (improves elasticity and shelf life) |
My honest rule of thumb: if it’s a rainy Tuesday and everyone’s already lost their minds, make the no-cook version. If you’re setting up a proper sensory bin activity for the week or making a batch to send home from a birthday party, take the extra ten minutes and cook it. This same logic — matching the recipe’s effort level to how you’ll actually use it — comes up again and again if you’re building out a rotation of DIY sensory bins alongside your playdough stash, since some fills need daily refreshing and others can sit for a month.
The 5-Minute No-Cook Playdough (Recipe #1)
This is the one I make when a kid is already melting down and I need a solution in the time it takes to boil water for pasta. No stove, no waiting, and kids as young as three can dump ingredients into the bowl themselves.
Ingredients:
- 2 cups all-purpose flour
- ¾ cup salt
- 2 tablespoons cream of tartar
- 2 tablespoons vegetable oil
- 1½ cups boiling water (adult pours this part)
- Food coloring or liquid watercolors, as desired
Instructions:
- Whisk the flour, salt, and cream of tartar together in a large bowl.
- Stir the food coloring into the boiling water first (this saves you from tie-dye hands later), then pour it into the dry ingredients along with the oil.
- Stir with a wooden spoon until it’s too thick to stir, then let it cool for 3-4 minutes — it will be hot.
- Turn it out onto a floured counter and knead for 2-3 minutes until smooth.
The boiling water is doing real work here — it partially cooks the flour on contact, which is why this version holds together better than the classic room-temperature no-cook recipes you’ll find elsewhere. If you skip the cream of tartar entirely (some pantries just don’t have it), add an extra tablespoon of salt and expect a slightly softer, less elastic dough that you’ll need to replace a bit sooner.
Real troubleshooting: If it’s sticky right out of the bowl, it needs more kneading time, not more flour — resist the urge to dump in extra flour, since that dries it out unevenly and leaves streaky bits. Give it a full three minutes of kneading before you judge it.
The Stretchy Stovetop Playdough Every Parent Should Master (Recipe #2)
This is the recipe on the index card that’s gotten so stained I’ve had to rewrite it twice. It’s the one that lasts, the one that feels like the tub stuff, and the one I make in a double batch every couple of months so we’ve always got backup colors on hand.
Ingredients:
- 2 cups all-purpose flour
- ¾ cup salt
- 4 teaspoons cream of tartar
- 2 tablespoons vegetable oil
- 2 cups water
- Food coloring
Instructions:
- Combine everything except the food coloring in a saucepan (yes, dry and wet together — it works).
- Cook over medium heat, stirring constantly, for 5-8 minutes. It will look like thin pancake batter, then lumpy, then suddenly pull together into a solid mass that clumps around your spoon.
- Pull it off the heat the moment it forms a ball and pulls cleanly from the pan sides — overcooking makes it dry and crumbly.
- Turn it onto a floured surface, let it cool for a few minutes until safe to handle, then knead in food coloring if you didn’t add it earlier.
The “aha” moment with this recipe is trusting the transformation. For the first four or five minutes it looks like a disaster — thin, streaky, nothing like dough. Then in the span of about thirty seconds it seizes up and becomes a ball. New playdough makers usually panic right before that happens and either give up or overcook it trying to force it along faster. Stand there, keep stirring, and it’ll come together.
This dough stores beautifully — I’ve had batches still soft and usable at the ten-week mark in a sealed container in the fridge. It’s also the one I reach for when we’re doing longer, quieter sensory sessions, the kind of unstructured hands-in-the-dough time that pairs naturally with loose parts play — sticks, buttons, and shells pressed into a smooth ball of dough hold their shape far better than they do in a crumblier no-cook batch.
Taste-Safe Doughs for Toddler Siblings and Babies (Recipes #3 & #4)
If you’ve got a baby or young toddler in the house who treats every craft session as a snack opportunity, standard playdough — even homemade — isn’t something you want them mouthing regularly. The salt content alone is a concern in large quantities, and cream of tartar isn’t something you want a baby eating by the fistful. These two recipes solve for that.
Edible “Eat It If They Must” Dough (Recipe #3)
Ingredients:
- 1 cup peanut-free sunflower seed butter (or peanut butter if no allergy concerns)
- 1 cup powdered sugar or oat flour (oat flour keeps it less sweet and less sticky)
- Honey or maple syrup, a tablespoon at a time, only if needed for consistency (skip for babies under 12 months — no honey before age one)
Instructions:
- Mix the sunflower seed butter and powdered sugar or oat flour together with your hands or a stand mixer.
- If it’s too dry to hold together, add liquid a teaspoon at a time. If it’s too sticky, add more oat flour or powdered sugar.
- Knead until smooth, then store in the fridge.
This one is genuinely meant to be eaten — it’s essentially edible cookie dough consistency. It won’t hold fine detail the way flour-based dough does, but for a one-year-old who wants to squish and taste alongside an older sibling’s “real” craft project, it buys you fifteen minutes of parallel play without a trip to poison control on your mind. Keep it refrigerated and treat it like food, because that’s exactly what it is.
Taste-Safe Cloud Dough for Younger Siblings (Recipe #4)
Ingredients:
- 8 cups all-purpose flour
- 1 cup baby oil or edible oil (avocado or vegetable oil both work fine)
Instructions:
- Combine in a large bin and mix with hands until it reaches a moldable, slightly crumbly-but-holds-a-shape texture.
- Adjust with more flour or more oil until it clumps when squeezed but breaks apart easily.
This isn’t traditional playdough — it’s closer to kinetic sand — but it’s non-toxic if a mouthful gets swallowed, and the texture is genuinely mesmerizing for babies who are still working on pincer grasp and hand strength. I keep a bin of this next to the “real” playdough table specifically so a crawling or early-walking sibling has their own zone. If you’re already rotating calm-down sensory tools for a toddler prone to big feelings, cloud dough is worth adding to that toolkit too — the slow, repetitive squeezing motion has a genuinely soothing effect, and it’s low-stakes enough that a frustrated three-year-old can dig their hands in without worrying about “messing up” a craft.
Gluten-Free and Allergy-Aware Playdough (Recipe #5)
Standard playdough is essentially all gluten, which is fine for most families but a real problem if you’ve got a child with celiac disease, a wheat allergy, or a sibling who can’t be anywhere near flour dust. This version swaps in cornstarch and rice flour and holds up surprisingly close to the real thing.
Ingredients:
- 1 cup cornstarch
- ½ cup white rice flour
- ½ cup salt
- 2 tablespoons cream of tartar
- 2 tablespoons vegetable oil
- 1 cup boiling water
- Food coloring
Instructions:
- Whisk the cornstarch, rice flour, salt, and cream of tartar together in a saucepan.
- Add the oil and colored boiling water, then cook over medium-low heat, stirring constantly.
- This one thickens faster than the wheat-based version — watch closely, it’ll go from liquid to dough in about 90 seconds once it starts to set.
- Cool slightly, then knead on a cornstarch-dusted (not floured) surface until smooth.
The texture is a touch more delicate than wheat-flour dough — it tears more easily when stretched thin — but it molds and holds shape just as well for rolling, cutting, and stamping. Store it the same way as your cooked wheat dough, and double-check that every add-in you use later (glitter, scent oils, food coloring brands) is also gluten-free if you’re making this for a celiac child, since cross-contamination can sneak in through unexpected products.
Sensory Specialty Doughs Worth the Extra Step (Recipes #6-#8)
Once you’ve got the basic recipes down, these three variations are the ones that turn “playdough again” into “wait, THIS is playdough?” They take a little more setup but they’re worth having in rotation, especially for kids who get bored fast or are seeking extra sensory input.
Silky Conditioner Dough (Recipe #6)
Ingredients:
- 3 cups cornstarch
- 1½ cups hair conditioner (a basic, unscented or lightly scented one works best)
Instructions:
- Combine in a bowl and knead by hand — it’ll feel strange for the first minute, almost like wet sand, then suddenly turn silky and cohesive.
- Adjust with a little more cornstarch if it’s sticking to hands, or a splash more conditioner if it’s crumbly.
This dough has a genuinely different feel from flour-based versions — cool, slippery, almost like a very dense lotion that holds shape. It doesn’t dry out the way regular dough does over an afternoon of play, so it’s a good option for sensory seekers or kids working through tactile defensiveness who need a longer window before the texture changes on them.
Coffee Grounds Dough for Textured Play (Recipe #7)
Ingredients:
- 1 cup used coffee grounds, cooled and dried
- 2 cups flour
- 1 cup salt
- 2 tablespoons cream of tartar
- 2 tablespoons oil
- 2 cups warm water
Instructions:
- Mix the coffee grounds into the dry ingredients first so they distribute evenly.
- Combine with oil and water and cook on the stovetop the same way as Recipe #2.
- Cool and knead until smooth.
This is less about “craft” and more about texture and smell — it’s gritty, earthy-scented, and a completely different sensory experience from smooth playdough. It also naturally comes out a deep brown without any food coloring, which makes it a fun stand-in for mud, dirt, or “cookie dough” in pretend play. It’s a nice change of pace if you’re building out a rotation of unstructured, exploratory activities — the same instinct that drives good process art projects, where the point is the sensory experience of making, not a specific finished product.
Kool-Aid Scented Dough (Recipe #8)
Ingredients:
- 2 cups flour
- ¾ cup salt
- 2 packets unsweetened Kool-Aid powder (any flavor — this is also your coloring agent)
- 2 tablespoons cream of tartar
- 2 tablespoons oil
- 2 cups boiling water
Instructions:
- Whisk the Kool-Aid powder in with the dry ingredients — it saves you from needing separate food coloring since the powder tints the dough vividly on its own.
- Add oil and boiling water, stir until it clumps, cool slightly, then knead.
This is the recipe that gets the “wait, it smells like GRAPE” reaction every single time, and it’s genuinely one of the most requested doughs in our house. A word of caution: the smell is strong enough that some taste-curious toddlers will actually try to eat it because it smells like candy, so this one’s better suited to kids who’ve moved past the mouthing phase.
Two No-Heat Backup Doughs for When You’re Out of Time (Recipes #9 & #10)
Some days you need something in under three minutes, no stove, no cooling time, no cleanup beyond wiping a counter. These two live in my “we’re leaving in ten minutes but someone needs a distraction” back pocket.
3-Ingredient Baby Oil Dough (Recipe #9)
Ingredients:
- 2 cups flour
- 1 cup salt
- ½ cup baby oil (plus a splash of water if needed)
Instructions:
- Mix flour and salt, then work in the baby oil with your hands until it comes together.
- Add a tablespoon of water at a time if it’s too dry to bind.
No cream of tartar, no cooking, no waiting — just mix and go. It doesn’t have the elasticity of a cooked batch and it won’t last more than a few days before it starts to dry out, but for an immediate need it does the job, and the baby oil leaves hands feeling soft afterward, which is a small but real bonus during dry winter months.
Microwave 90-Second Dough (Recipe #10)
Ingredients:
- 1 cup flour
- ½ cup salt
- 1 tablespoon cream of tartar
- 1 tablespoon oil
- 1 cup water
- Food coloring
Instructions:
- Combine everything in a microwave-safe bowl.
- Microwave in 30-second bursts, stirring between each, for a total of about 90 seconds to 2 minutes, until it thickens into a dough-like mass.
- Cool for a couple of minutes, then knead until smooth.
This is essentially the cooked recipe, minus the stovetop, and it’s a genuine lifesaver when you don’t want to babysit a pot or you’re making a single small batch just for one kid’s request. Watch it closely near the end — microwaves vary enough that it can go from “not there yet” to “overcooked and rubbery” in a single extra burst.
Troubleshooting: Sticky, Crumbly, or Weirdly Dry Dough
Every parent who’s made playdough more than twice has hit one of these problems. Here’s what’s actually going on and how to fix it without starting over.
| Problem | Likely Cause | Fix |
|---|---|---|
| Sticky right after mixing | Not kneaded long enough, or too much liquid | Knead 2-3 more minutes on a floured surface before adding anything else |
| Crumbly, won’t hold together | Overcooked (cooked version) or too much flour added during kneading | Knead in water, a teaspoon at a time, until it comes back together |
| Dry and cracking after a few uses | Left uncovered, or too much time between play sessions | Knead in a few drops of water and a drop of oil; re-seal tighter next time |
| Smells sour or “off” | Bacteria growth, usually from being handled with unwashed hands or stored too long | Toss it — this one’s not salvageable, and it’s a sign to store the next batch in the fridge |
| Greasy or oily feeling | Too much oil relative to flour | Knead in a tablespoon of flour at a time until the greasiness disappears |
| Won’t take color evenly | Food coloring added after the dough already formed | Next batch, mix coloring into the liquid before combining with dry ingredients |
The sour-smell one catches new playdough makers off guard the most. Homemade dough has no preservatives, so if it’s been played with by unwashed hands (saliva, snack crumbs, you name it) and then sealed in a warm room, it can genuinely start to ferment within a week. That’s not a sign you did the recipe wrong — it’s just the tradeoff for skipping the preservatives that keep store-bought dough shelf-stable for years. When in doubt, smell it before handing it back over; sour or vinegary means it’s time for a fresh batch.
How to Store Homemade Playdough So It Lasts (Weeks, Not Days)
Storage is honestly where most homemade playdough goes wrong, and it’s an easy fix once you know the pattern. Here’s what actually extends shelf life:
- Airtight is non-negotiable. A zip-top bag with the air pressed out, or a container with a snap-tight lid — not a loosely covered bowl. Exposure to air is the number one reason dough dries out within days instead of weeks.
- Refrigerate cooked dough for maximum life. It sounds unnecessary, but a cooked batch kept in the fridge in an airtight container has genuinely lasted us two to three months, versus two to three weeks at room temperature.
- Keep colors separated. Store each color in its own bag or container rather than one big bin — even a few minutes of mixed play turns your whole batch muddy brown, and there’s no reversing that.
- Let kids’ hands dry before repackaging. Wet or sweaty hands introduce moisture that speeds up mold growth. A quick wipe with a paper towel before the dough goes back in its container makes a real difference.
- Label with the make date. A piece of masking tape with the date written on it takes ten seconds and saves you from guessing whether a container’s contents are still good three weeks later.
- Watch for the telltale signs it’s done. Mold spots (even tiny ones), a sour smell, or a texture that’s gone permanently crumbly no matter how much you knead — all three mean it’s time to toss and start fresh rather than try to rescue it.
If you’re making playdough as part of a broader rainy-day activity rotation, it’s worth batching your storage the same way you would sensory bin materials — labeled containers, grouped by type, easy to grab on a whim rather than dug out from the back of a cabinet.
Natural Colors and Scents That Actually Work
You don’t need artificial food dye to get vibrant playdough, and if you’re trying to keep things closer to “kitchen ingredients” for a taste-safe batch, these natural options genuinely work.
For color:
- Beet juice or beet powder for pink and red
- Turmeric for a bright, warm yellow (a little goes a very long way — start with ¼ teaspoon)
- Spirulina powder or matcha for green
- Cocoa powder for brown (and it smells like chocolate, which toddlers love)
- Butterfly pea flower tea, steeped strong, for blue and purple
For scent, add a few drops or a teaspoon during kneading:
- Vanilla extract for a warm, familiar smell
- Cinnamon or pumpkin pie spice for a cozy, seasonal batch
- Citrus zest (orange or lemon) for a bright, fresh scent that also naturally deters some pantry bugs
- Peppermint extract, used sparingly, for a cooling sensory element
A word of caution on essential oils specifically: while they’re popular in a lot of playdough tutorials, some (particularly citrus and peppermint oils, not extracts) can irritate sensitive skin in concentrated form, especially with repeated handling over multiple play sessions. If you want scent without that risk, kitchen extracts and dried spices are the safer bet for daily use, and they smell just as good.
Frequently Asked Questions
How long does homemade playdough actually last?
No-cook dough typically lasts 1-2 weeks at room temperature in an airtight container. Cooked dough lasts 2-3 weeks at room temperature, or 2-3 months if refrigerated in a sealed container. The biggest factor isn’t the recipe — it’s how airtight your storage is and how much moisture gets introduced by little hands during play.
Is homemade playdough safe if my toddler eats a little bit?
Standard homemade playdough (flour, salt, cream of tartar, oil, water) isn’t toxic in small amounts — it’s essentially unbaked bread dough with extra salt — but it’s not meant to be eaten regularly, and the high salt content means a large mouthful isn’t ideal. If you have a baby or toddler who mouths everything, make the edible sunflower seed butter dough (Recipe #3) or the taste-safe cloud dough (Recipe #4) specifically for them instead of hoping they won’t touch the “real” batch.
Why did my cooked playdough turn out crumbly instead of smooth?
This almost always means it cooked a few seconds too long. The moment the mixture pulls together into a ball and separates cleanly from the pan, pull it off the heat immediately — every extra 30 seconds on the stove pulls more moisture out and makes it drier. If it’s already crumbly, knead in water a teaspoon at a time until it smooths back out; most batches are salvageable this way.
Can I make playdough without cream of tartar?
Yes. Substitute an extra tablespoon of salt or a tablespoon of lemon juice or white vinegar in its place — cream of tartar is an acid that helps with elasticity and shelf life, so any mild acid gets you partway there. The dough will be a touch less stretchy and won’t last quite as long in storage, but it’s a fine substitute in a pinch.
My playdough smells sour after a week — is it safe to use?
No — toss it. A sour or vinegary smell means bacterial growth has started, usually from being handled without handwashing first or stored somewhere warm and humid. This is one of the real tradeoffs of homemade dough versus store-bought (which has preservatives): it doesn’t stay safe indefinitely. When it smells off, it’s time for a fresh batch, not a rescue attempt.
What’s the best playdough recipe for a classroom or large group?
The stovetop cooked recipe (Recipe #2) scales well and holds up best to dozens of little hands over multiple days, which makes it the most practical choice for a classroom, co-op, or birthday party favor. Make it a day ahead so it’s fully cooled, divide it into individual containers per child, and it’ll survive a week of daily handling far better than a no-cook batch would.
How do I get playdough color and glitter off little hands and countertops?
A small amount of dish soap worked into dry hands before rinsing with water lifts most food coloring stains, and a paste of baking soda and water handles the rest on skin. For countertops, wipe up any residue while it’s still damp — dried playdough (and any glitter mixed in) is much harder to scrub off a laminate or wood surface once it’s set.
Give Yourself Permission to Make a Mess
If your first batch comes out lumpy, or your kitchen counter looks like a flour bomb went off, you’re doing it exactly right — every recipe on this list took me at least two tries before it became the reliable version I’m sharing here. Start with the classic no-cook or stovetop recipe, get a feel for how the dough behaves in your hands, and then branch out into the taste-safe and specialty versions whenever curiosity (yours or theirs) strikes. The mess washes off the counter a lot easier than it seems like it will in the moment, and the ten minutes of squishing, kneading, and rolling is doing more for your kid’s hands, patience, and imagination than almost anything else in your craft drawer.