DIY Friendship Bracelets for Kids: Easy Patterns and Techniques for Beginners
This guide teaches you how to make DIY friendship bracelets, covering essential supplies, the two fundamental knots (forward and backward), and beginner patterns. You'll learn how to get started with minimal cost and troubleshoot common issues.
- Gather basic supplies like floss, tape, and scissors; skip expensive kits.
- Measure floss about 24-27 inches (fingertip to shoulder) for a child's bracelet.
- Master the Forward and Backward knots; they unlock every bracelet pattern.
- Practice the Forward Knot by forming a '4' and pulling the string up twice.
Last week I found four inches of hot pink embroidery floss knotted into what my daughter swore was “definitely a bracelet” wedged between the couch cushions. It was not a bracelet. It was a tangle with ambitions. But she’d been trying for twenty minutes, tongue poking out of the corner of her mouth in that fierce concentration kids get right before either a breakthrough or a meltdown — and when I sat down next to her and showed her just one knot, done slowly, three times in a row, something clicked. Ten minutes later she had an inch of actual, recognizable pattern. By dinner she’d made one for her little brother, one for me, and one that she wrapped in a paper towel “for camp tomorrow, in case someone doesn’t have one yet.”
That’s the thing about friendship bracelets in August: they’re basically the currency of the last two weeks of summer. Camp is winding down, new class lists are getting emailed out, and kids are trading these things like tiny woven promises that the friendships made in June aren’t going to evaporate the second school starts. The good news is that this is one of the most forgiving crafts you’ll ever teach — cheap, portable, endlessly repeatable, and genuinely masterable by most kids age 6 and up with the right first lesson. This guide walks through exactly that: the supplies, the two knots that unlock every pattern that exists, three beginner-to-intermediate patterns with step-by-step directions, and what to do when (not if) it turns into a knotted mess on the kitchen table.
What You’ll Need to Get Started
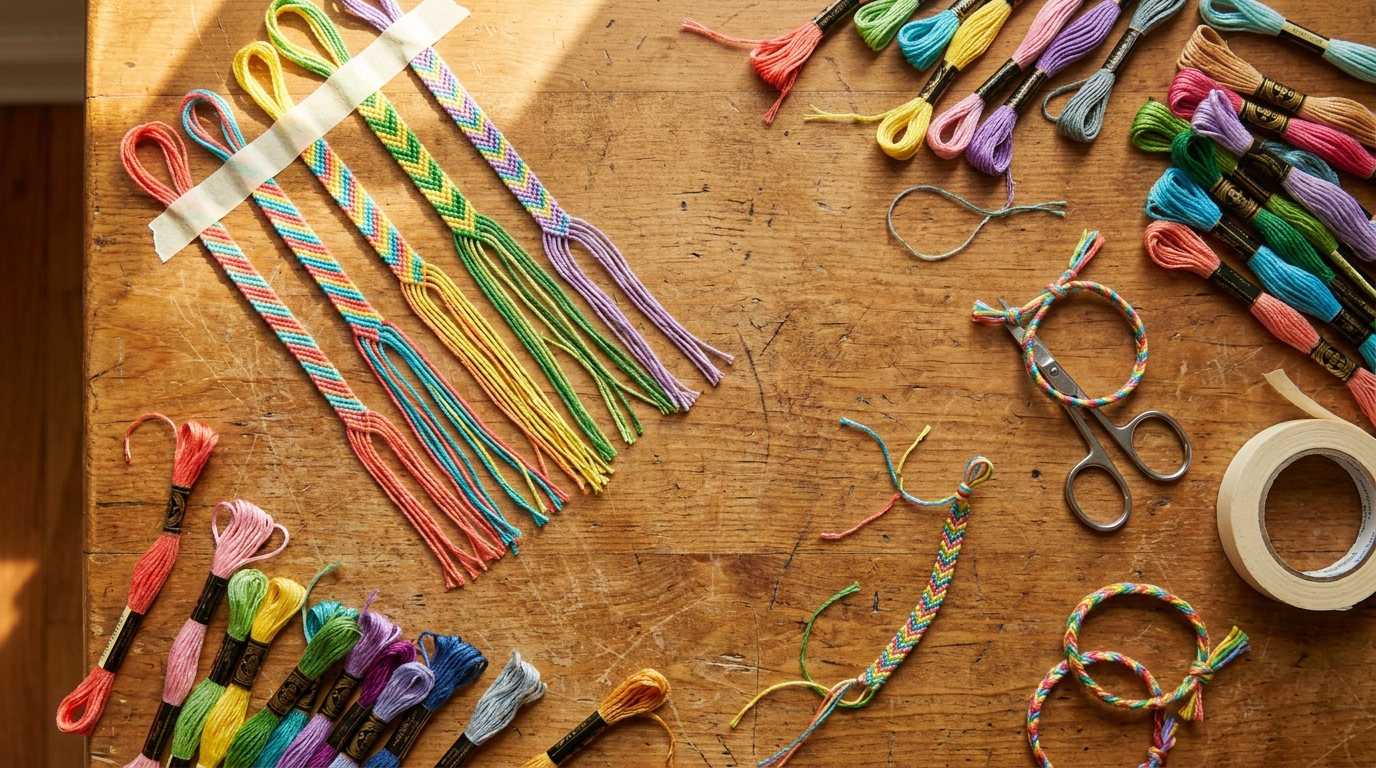
The beauty of friendship bracelets is that the supply list is short and the whole kit fits in a shoebox. Here’s what actually matters:
| Item | Why You Need It | Budget Tip |
|---|---|---|
| Embroidery floss (6-strand cotton) | The classic material — holds knots well, comes in every color | Buy variety packs of 30-50 skeins; craft stores run these under $10 |
| Masking or painter’s tape | Anchors the bracelet to a table or clipboard while working | Use what’s already in your junk drawer |
| A clipboard or safety pin | Holds the top knot steady so kids aren’t fighting the whole bracelet | Skip if working at a table with tape |
| Small scissors | For trimming ends and cutting floss to length | Blunt-tip kid scissors work fine |
| A ruler or yardstick | Measuring floss length so you don’t run short mid-pattern | Optional but saves frustration |
You genuinely do not need a bracelet-making kit with a fancy board, a floss organizer, or beads to get started — those are nice upgrades once a kid is hooked, not requirements for the first attempt. If you’re setting this up alongside other low-cost, use-what-you-have projects, it pairs nicely with the mindset behind Earth Day Crafts for Kids: 15 Projects Made Entirely from Recycled Materials — friendship bracelets are about as zero-waste as crafting gets, since scraps too short to use become bookmark tassels or bag charms.
Floss math: for a basic 4-strand bracelet sized for a kid’s wrist, cut each strand about 24-27 inches (roughly from fingertip to shoulder on an adult, which is an easy way to measure without a ruler when you’re out of arm’s reach of one). More strands or a longer pattern means longer floss — when in doubt, cut it long. You can always trim excess; you can’t un-cut floss that’s too short.
The Only Two Knots You Need to Know
Every friendship bracelet pattern, no matter how complicated it looks, is built from two knots. Once a kid has these down cold, every pattern in this guide (and honestly, every pattern on the internet) becomes accessible.
The Forward Knot (F):
- Take the left string and cross it over the string to its right, making a shape like the number 4.
- Thread the left string under the right string and up through the loop.
- Pull up (not sideways) to tighten the knot snugly against the row above it.
- Do this exact same knot a second time with the same two strings before moving on — one “forward knot” is actually two identical knots stacked together.
The Backward Knot (B):
This is the forward knot’s mirror image. Instead of crossing left-over-right, you cross right-over-left, thread under, and pull up — again, doing it twice with the same two strings.
Here’s the part that trips kids up the most: direction matters more than speed. A knot pulled sideways instead of straight up will slide loose or bunch up unevenly, and that’s 90% of “why does my bracelet look messy” complaints. Slow down, pull straight up toward the ceiling, and check that the knot sits flush against the row before starting the next one. I make my kids say “up, not sideways” out loud the first few times — it sounds silly, but it works.
Practice tip: before starting an actual pattern, have your child practice forward knots on a single pair of strings for a solid minute or two, just tying the same knot over and over until it’s muscle memory. It’s the friendship-bracelet equivalent of learning scales before playing a song, and it saves a lot of frustrated unraveling later.
Setting Up Without Losing Your Mind (or the Cat)
Embroidery floss has one design flaw: it wants to tangle, and it wants to do it the second you look away. A few setup habits make the difference between a calm 20-minute craft session and a floor covered in what looks like a yarn explosion.
- Tape it down first. Lay your strands side by side, gather the top ends, tie one overhand knot to hold them together, and tape that knot firmly to the edge of a table or clipboard. Working against a fixed anchor point means kids use both hands for knotting instead of one hand just holding everything together.
- Fan the strands out in pattern order before you tape, left to right, exactly how they’ll appear in the finished design. This is the step adults skip and kids need most — it turns “which string do I grab” into “the string right there.”
- Corral loose ends. A second small piece of tape across the bottom ends keeps the working strands from sliding around while you’re only partway through.
- Expect floss on the floor. This is a real craft with real thread, and stray inch-long scraps happen. If you’re doing this with multiple kids or a group, this is a good moment to borrow a page from Mess-Free Art Activities for Toddlers: 15 Creative Projects with Zero Cleanup — not because friendship bracelets are mess-free (they’re not), but the same “set boundaries before you start” logic (a tray, a placemat, a designated cutting zone) keeps the cleanup contained to one spot instead of the whole living room.
- Work in short bursts for younger kids. A first attempt should be 15-20 minutes max. Fingers get tired, knots get sloppy when kids rush, and a bracelet abandoned half-finished on day one is way less discouraging than one gripped through gritted teeth for an hour.
Beginner Pattern: The Candy Stripe
This is the pattern to teach first, full stop. It uses only the forward knot, it looks satisfying almost immediately, and a 6-year-old can genuinely finish one.
What you need: 4 strands of floss (2 colors, 2 strands each works great, or 4 different colors for a rainbow effect), each cut to about 24 inches.
Steps:
- Tape your four strands to the table in this order: Color A, Color B, Color A, Color B (or, for a rainbow version, just line up all four different colors in the order you want them to stripe).
- The leftmost string is always your “working string” for this pattern. Tie a forward knot with string 1 over string 2.
- Now that same string 1 has moved one position to the right. Tie a forward knot with it over string 3.
- Keep going — string 1 knots over every single string to its right, one at a time, until it reaches the far right side of the row.
- Once it’s all the way at the right, the string that’s now in the leftmost position becomes your new working string. Repeat the whole process.
- Keep repeating row after row. Because every row uses only forward knots on every string, this produces a clean diagonal stripe pattern that “wraps” — it genuinely looks harder than it is.
- When the bracelet reaches the length you want (wrap it around a wrist for a rough gauge — kid wrists are usually 5-6 inches, and you want a little slack), finish by tying all the strands together in one overhand knot and trimming, leaving about an inch for tying onto a wrist. Braid the last inch or two of loose ends together for a neater finish, or just tie a simple knot.
This pattern is forgiving because a slightly uneven knot here and there barely shows — the diagonal stripe visually hides small mistakes, which makes it a genuine confidence-builder rather than a setup for frustration.
Level Up: The Diagonal Stripe (Two Colors, Sharper Look)
Once the candy stripe clicks, this next pattern uses the exact same forward-knot skill but with a color arrangement that produces a crisper, more “store-bought looking” diagonal.
What you need: 6 strands, 3 of Color A and 3 of Color B, cut to about 27 inches each (more strands means you’ll want a bit more length).
Steps:
- Arrange strands left to right: A, A, A, B, B, B.
- Just like the candy stripe, string 1 (leftmost) forward-knots over every string to its right until it reaches the end of the row.
- New leftmost string repeats.
- The key difference from the candy stripe is purely in the starting color layout — grouping three of each color together (instead of alternating) creates a bolder, wider diagonal band instead of a busy stripe.
This is a great “second bracelet” because a kid who just learned the forward knot doesn’t need to learn anything new — they just get to see how changing the starting color order completely changes the final look. That’s a genuinely valuable lesson for future pattern experimentation: the knot technique and the color layout are two separate decisions, and mixing and matching them is basically the entire hobby.
Camp-Favorite: The Chevron (Arrow) Pattern
This is the pattern kids come home from camp wanting to make because it’s the one that looks the most impressive — a symmetrical V or arrow shape running down the center. It requires both knots from earlier, so it’s a genuine “you’ve graduated” pattern.
What you need: 6 or 8 strands in symmetrical colors — for example, with 6 strands: A, B, C, C, B, A (colors mirror on either side of the center).
Steps:
- Tape your strands in mirrored order, so whatever colors are on the left match the colors on the right in reverse.
- Find your two center strings. Tie a forward knot with the left-center string over the string immediately to its right.
- Now go to the two strings just left of that midpoint. Tie a backward knot with the string just to the left of center, going over the string to its right (which, after step 2, is now sitting in the middle).
- Continue moving outward on the left side, always tying backward knots, each one bringing a string in from the left toward the center.
- Meanwhile on the right side, do the mirror image: forward knots, always bringing strings in from the right toward the center.
- Every row, the two strings that end up in the very middle get tied together with one forward knot (or one backward knot — pick one and stay consistent) to lock the row and start the point of the next V.
- Repeat row after row. The visual “trick” of the chevron is that the two halves are mirror images of each other, using opposite knots, which is exactly why kids find it satisfying once it clicks — it feels like solving a small puzzle every single row.
This pattern takes real patience, so it’s the one where 8-and-up kids tend to have more success solo, while younger kids often do better with an adult tying every other row until the rhythm sets in. It’s also, not coincidentally, the pattern most likely to end up traded at camp on the last day — it just looks like more effort went into it, which is exactly the point when you’re trying to signal “you’re my best friend” in bracelet form.
When Things Go Wrong: Troubleshooting Guide
Every kid hits the same handful of snags. Here’s the quick fix for each one:
| Problem | Likely Cause | Fix |
|---|---|---|
| Knots keep sliding loose | Pulled sideways instead of straight up | Re-teach “up, not sideways” — have them pull each knot snug before moving to the next string |
| Pattern looks lumpy or uneven | Knots pulled too tight in some spots, too loose in others | Aim for consistent, moderate tension — not white-knuckle tight |
| Only did one loop instead of two | Rushed through the “do it twice” step | Remind them: every forward or backward knot is actually two identical knots stacked |
| Floss keeps tangling below the work area | Loose ends not secured | Add a second piece of tape across the bottom ends, or clip them with a binder clip |
| Lost track of which string is which color | No fixed anchor point | Switch to taping the top knot to a clipboard or table edge instead of holding it |
| Bracelet is too short or too long | Didn’t measure before starting | Wrap floss loosely around the wrist before cutting, and always cut a bit longer than needed — you can trim, not extend |
| Kid wants to quit halfway through | Fatigue, frustration, or a pattern that was too advanced | Stop for the day, save the piece with tape around the knots so it doesn’t unravel, and pick a simpler pattern next time |
The single biggest thing I’ve learned watching kids learn this craft: let them make an ugly first bracelet. Uneven knots, a pattern that drifts off to one side, tension that loosens halfway through — none of it matters for a first attempt. The muscle memory is the actual goal. The pretty bracelet is bracelet number three or four, not number one.
From Camp Trunk to Homeroom: Trading, Gifting, and Storage
There’s an unspoken etiquette to friendship bracelets that’s worth knowing if you’re new to this world: you don’t ask for one back, you don’t take one off in front of the person who gave it to you, and the “correct” way to wear one is to let it wear out and fall off naturally rather than cutting it off (though let’s be honest, most end up trimmed off eventually because they get soggy or itchy). If your kid is making a stack of these to trade before the last week of camp wraps up, encourage them to make a few extra in advance — nothing stings quite like realizing on the final day that everyone else has a bracelet to trade and you don’t.
This is also a natural bridge into the school year. A friendship bracelet makes a sweet, personal locker or backpack accessory once September hits, and if your kid’s already in a back-to-school crafting mood, it pairs well with a full afternoon of prep — check out Back-to-School Crafts for Kids: DIY Backpack Tags, Pencil Toppers, and Locker Decor for more first-week projects that use the same “cheap supplies, big payoff” logic. And if your child is the type who wants to make something special for a teacher they loved, a hand-tied bracelet — or a coordinating keychain using the same knots — fits right alongside the ideas in 10 Heartfelt DIY Teacher Gifts Kids Can Actually Make Themselves.
For storage, floss tangles if you so much as look at it wrong, so a little organization goes a long way:
- Cardboard floss bobbins (wind each color around a notched rectangle of cardboard) keep colors separate and untangled — a great use for scrap cardboard if you’ve already got a stash going from Cardboard Box Crafts for Kids: 25 Amazing Creations from Free Materials.
- A pencil box or shoebox with a lid keeps loose floss, scissors, and works-in-progress contained between sessions.
- Ziptop bags per color are the low-effort version — not elegant, but functional, and easy for a kid to manage independently.
Making It Work for Different Ages
Not every kid is ready for knot-tying, and that’s completely fine — the friendship bracelet spirit (make something small and colorful to give a friend) scales down easily.
- Ages 3-5: Skip floss entirely and go with pony beads on stretchy cord, or chunky yarn “finger knitting” instead of embroidery knots — the fine motor demands of a forward knot are genuinely tough before kindergarten-ish hand strength kicks in.
- Ages 6-7: Start here with this guide’s candy stripe pattern, ideally with an adult tying alongside for the first bracelet and then stepping back.
- Ages 8-10: Most kids in this range can handle the diagonal stripe independently and are ready to attempt the chevron with some coaching on the first row or two.
- Ages 11+: Kids this age often want to move into more complex patterns (names spelled in Morse-code-style knots, alpha beads woven in, or arrowhead variations) — at that point they’ve genuinely outgrown “beginner” and are ready to explore patterns and tutorials on their own.
If you’ve got a mixed-age group — a birthday party, a cousin sleepover, a rainy craft afternoon — set up a station where older kids work on chevrons while younger ones do beaded versions nearby. Everyone leaves with a bracelet, nobody’s frustrated by a pattern above their skill level, and honestly, that mixed-ability setup works for a lot of craft projects, not just this one.
Frequently Asked Questions
What age can kids start making friendship bracelets?
Most kids can handle basic embroidery-floss knotting starting around age 6-7, once fine motor skills and patience for a repetitive task are established. Younger kids (ages 3-5) can still participate using beads on stretchy cord or chunky yarn instead of floss knots — same friendship-bracelet spirit, no fiddly knotting required.
How long does it take to make a friendship bracelet?
A simple candy stripe pattern usually takes a beginner 20-40 minutes, spread across one or two sessions since young hands tire out. More advanced patterns like the chevron can take an hour or more for a first attempt, though experienced kids get much faster with practice — some can knock out a simple bracelet in 10-15 minutes.
What’s the easiest friendship bracelet pattern for a total beginner?
The candy stripe (sometimes called a “wrap” or “stripe” pattern) is the easiest, since it uses only the forward knot repeated in the same direction, row after row. It’s forgiving of uneven tension and looks good even with a beginner’s imperfect knots.
How much embroidery floss do I need for one bracelet?
For a 4-6 strand bracelet sized for a kid’s wrist, cut each strand 24-27 inches long — roughly from fingertip to shoulder if you don’t have a ruler handy. It’s always better to cut a bit long and trim the excess than to run short mid-pattern.
My child’s bracelet keeps coming undone — what’s going wrong?
This is almost always a tension or direction problem. Knots need to be pulled straight up (not sideways) to lock into place, and each forward or backward knot should actually be two identical knots tied in a row, not just one. Slow down and check that each knot sits snug against the row above before moving to the next.
Do you need a special board or kit to make friendship bracelets?
No — a piece of tape and a table edge, or a plain clipboard, works just as well as a dedicated bracelet-making board. Fancy kits with built-in floss organizers are a nice upgrade once a kid is hooked, but they’re not necessary to get started.
How do you finish and tie off a friendship bracelet?
Once the bracelet reaches the length you want, gather all the strands and tie one secure overhand knot below the last row, leaving about an inch of loose ends. Braid or knot those loose ends together, then tie the two ends around the wearer’s wrist to close the bracelet.
What’s the friendship bracelet etiquette kids should know?
The tradition is that a friendship bracelet is a gift, not a loan — you don’t ask for it back, and you’re not supposed to take it off on purpose once someone ties it on for you. Most kids let them wear out and fall off naturally over weeks or months rather than cutting them off right away.
Tie One On (You’ve Got This)
Friendship bracelets are one of those crafts that rewards patience over perfection — the first one will probably be a little wonky, and that’s exactly how it’s supposed to go. Give it a few tries, keep the tape and scissors handy, and before long you’ll have a kid who can knot one out on a car ride, at a friend’s house, or during that last stretch of summer when everyone’s trying to hold on to camp just a little bit longer. Have fun with it, expect some floss on the floor, and enjoy watching those little hands turn a tangle into something they’re proud to give away.