Tissue Paper Crafts for Kids: 15 Colorful Ideas
Discover why tissue paper is the perfect craft supply for kids of all ages, offering an inexpensive way to create beautiful art while building essential developmental skills. You'll learn core techniques like crumpling, tearing, wrapping, and bleeding to start your colorful projects.
- Utilize tissue paper's unique properties like translucency and vibrant colors for stunning results.
- Boost your child's fine motor skills, hand-eye coordination, and color theory through tissue crafts.
- Master core techniques: crumpling (18m+), tearing (2+), wrapping (3+), and bleeding (3+).
- Create gallery-worthy art with simple, inexpensive tissue paper, bridging age gaps gracefully.
There’s a craft supply that costs less than a candy bar, comes in every color imaginable, and can be torn, crumpled, twisted, layered, and transformed by the smallest, least coordinated hands in your house — and it consistently produces art that looks like it belongs in a gallery rather than on a refrigerator. Tissue paper is the great equalizer of kids’ crafting: a two-year-old scrunching tissue squares onto a glue-covered plate creates something genuinely beautiful, and a seven-year-old layering translucent colors on a window creates something genuinely stunning. No other material bridges the age gap so gracefully or produces such vibrant, professional-looking results from such simple techniques.
What Makes Tissue Paper So Perfect for Kids’ Crafts
Tissue paper has a combination of properties that make it uniquely suited for early childhood art:
- Lightweight and easy to manipulate: Even toddlers with limited hand strength can tear, crumple, and fold tissue paper, unlike heavier cardstock or construction paper
- Translucent: Light passes through tissue paper, creating stained-glass effects and beautiful color mixing when layers overlap
- Vibrant colors: The pigments in tissue paper are more saturated than most other craft papers, producing eye-catching results
- Color bleeds when wet: This “problem” is actually a feature — wetting tissue paper on white paper creates watercolor effects without any paint required
- Forgiving: Crumpled tissue paper looks artistic, not messy. There’s no “wrong” way to apply it.
- Inexpensive: A pack of 100+ sheets in assorted colors costs a few dollars and lasts for dozens of projects
Developmentally, tissue paper crafts build fine motor skills through tearing, crumpling, and placing; hand-eye coordination through precise glue placement; color theory through layering and mixing; and creative decision-making through choosing colors and arrangements. The tearing motion in particular strengthens the same hand muscles used for handwriting, making tissue paper crafts a sneaky pre-writing activity.
Essential Tissue Paper Techniques for Kids
Before diving into specific projects, here are the core techniques that form the building blocks of tissue paper art. Teach these individually and children will be able to adapt them to endless projects.
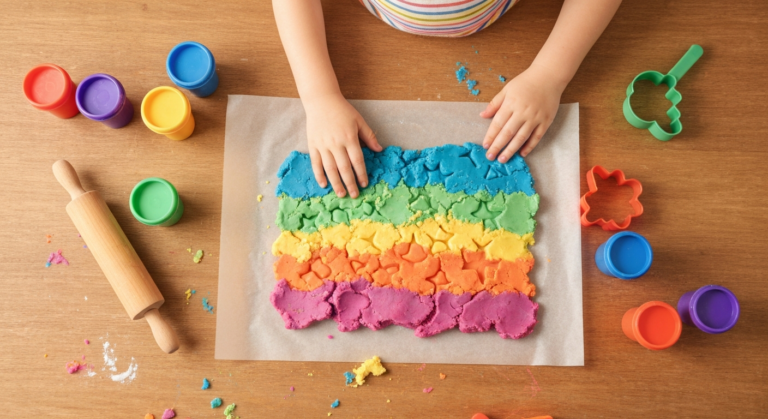
The Crumple Technique (Ages 18 months+)
Cut tissue paper into 2-3 inch squares. Show your child how to crumple each square into a ball by scrunching it in their fist. Dip the ball lightly in glue (or press it onto a glue-covered surface) and stick it down. This is the most accessible tissue paper technique because it requires no precision — just grabbing and squeezing, which even the youngest toddlers can do. The crumpled balls create a textured, three-dimensional surface that looks like flowers, clouds, treetops, or abstract texture depending on the color arrangement.
The Tear-and-Layer Technique (Ages 2+)
Tear tissue paper into irregular pieces (no scissors needed) and layer them onto a glue-covered surface, overlapping the edges. When colors overlap, they blend where the layers are translucent, creating new colors: blue over yellow creates green, red over yellow creates orange. This natural color mixing is a hands-on lesson in color theory that’s far more memorable than any color wheel chart.
The Wrap Technique (Ages 3+)
Place a tissue paper square flat on the table. Put the eraser end of a pencil in the center of the square. Wrap the tissue paper up around the pencil tip, dip the base in glue, and press it onto the project surface. Remove the pencil, leaving a tiny tissue paper “flower” standing upright. This technique creates a dense, textured, almost mosaic-like surface and is the basis for many of the most impressive tissue paper art projects. It requires more dexterity than crumpling, making it ideal for preschoolers and kindergartners.
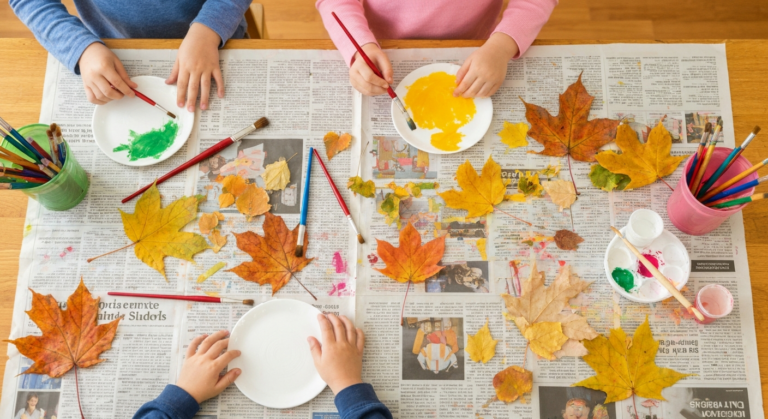
The Bleeding Technique (Ages 3+)
Place pieces of colored tissue paper on white paper or cardstock. Using a spray bottle or paintbrush dipped in water, wet the tissue paper thoroughly. Let it sit for 5-10 minutes, then peel off the tissue paper pieces. The color transfers from the tissue to the white paper, leaving beautiful watercolor-like prints in the shapes where the tissue sat. Not all tissue paper bleeds (some is colorfast), so test a piece first — the cheap stuff from dollar stores bleeds the best, which is perfect since it’s also the most affordable.
Colorful Tissue Paper Project Ideas
These projects use the techniques above in specific, guided ways to create finished art pieces that are genuinely display-worthy.
1. Stained Glass Sun Catchers
Materials:
- Clear contact paper (sticky side up, taped to the table)
- Tissue paper torn or cut into small pieces in assorted colors
- A second sheet of contact paper for sealing
- Black construction paper for the frame (optional)
- Scissors and string for hanging
Tape a sheet of clear contact paper sticky-side up to the table. Let your child place tissue paper pieces all over the sticky surface, overlapping colors to create blended effects. When the surface is covered, carefully press a second sheet of contact paper on top, sealing the tissue inside. Cut the finished piece into any shape — a circle, heart, butterfly, or freeform — and hang it in a sunny window. The light shining through creates a breathtaking stained-glass effect with no paint, no glue, and no mess. For a more polished look, cut a frame from black construction paper and adhere it to the front.
2. Tissue Paper Mosaic Art
Materials:
- White cardstock with a simple outline drawn on it (a butterfly, rainbow, tree, flower, or initial letter)
- Tissue paper in assorted colors, cut into roughly 1-inch squares
- White school glue thinned slightly with water, applied with a paintbrush
Brush glue inside one section of the outline and let your child fill it with crumpled or flat tissue paper squares. Work section by section, changing colors for each area. The finished mosaic has a rich, textured, almost stained-glass quality that looks spectacular framed or hung on a wall. This project teaches children about working within boundaries, color selection, and patience (filling a large outline takes time and persistence). For younger children, use a simple shape like a circle or heart. For older kids, use more complex outlines with multiple color sections.
3. Tissue Paper Flowers
Materials:
- 5-8 sheets of tissue paper per flower (all one color or mixed)
- Pipe cleaners or green floral wire for stems
- Scissors
Stack 5-8 sheets of tissue paper and fold them together in an accordion pattern (back and forth like a fan). Pinch the center and twist a pipe cleaner around it to secure and form the stem. Carefully fan out the accordion folds, then gently separate each individual tissue layer, pulling them upward and toward the center. The result is a gorgeous, fluffy flower that looks incredibly realistic. This project is more suited to children ages 5 and up due to the delicacy required in separating layers, but younger children can help with the accordion folding and color selection. Make a whole bouquet for a Mother’s Day gift or centerpiece.
4. Tissue Paper Color Bleed Butterflies
Materials:
- White coffee filters (the cone type or flat-bottom basket type)
- Tissue paper pieces in bright colors
- A spray bottle of water
- A clothespin for the body
- Pipe cleaners for antennae
Lay pieces of colored tissue paper on a flattened coffee filter. Spray generously with water and watch the colors bleed and blend into the filter. Let it sit for 5 minutes, then peel off the tissue paper. The filter will be dyed in beautiful, watercolor-like patterns. Once dry, pinch the center of the filter and clip a clothespin over the pinch to form the butterfly body and wings. Add pipe cleaner antennae to the clothespin. Each butterfly turns out completely unique depending on the tissue paper placement and how the colors run together.
5. Tissue Paper Collage Portraits
Materials:
- A large piece of white paper or cardstock
- Tissue paper in skin tones, hair colors, and clothing colors
- Glue
- Markers for details
Have your child create a self-portrait using torn tissue paper for hair, skin, and clothes, then add marker details for eyes, mouth, and background. The translucent quality of tissue paper creates beautifully nuanced skin tones and hair colors when layers overlap. This project blends art skills with self-awareness and identity exploration, and the finished portraits have a fine-art quality that surprises everyone. Display them in matching frames for a gallery wall that celebrates each family member.
6. Tissue Paper Lanterns
Materials:
- Glass jars (mason jars, baby food jars, or recycled jam jars)
- Tissue paper torn into pieces
- Liquid starch or a 50/50 mix of white glue and water
- A foam brush
- Battery-operated tea light candles
Brush the glue mixture onto the jar and press tissue paper pieces onto the sticky surface, overlapping and layering colors. Brush another layer of the glue mixture over the top to seal. Once dry, place a battery-operated tea light inside. When lit, the jar glows with warm, colorful, stained-glass-like light that’s absolutely magical in a dark room. These make beautiful nightlights, holiday decorations, or handmade gifts. The decoupage technique used here develops brushwork, layering skills, and an understanding of transparency and light.
7. Tissue Paper Wreath
Materials:
- A paper plate with the center cut out (adult prep)
- Tissue paper squares in seasonal colors (about 3×3 inches)
- White school glue
- Ribbon for hanging
Spread glue on a section of the paper plate ring. Crumple tissue paper squares into balls and press them into the glue, packing them tightly. Continue around the entire ring until the plate is completely covered in tissue paper puffs. Add a ribbon loop at the top for hanging. Seasonal variations: red and pink for Valentine’s Day, pastels for Easter, red, white, and blue for July 4th, orange and yellow for fall, red and green for winter holidays. This is a high-impact, low-skill project — every age from 2 to 8 produces a beautiful result.
Tips for Successful Tissue Paper Crafting
These practical strategies prevent common tissue paper frustrations and make crafting sessions smoother.
- Pre-cut tissue squares for young children. Tearing is a great skill-builder, but if you need a lot of small pieces, pre-cutting saves time and prevents frustration. Stack several sheets and cut through them all at once.
- Thin your glue. Full-strength white school glue is too thick and heavy for delicate tissue paper, causing it to slide off or become transparent in patches. Mix glue with a small amount of water (about 3 parts glue to 1 part water) and apply with a foam brush for even, manageable coverage.
- Use a damp paper towel station. Tissue paper dye stains fingers. Keep damp paper towels nearby so children can wipe their hands between colors without making a trip to the sink.
- Work on a covered surface. Wet tissue paper will stain tables and countertops. A layer of newspaper, a plastic tablecloth, or a large sheet of butcher paper protects surfaces and makes cleanup a one-step process.
- Let projects dry flat and fully. Tissue paper crafts with glue need to dry completely before hanging or they’ll sag and wrinkle unevenly. Lay them flat on a protected surface for at least 4 hours, preferably overnight.
- Embrace imperfection. Tissue paper tears, wrinkles, and overlaps in ways that are always beautiful. There’s no way to mess up a tissue paper craft — every crumple, every fold, every bleed creates something unique.
Tissue paper proves a fundamental truth about children’s art: the most beautiful results often come from the simplest materials. A sheet of tissue paper costs less than a penny, weighs almost nothing, and can be transformed by any pair of hands — no matter how small, how shaky, or how new to crafting — into something that catches the light and stops people in their tracks. Stock up, tear it open, and let the color fly.