Free Printable Letter Tracing Cards for 2 Year Olds
You can download free printable letter tracing cards specifically designed for your 2-year-old, featuring big 3-inch dotted letters. Learn how to print, laminate, and use them in ten toddler-friendly ways.
- Download free 3-inch letter tracing cards for your 2-3 year old.
- Discover 10 toddler-friendly ways to use the tracing cards.
- Print and laminate the 15 half-page cards for durability.
- Understand why typical tracing worksheets don't suit 2-year-olds.
This post contains affiliate links. As an Amazon Associate I earn from qualifying purchases.
Free printable letter tracing cards for 2 year olds: big 3-inch dotted letters, five at a time, in one PDF you can grab below. You’ll also find what’s inside, how to print and laminate, and ten toddler-friendly ways to use them (with supervision).
Last winter I printed a 26-page A-Z packet for my niece, who had just turned two.
She looked at page one, tasted the crayon, scribbled one furious orange tornado across the “A,” and went to find the dog.
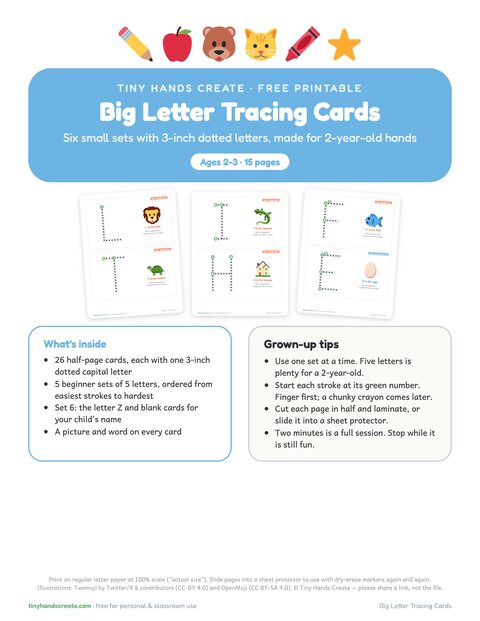
Free printable · 15 pages
Big Letter Tracing Cards
Twenty-six half-page cards with 3-inch dotted capital letters and numbered start dots, in five beginner sets of five letters plus Z and blank name cards.
Free. Your download link appears right here. You'll also join the Daily Printable Drop. Unsubscribe anytime. Privacy
The packet was the problem, not her. So I started over with bigger letters, far fewer of them, on cards we could use on the floor or with playdough.
In this article (13 sections)
- Why Most Letter Tracing Printables Don’t Work for 2-Year-Olds
- Free Printable Letter Tracing Cards for 2-Year-Olds: What’s Inside
- How to Print, Cut, and Laminate the Letter Tracing Cards
- How to Teach Letter Tracing to a 2-Year-Old
- 10 Letter Tracing Activities for Toddlers (Most Don’t Need a Pencil)
- A Week-by-Week Letter Tracing Plan
- What Letter Tracing Builds at Age 2 (It’s Not Handwriting Yet)
- Adapting Letter Tracing for Different Toddlers
- Troubleshooting Common Toddler Tracing Problems
- Signs Your Toddler Is Ready for Smaller Letters
- Safety Recap
- Frequently Asked Questions
- Keep Toddler Letter Tracing Short and Playful
Why Most Letter Tracing Printables Don’t Work for 2-Year-Olds
Most “toddler” tracing worksheets are preschool worksheets with a cartoon sticker on them. At two, most kids still hold a crayon in a fist, move from the shoulder rather than the fingers, and find twenty-six new shapes overwhelming. Standard worksheets also expect a seated kid with a pencil, and two-year-olds are more of a “coffee table, then rug, then couch” crowd.
| Typical worksheet feature | What a 2-year-old actually needs |
|---|---|
| Letters about 1 inch tall | Letters around 3 inches tall. |
| Full A-Z in one packet | 5 letters at a time. |
| Thin dotted lines | Chunky, widely spaced dots. |
| Pencil-only | Finger, crayon, marker, playdough, whatever. |
| One page, one sitting | Short, repeatable, ten-minute-or-less play. |
| Expects correct stroke order | Exploring shapes and movement is the win. |
Your toddler can still do letter work. It just has to be big, short and hands-on.
Free Printable Letter Tracing Cards for 2-Year-Olds: What’s Inside
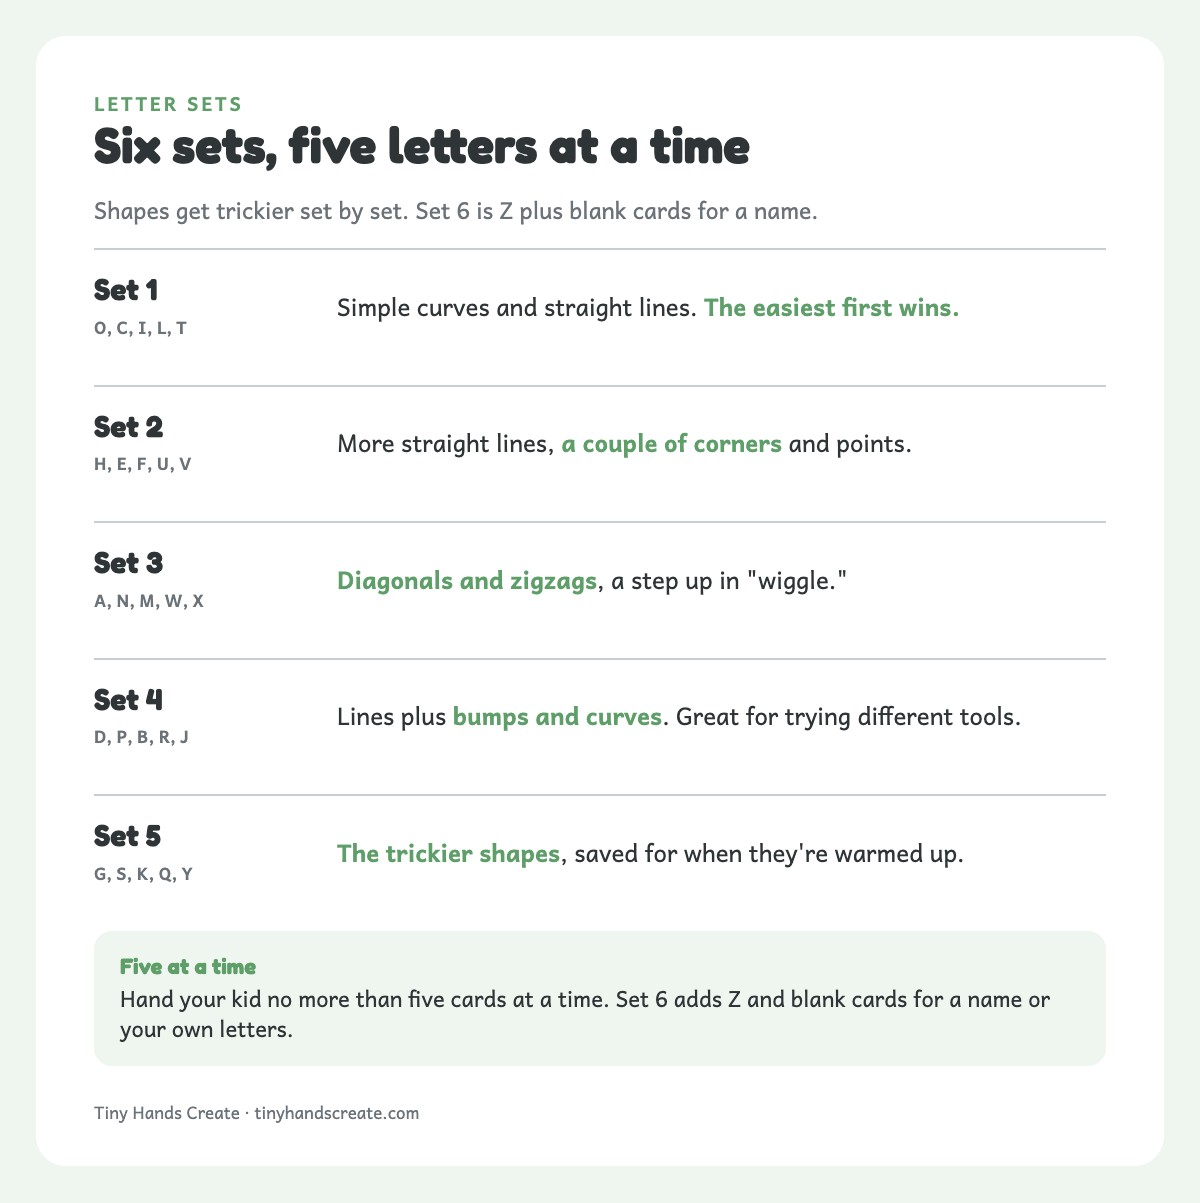
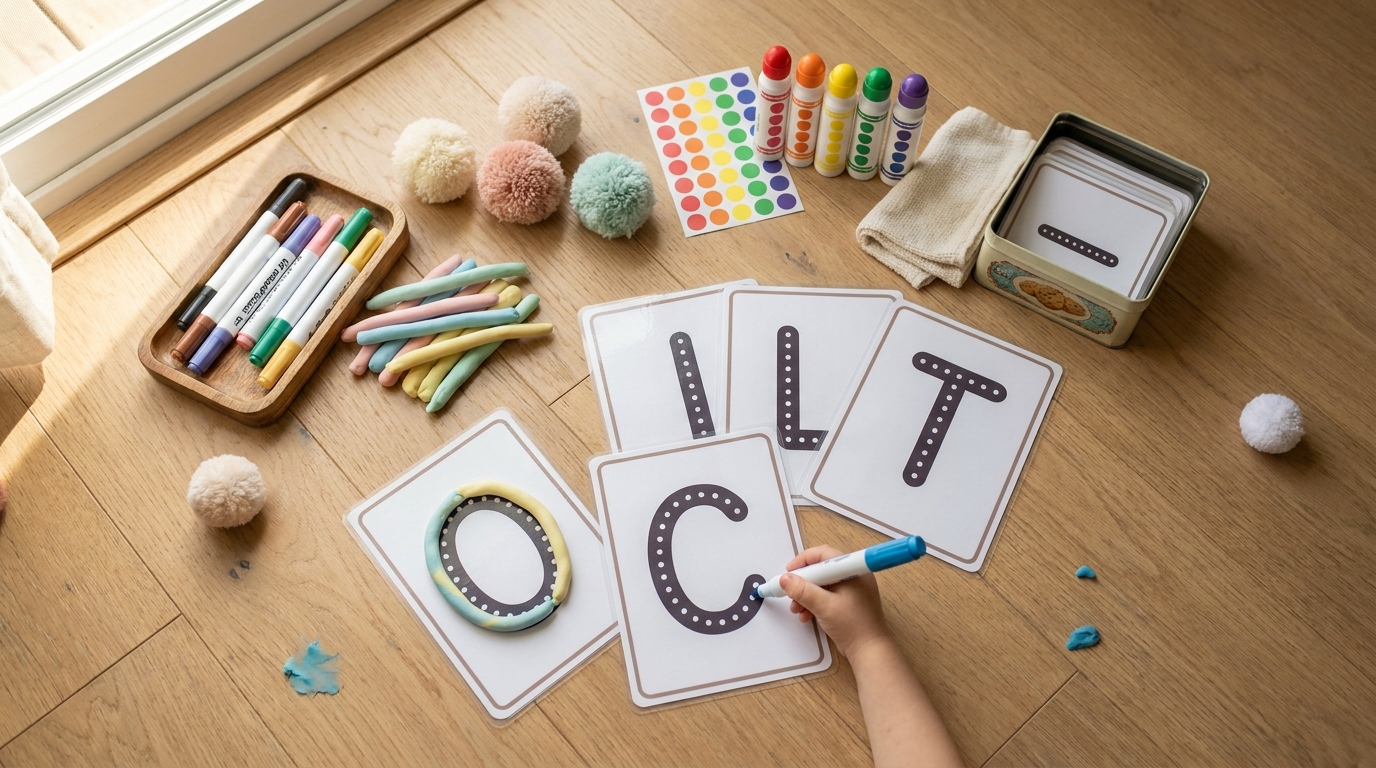
The download is a single PDF with six sets of cards. Each card has one oversized letter made of dotted lines, roughly 3 inches tall, with a little starting dot so you can point out where to begin.
Here’s how the sets are organized:
| Set | Letters | Why they’re grouped this way |
|---|---|---|
| Set 1 | O, C, I, L, T | Simple curves and straight lines. The easiest first wins. |
| Set 2 | H, E, F, U, V | More straight lines, a couple of corners and points. |
| Set 3 | A, N, M, W, X | Diagonals and zigzags, a step up in “wiggle.” |
| Set 4 | D, P, B, R, J | Lines plus bumps and curves. Great for trying different tools. |
| Set 5 | G, S, K, Q, Y | The trickier shapes, saved for when they’re warmed up. |
| Set 6 | Z + blank cards | The last letter, plus blank cards for a name or your own letters. |
Hand your kid no more than five cards at a time.
A few design choices worth knowing about:
- Laminate-size cards. Each card is sized so you can print on standard paper, cut, and slide it through a pouch laminator.
- One letter per card. No clutter, no borders competing with the letter, no cartoon animals distracting from the point.
- Uppercase first. Uppercase letters are made of simpler lines and are generally easier for little hands, so these are uppercase only. Lowercase can wait until your child shows interest in writing.
- A starting dot. Each letter has a bold dot where the tracing starts. Don’t worry about stroke order yet, but it gives you a natural thing to point at.
Print on plain white paper, or cardstock if you have it. If you’re laminating, cardstock is a little sturdier. These cards are for supervised play, not chewing.
How to Print, Cut, and Laminate the Letter Tracing Cards
You don’t need fancy equipment. My pick for under-3s is a laminated card with rounded corners. A page protector works as a stopgap, but only while you’re sitting right there.
The laminated version (best for under-3s)
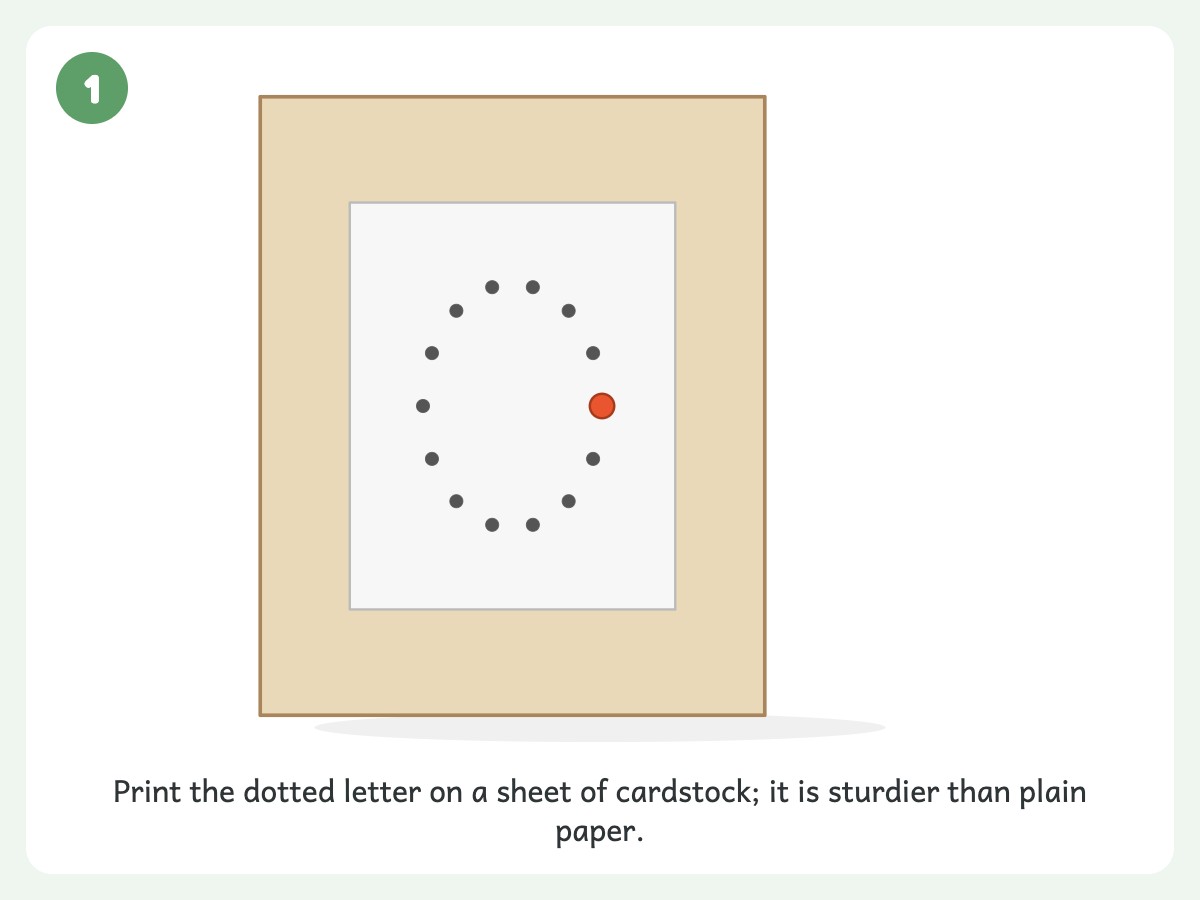
- Print. Use cardstock if possible.
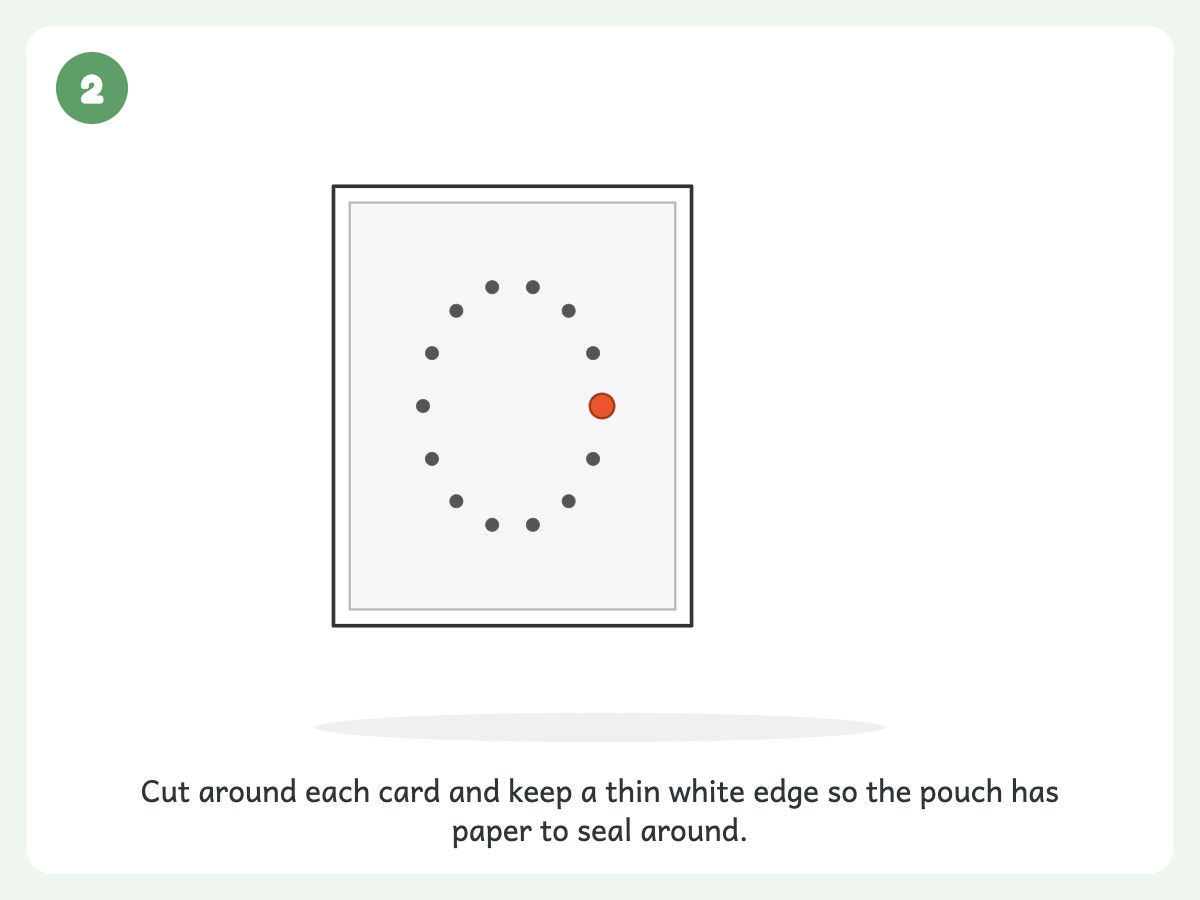
- Cut the cards apart. Leave a small white border so the pouch has paper to seal around.
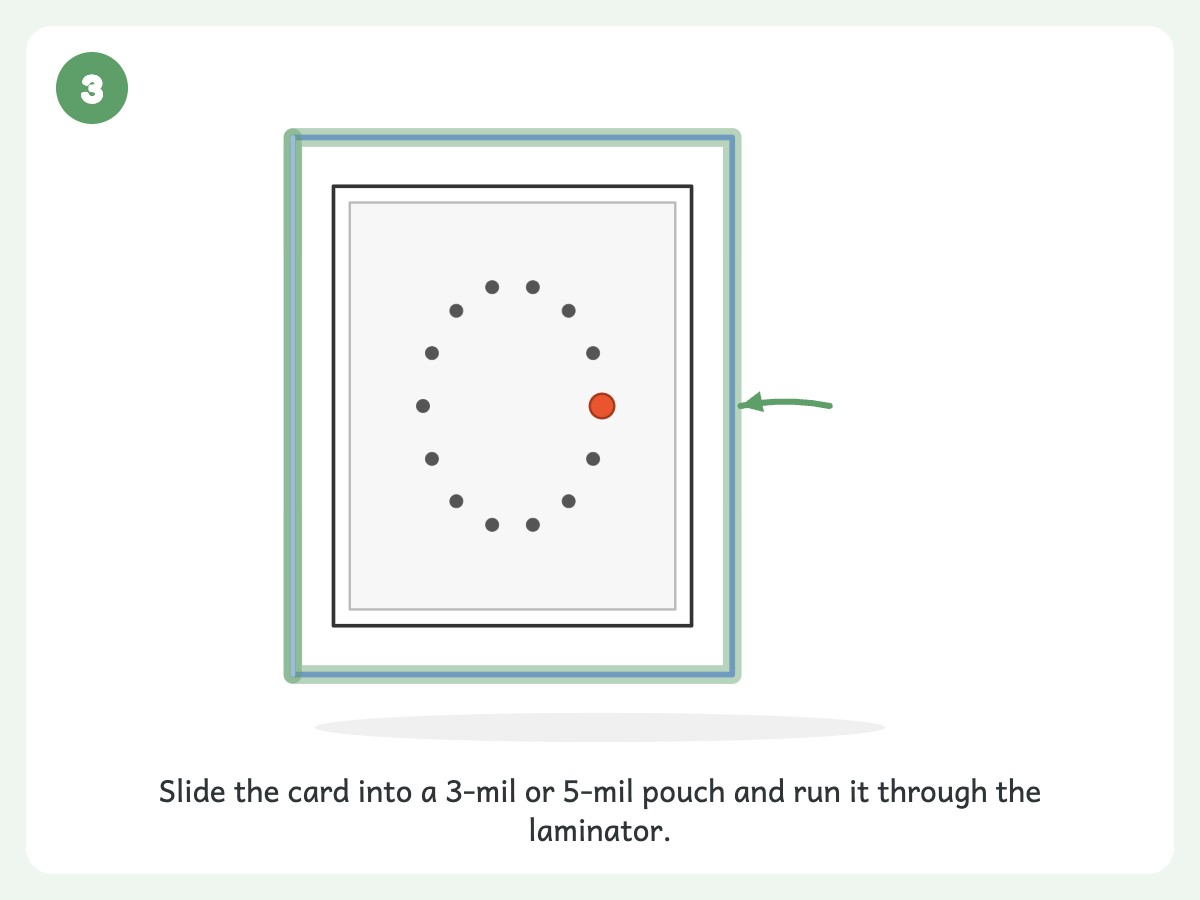
- Laminate. Use 3-mil or 5-mil pouches. Thicker pouches are stiffer and more toddler-proof.
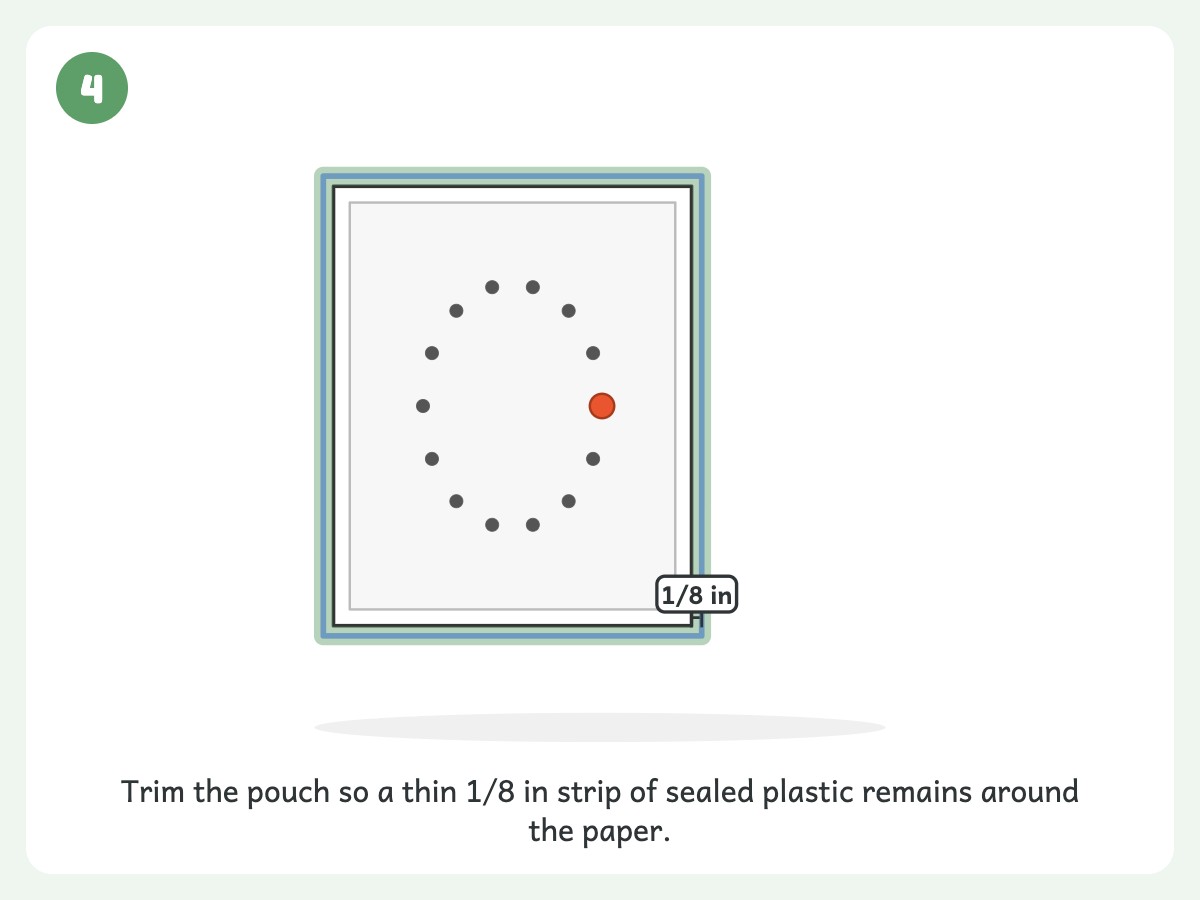
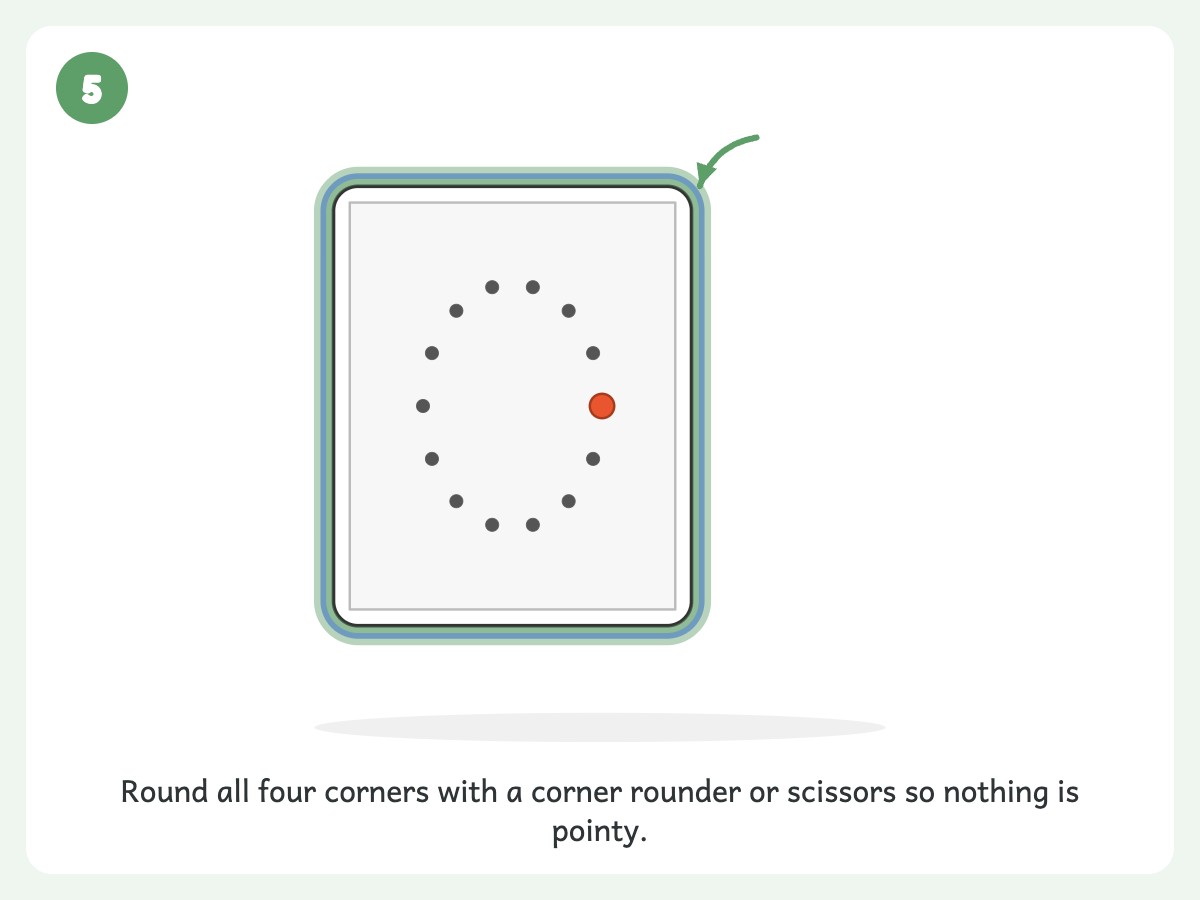
- Trim and round. Trim each card, leaving about an eighth of an inch of sealed plastic so the laminate doesn’t peel apart. Then round every corner, because pointy laminated corners and two-year-old faces are not a great combination.
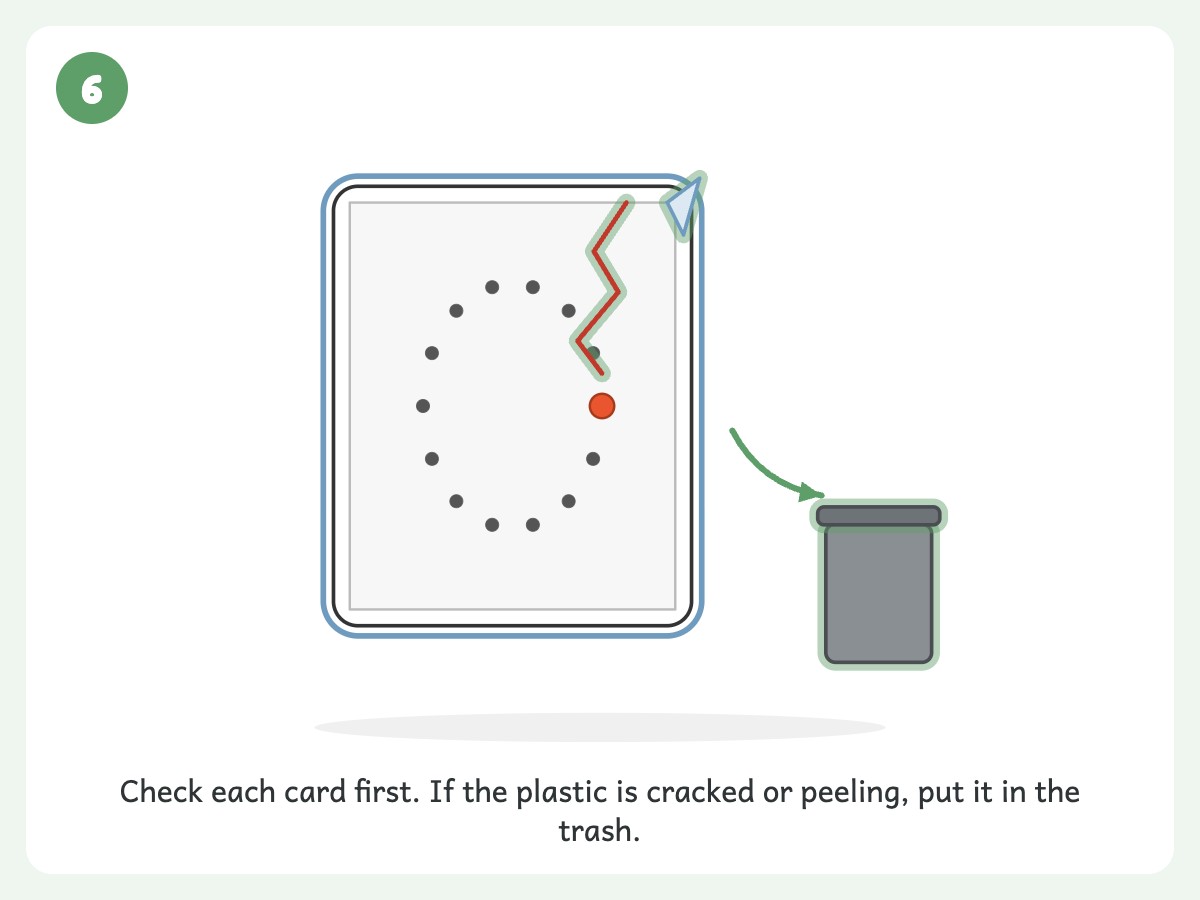
- Check them over. Before each session, throw out any card with peeling or cracked laminate.
No laminator? Take the printed cards to a copy shop and ask them to laminate and trim, with a sealed border and rounded corners.
The no-laminator stopgap: page protectors
- Print. Regular paper is fine.
- Cut. Cut the cards apart with scissors, or a paper trimmer if you have one.
- Sleeve. Slide each card into a clear page protector.
A page protector turns any card into a wipe-clean surface, and dry-erase marker wipes off with a tissue or a bit of old sock.
Safety firstPlastic sleeves are a suffocation risk. Use a page protector only while you’re sitting right there. Never leave a plastic sleeve or bag with a toddler, and take the card out and put the sleeve away when play ends.
Storing them
Keep each set of five together with a binder ring through a punched corner, or in a small zip bag labeled with the letters. A cookie tin works great too, and it doubles as a “clean-up game” where cards go in the tin.
How to Teach Letter Tracing to a 2-Year-Old
Don’t announce “we’re doing letters now.” Two-year-olds can smell an agenda.
Instead, put Set 1 out where they can see it. Maybe on a tray, or fanned across the floor next to a basket of the stuff they already love. Then do the thing yourself, casually, and let them be nosy.
A first session might sound like this:
“Ooh, look, this one is a big round O. Like a circle. Want to go around it with your finger? Round and round…”
If they trace it with a finger, great. If they pick the card up and use it as a steering wheel, also great. If they walk away, that’s information too. Try again after lunch or tomorrow.
TipAim for two to ten minutes. One card with real interest is a win, and three is a bonus.
Name the letter, skip the quiz, and let them pick the card
Say the name once or twice in natural conversation: “That’s an L. L like lemon.” Skip the “What letter is this?” test. Quizzing a two-year-old mostly teaches them to say “no” or look at the ceiling.
If they grab the O and ignore everything else for a week, that’s your Set 1 for the week. Put the other cards away and bring them back later.
Set up a spot that works
- Go low. Try the floor, a low coffee table, or a tray on a blanket. Toddlers often do better kneeling or standing than sitting.
- Contain the stuff. A rimmed baking sheet or a shallow plastic tub keeps cards and tools from migrating.
- Limit the choices. Put out five cards and one or two tools.
- Pick your moment. After a snack or a nap usually beats right before dinner.
- Stay close. Sit with them for the first few minutes, and stay nearby even if they settle into playing on their own.
10 Letter Tracing Activities for Toddlers (Most Don’t Need a Pencil)
Skip the pencil. Some days you have energy for shaving cream. Some days you have energy for… a finger. Pick a method from the table, then scroll to its number for the how-to.
| Method | Mess level | Supplies | Best for | For kids who mouth things |
|---|---|---|---|---|
| 1. Finger tracing | None | Nothing | Bad days, car rides, waiting rooms | OK. |
| 2. Dry-erase marker | Very low | Laminated card + chunky marker | Daily practice | OK with you right beside them and caps out of reach. |
| 3. Playdough snakes | Medium | Playdough | Hand strength | Skip. |
| 4. Dot markers | Low-medium | Dot markers | Kids who love “stamping” | OK with you right beside them and caps out of reach. |
| 5. Stickers | Low | Large stickers | Quiet time | Skip. |
| 6. Pom-poms | Low (until they fly) | Large pom-poms | Counting and matching | Skip. |
| 7. Toy cars | Low | Larger toy cars | Reluctant “writers” | OK with cars bigger than the tube test. |
| 8. Paint or water painting | Low-medium | Foam brush + washable paint or water | Warm days, high chairs | Water only, no paint. |
| 9. Shaving cream | High | Fragrance-free foam + tray | Weekend sensory play | Skip the foam. Swap in plain yogurt (if already eaten) or skip. |
| 10. Tape pull-off | None | Painter’s tape | Finger strength, quick setup | Skip. |
Safety firstUnder-3 rules for every method below: an adult supervises the whole session. Nothing that fits through a toilet paper tube (about 1.75 inches) goes near the cards, so no buttons, beads or small pom-poms. Use washable, large-barrel markers with vented caps, and keep the caps out of reach (choking hazard). Look for supplies that meet ASTM D-4236 or carry the AP seal, but non-toxic does not mean edible. Poison Control (1-800-222-1222) can answer ingestion questions.
1. Finger tracing
The classic. Have your child run a pointer finger along the dotted line. Add a little narration: “Down, down, down. Now across.” Don’t correct. If they drift, let them drift.
2. Dry-erase marker on laminated cards
Chunky dry-erase markers are the easiest tool to start with on a laminated card. Because the marker wipes off, there’s no pressure to “get it right,” and they get to see a bright line appear where their hand moved. Use markers with a thick barrel if you can find them. Bonus: a dry-erase mitt or old sock makes cleanup a game.
3. Playdough snakes
Roll playdough snakes and press them along the dotted lines to build the letter. This is a favorite because it uses the whole hand, builds strength, and doesn’t require precision. If you want a no-fuss batch, there’s a good rundown of homemade playdough recipes parents actually trust that you can mix up in ten minutes.
Safety firstHomemade playdough is very salty, and eating a large amount can make a toddler seriously ill. Keep it on the card and out of mouths. If your child eats a large amount, call Poison Control (1-800-222-1222) right away. Skip this method for kids who still mouth everything.
4. Dot markers (do-a-dots)
Dab bingo-style dot markers on each dotted spot. This is practically made for toddlers. They get the satisfying thunk of the marker, and the letter appears out of their dots. If you haven’t tried these yet, our do-a-dot printables for toddlers are a good companion. The tracing cards and the dot pages play really nicely together: one builds shapes, the other builds hand control.
5. Stickers on the dots
Large round stickers stuck on each dot turn tracing into a sticker project. Peeling them is fantastic fine-motor work, and it takes longer than you’d think, so it buys you some quiet time.
Safety firstStickers are optional, and for non-mouthers only. Even large stickers can be peeled off a card and mouthed, so collect peeled stickers and backing right away.
6. Large pom-poms
This one is optional, and only for older toddlers who no longer put things in their mouths. Place large pom-poms along the dotted line. They’re soft and easy to grip.
Safety firstOnly use pom-poms that are clearly bigger than the toilet paper tube test and firmly made. Pom-poms can shed fibres, so discard any that fray, and skip this method entirely for kids who mouth things.
For more ideas, see our post on loose parts play for toddlers and preschoolers, which has larger, age-appropriate things to line up on cards.
7. Toy cars
Drive a toy car along the letter path. Pick a car bigger than the tube test, with no small wheels or parts that pop off. Make engine noises. This one works well for kids who avoid anything that feels like “drawing” but will happily vroom.
8. Paint with foam brushes or sponge daubers
Dip a foam brush or sponge dauber in washable paint and dab along the dots, with your child seated. Or skip paint and have them “paint” with water on a laminated card. Water painting is mess-free in the way that matters most to a tired adult.
Use a small cup with just a splash of water, stay beside it, and tip it out when you finish.
9. Shaving cream or sensory tray
Set a card in a shallow baking dish and spread a thin layer of foam on top. Your child draws in it with a finger, and the dotted line peeks through.
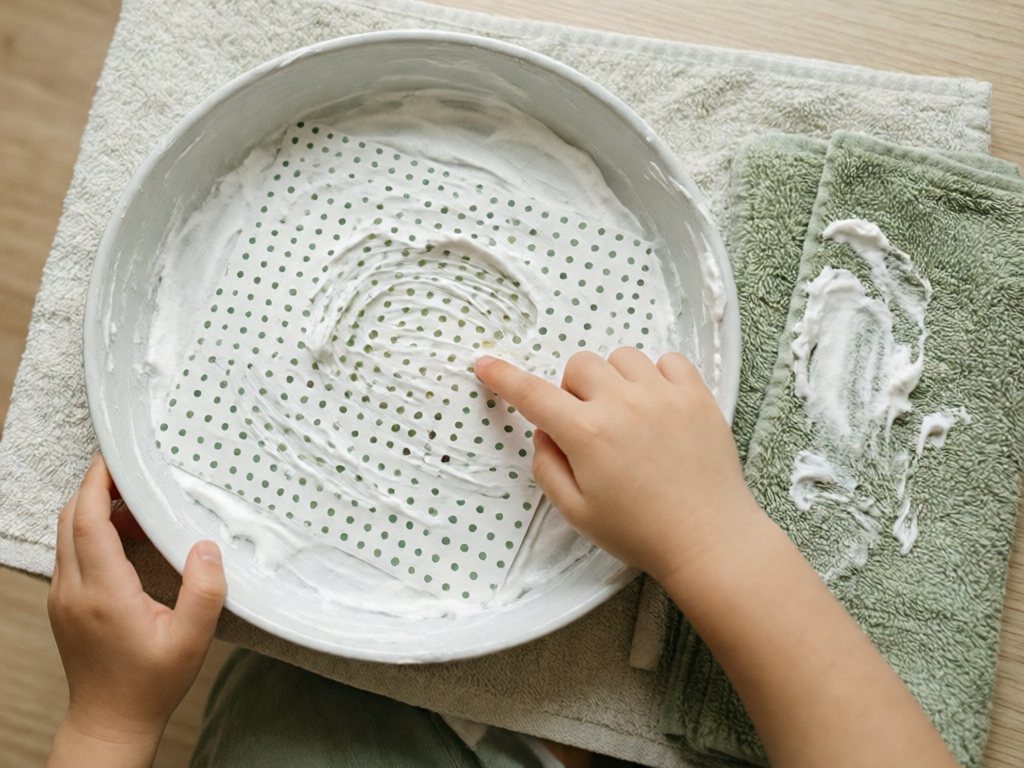
Safety firstShaving cream is not edible and can irritate eyes and skin. Use fragrance-free foam, keep it away from eyes and mouth, and wipe hands afterward. For kids who mouth things, skip the foam. A thin layer of plain yogurt works instead, but it’s dairy, so only use it if your child already eats it without a problem. Stay right beside them either way, because a toddler still needs watching when anything goes in the mouth.
Yes, it’s messy. Yes, it’s wonderful. Lay down a towel.
10. Sticky tape pull-off
Tape the card to the floor. Stick short strips of painter’s tape along the dotted line, and have your child peel them off one at a time. It’s more “undo the letter” than “make the letter,” but it gets a lot of finger work in.
Safety firstTear the tape into short strips, never long ones. An adult takes each strip the moment it comes off, so none ends up in a mouth or wrapped around a finger. Skip this method for kids who mouth things.
Realistic mess expectation: most sessions with a two-year-old and a tool end with something under the couch, a marker on the wrong surface, or a card that was briefly in a mouth. I keep a damp rag and a small basket nearby, and I assume the floor will need a wipe.
A Week-by-Week Letter Tracing Plan
If you’re the kind of person who likes a plan, here’s a gentle one. If you’re not, skip this section and just put the cards on the floor.
Week 1: Set 1 (O, C, I, L, T)
- Days 1-2: O and C. Finger tracing first, then add a dry-erase marker. About 2-5 minutes.
- Days 3-4: Add I, L and T with finger tracing, then playdough snakes on the O and L. About 5 minutes.
- Day 5 and the weekend: Free choice. They pick the card and the method, up to 10 minutes. Or skip it. Seriously.
Week 2: Review Set 1, introduce Set 2 (H, E, F, U, V)
Spend the first few days letting them pick their favorite cards from Set 1. Then weave in the new letters. This is the “familiar plus new” rhythm that works well at this age.
Week 3 and beyond
Repeat the pattern. Every week, two or three cards come back, and a few new ones show up. If Set 2 takes a month, that’s a perfectly respectable pace.
When to pause
If your child has been resisting for several days in a row, put the cards away for a week or two, then try again.
What Letter Tracing Builds at Age 2 (It’s Not Handwriting Yet)
At two, tracing is mostly not about learning to write. It builds three things:
- Hand and finger strength. Squeezing playdough, pressing dot markers, and peeling stickers are the foundation for pencil grip later.
- Shape awareness. Circles, lines, diagonals, and curves are the building blocks of letters. A child who has traced a lot of big O’s and I’s is already learning what letters are made of.
- Language and print awareness. Hearing “that’s an L” while looking at an L starts connecting spoken language to print.
Many children start naming letters between ages three and four, and the range of “normal” is wide.
For under-2s, use the cards for finger tracing only, with an adult holding the card. For more ideas on activities that build the same hand skills without pushing letters, our list of 30 crafts for 2-year-olds is a good place to browse.
Adapting Letter Tracing for Different Toddlers
Every two-year-old is different. Here’s how I’d adjust.
For the kid who hates sitting still
Tape the cards to a wall at their eye level, or to a window. Vertical surfaces build shoulder strength and make tracing feel more like painting. Use dry-erase markers directly on the window-taped cards.
For the kid who puts everything in their mouth
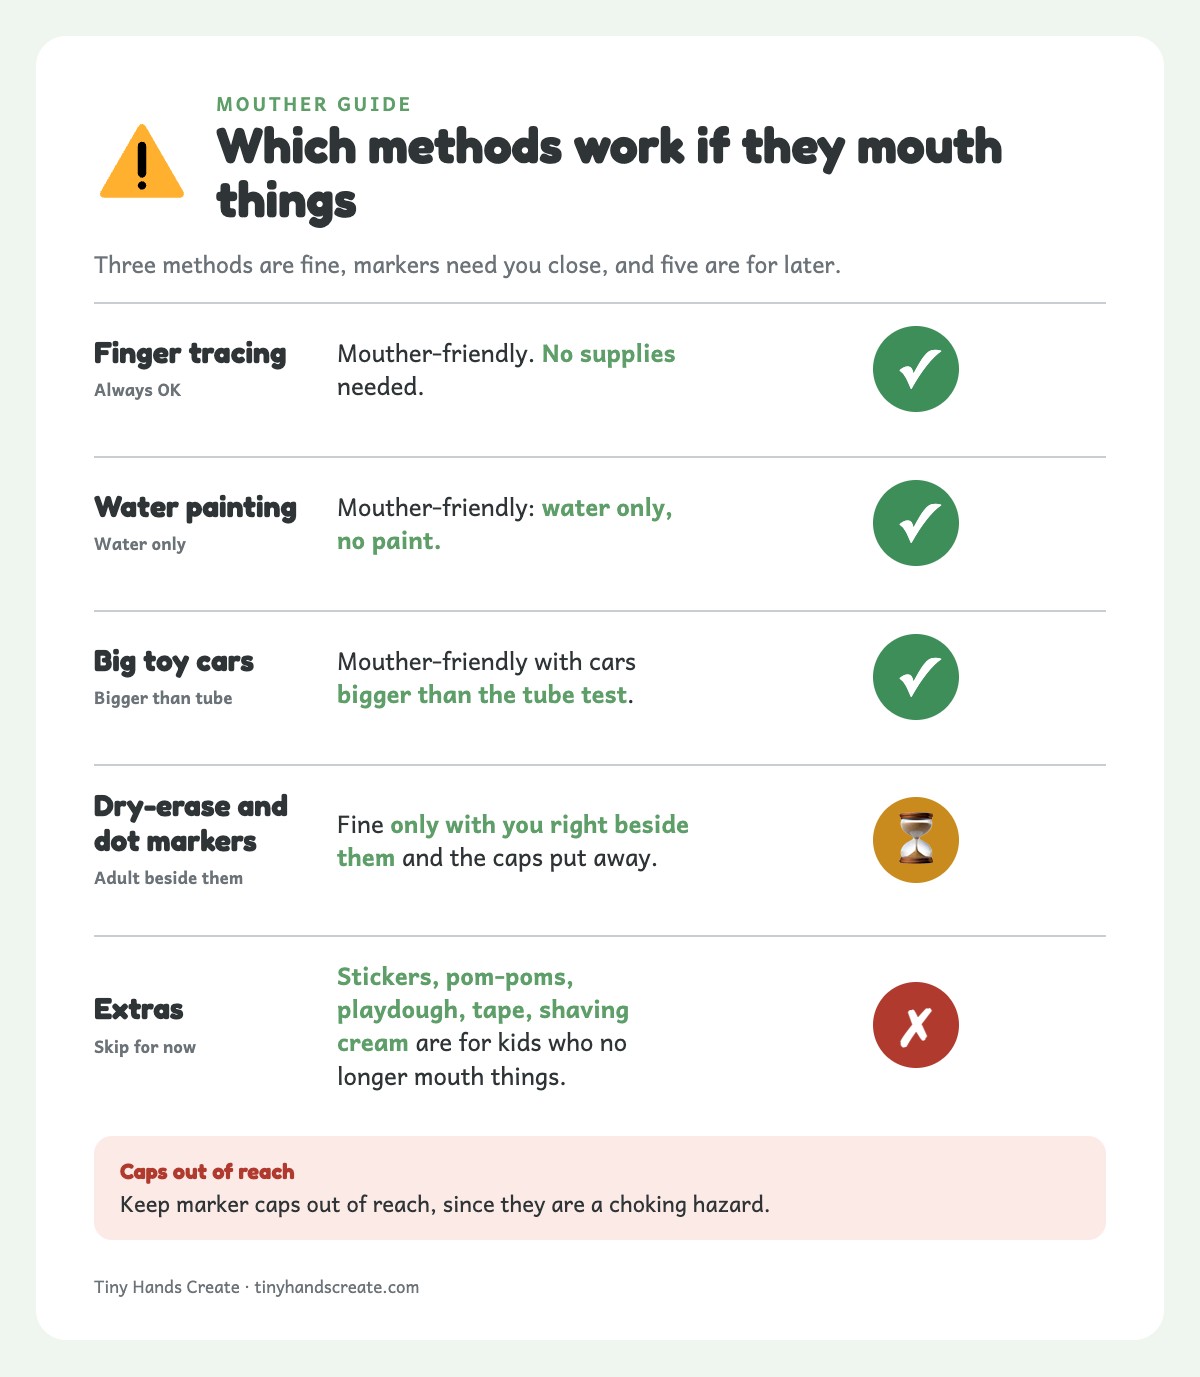
Skip the pom-poms, stickers, playdough, tape and shaving cream for now. Stick with finger tracing, water painting and big toy cars. Dot markers and dry-erase markers are fine only with you right beside them and the caps put away.
You can also try an edible sensory play option for mouthers.
For the kid who wants to do it “right”
Some toddlers are perfectionists even at two. Model messy tracing yourself. Draw a deliberately wobbly line and say, “Whoops! That’s okay, it’s still an L.” Keep the tone light.
For the kid who isn’t interested in letters at all
That’s fine. Use the cards as shapes. “Can you find the circle? That’s an O, and it’s a circle.” Or turn the cards into a car track or a stepping-stone game on the floor. Interest often shows up later.
For an almost-three-year-old who’s ready for more
Once your child is comfortably tracing most of Set 1 through Set 3, you might try a standard preschool format. Our free alphabet worksheets for preschool pick up where these cards leave off, with smaller letters and a more traditional layout. The same goes for our number tracing worksheets and shape recognition worksheets.
For multiple kids at different ages
Hand the toddler a card and a dot marker. Hand the older sibling a card and a pencil, and have them trace the letter and then write it themselves underneath. The same laminated card serves both.
Troubleshooting Common Toddler Tracing Problems
Here are the things that come up most, with the quick fixes I use.
| Problem | Why it happens | Try this |
|---|---|---|
| Scribbles over the whole card | They’re finding out what the marker does | Let them. Offer a fresh card or wipe and reset. |
| Throws the cards | Testing cause and effect | Make a “card toss” game with a basket. Then redirect. |
| Mouths the marker cap | Mouth exploration | Use markers with vented caps, keep caps out of reach, and swap to finger tracing. If a cap is swallowed or your child chokes, call emergency services. |
| Loses interest in one minute | Developmentally typical | Count it as a session. Try again after lunch or tomorrow. |
| Refuses to participate | Wants control | Offer two choices: “Playdough or stickers?” |
| Rips the cards | Strong hands, no laminate | Laminate the cards. Use a page protector only while you sit with them. |
| Meltdown when you correct | Correction feels like criticism | Stop correcting. Narrate instead of directing. |
| Only wants one card | Strong preference | Great, that’s the week’s card. |
When letters aren’t landing, play around them instead. Point out O-shaped clocks around the house, draw huge chalk letters on the driveway to walk along, or write their name on a blank card from Set 6. For non-mouthers, a letter-of-the-day bin from our DIY sensory bin ideas works too, with constant supervision and objects larger than the tube test.
For more, browse our play-based learning ideas for 2-year-olds or these fine motor activities for toddlers.
Signs Your Toddler Is Ready for Smaller Letters
I’d watch for a few real-world signs:
- They choose the cards on their own sometimes.
- They hold a marker with a pinching or tripod-ish grip, even occasionally.
- They can follow a line with a finger for at least part of the letter.
- They’re starting to name a few letters, or at least show interest when you do.
- They’re making more controlled marks, such as dots, lines, and circles, in their other art.
Good to knowIf you have significant concerns about your child’s hand use, marks or language, mention them to your pediatrician.
Those signs often show up closer to age three. Until then, keep playing with the cards at the same level.
A good session at two is small: they touch a card, make a mark or three, then go find a ball.
Safety Recap
- Supervise every session, and store tools out of reach in between.
- Use washable, non-toxic supplies. Non-toxic does not mean edible.
- No small parts for children under 3. If it fits through a toilet paper tube, skip it. Supervision does not make it safe.
- Check laminated edges. Sharp or peeling corners should be trimmed or rounded, and cracked cards thrown out.
- Never leave a plastic sleeve with a toddler. Use page protectors only while you sit with your child, and put them away when play ends.
- Mouthers skip the extras. Stickers, pom-poms, playdough, tape and shaving cream are for kids who no longer put things in their mouths. Finger tracing, water painting and big toy cars are the mouther-friendly methods, and markers are fine only with you right beside them.
Frequently Asked Questions
At what age can toddlers start letter tracing?
Most children are ready for very simple, large-scale tracing somewhere around age two, usually with their finger or a chunky tool rather than a pencil. Some kids show interest closer to 18 months, and others don’t care until nearly three. These cards are designed for ages 2-3. For a younger toddler, use them for finger tracing only, with an adult holding the card.
Why are the letters 3 inches tall instead of smaller?
Because two-year-olds are still developing the fine motor control needed for small, precise lines. A 3-inch letter gives their whole hand and arm room to move, and it’s much easier to “succeed” when the dotted line is large and widely spaced. Smaller letters are a good next step once your child is closer to three or four.
Why only five letters at a time?
A full alphabet is a lot for a two-year-old to take in. Five cards keeps the choices manageable, makes repetition easy, and helps your child build familiarity instead of feeling overwhelmed. You can leave one set out for a week or two, then rotate in the next when your child seems comfortable. There’s no deadline for finishing all six sets.
Do I need to laminate the cards?
No, but laminating is my pick for under-3s. It lets you use dry-erase markers and wipe the cards clean, and the cards survive drool, spills, and enthusiastic bending. Round the corners and throw out any card that peels or cracks. No laminator? A copy shop can laminate for you, or you can use a clear page protector while you sit with your child. Never leave a plastic sleeve with a toddler.
Should my 2-year-old trace in the correct stroke order?
Not yet. Stroke order matters later, when your child is learning to write with a pencil. The starting dot on each card gives you something to point to, but there’s no need to correct the direction.
What if my toddler just scribbles all over the cards?
That’s normal and still useful. Scribbling builds hand strength and comfort with tools. Wipe the card clean if it’s laminated, try again another day, and offer big paper too.
Is it okay to skip around and not follow the set order?
Yes. The sets run from easier shapes to trickier ones, but your child’s interests matter more than the order. If your toddler is obsessed with the letter B because it’s in their name, start there.
Keep Toddler Letter Tracing Short and Playful
Pick five letters, put them on the floor, and see what happens. Maybe they trace one with a finger. Maybe the whole thing ends with the dog sniffing a laminated O. All of it counts.
Grab the free PDF, print a set, and let your two-year-old explore at their own pace. For now, a big dotted O, a fat marker, and a few minutes together is plenty.