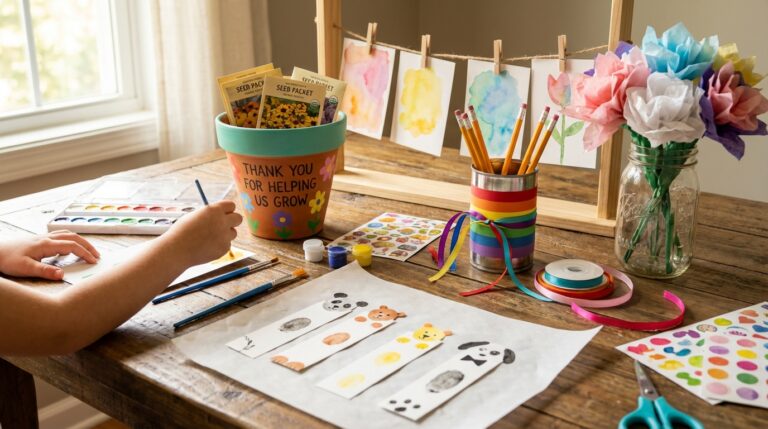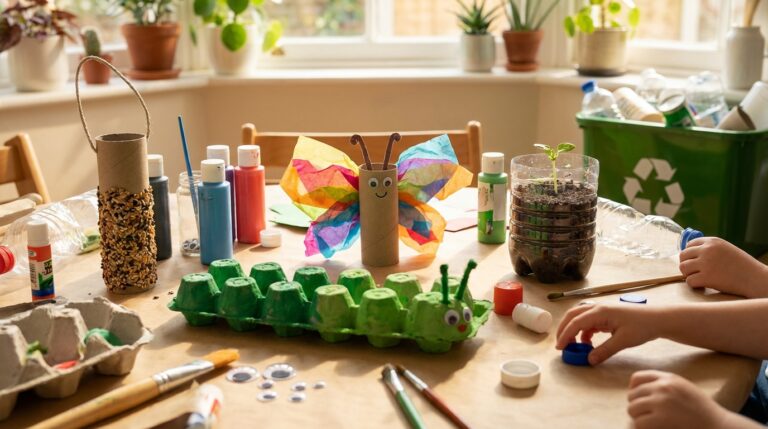
Easter Crafts for Toddlers and Preschoolers: Easy Spring Projects They Can Actually Do
Discover easy Easter crafts for toddlers and preschoolers that prioritize your child's creative process over perfect results. You'll learn how these simple projects boost fine motor skills, offer sensory exploration, and create lasting family memories.
- Prioritize your child's creative process over a perfect craft outcome.
- Boost your child's fine motor skills through simple tearing, squeezing, and painting.
- Offer sensory exploration to help regulate your toddler's emotions.
- Create lasting family memories and holiday traditions with easy crafts.
Your two-year-old has found the glue stick. She has removed the cap, applied glue to her own forehead, and is now pressing a cotton ball to it with an expression of deep concentration. She looks up at you, cotton ball dangling from her brow like a tiny cloud, and beams.
This, friends, is Easter crafting with a toddler. And honestly? It’s perfect. That cotton ball forehead is the most joyful thing you’ll see all week, and she is learning more than you’d think — about texture, about cause and effect, about the sticky magic of adhesive. The fact that the cotton ball was supposed to become a bunny tail is irrelevant. She’s creating. She’s experimenting. She’s exactly where she needs to be.
I’ve been doing Easter crafts with little ones for years now, and here’s the truth I wish someone had told me at the start: the best toddler and preschooler Easter crafts are not the ones that look like the Pinterest photo. They’re the ones your child can actually do — with their own hands, at their own pace, with their own wonderfully chaotic creative vision. The crafts in this article are designed for real little kids with real little hands and real short attention spans. Some will come out looking like bunnies. Some will come out looking like abstract art. All of them will be worth the twenty minutes and the mess. So grab your smock (or your old t-shirt that already has paint on it — we both know which one you’re reaching for), and let’s make some Easter magic.
Why Easter Crafts Matter for Toddlers and Preschoolers
Before we dive into the projects, let me make a quick case for why this stuff matters beyond “it’s cute and it’s seasonal.”
Fine Motor Development in Disguise
Every single craft in this article involves skills that occupational therapists actively work on with young children: tearing paper, squeezing glue, peeling stickers, pinching pom poms, painting with brushes. When your toddler rips tissue paper into little pieces for an Easter egg collage, they’re building the exact same hand strength they’ll need to hold a pencil later. When your preschooler uses a cotton swab to dot paint inside an egg outline, they’re refining the pincer grip that makes writing possible.
This is the beautiful trick of crafting with kids — they think they’re making a bunny. They’re actually building fine motor skills that will serve them for years. You don’t have to tell them that, of course. Let them think it’s all about the bunny.
Sensory Exploration and Emotional Regulation
Toddlers and preschoolers are sensory-seeking creatures by nature. They want to touch everything, squish everything, and — let’s be honest — taste a concerning percentage of craft supplies. Easter crafts offer rich sensory input: the cool slipperiness of paint, the softness of cotton balls, the satisfying rip of tissue paper, the springy bounce of pom poms.
This kind of sensory engagement isn’t just fun — it’s regulating. A child who’s been running around the house like a tiny tornado will often settle into a calm, focused state when given something tactile and engaging to work with. If you’ve ever noticed your kid go quiet and still while finger painting, that’s their nervous system finding its groove. Process art for toddlers works the same way — it’s the doing that matters, not the final product.
Holiday Connection and Family Memory
There’s something about seasonal crafts that anchors kids in time. They start to understand the rhythm of the year — that spring means pastels and bunnies and flowers, that Easter comes with eggs and baskets and new beginnings. These are the activities that become family traditions without you trying. Three years from now, your kid will say, “Remember when we made those cotton ball bunnies?” and you’ll be glad you spent the twenty minutes.
Supplies You Probably Already Have
You do not need to make a craft store run for these projects. Here’s the master supply list, and I’d bet you have 80% of it in your house right now.
Paper and Cardboard
- Construction paper (pastels: pink, yellow, light blue, green, white)
- Paper plates (the thin, cheap ones work best — not the heavy-duty wax-coated party plates)
- Cardboard tubes (toilet paper and paper towel rolls)
- Tissue paper (any colors, but pastels are ideal)
- Coffee filters (unbleached or white — both work)
- Newspaper or scrap paper for protecting surfaces
Adhesives and Tools
- White school glue (the washable kind)
- Glue sticks (toddler favorite — easier to control than liquid glue)
- Kid-safe scissors (for preschoolers; you’ll do the cutting for toddlers)
- Tape (masking tape is easier for little hands than clear tape)
- Clothespins or binder clips (for holding things while glue dries)
Paint and Color
- Washable tempera paint (spring colors: pink, yellow, green, light blue, purple, white)
- Washable markers and crayons
- Cotton swabs (for dotting)
- Sponges (cut into egg shapes if you’re feeling ambitious)
Textural Supplies
- Cotton balls and cotton rounds
- Pom poms (assorted sizes and colors)
- Stickers (especially dot stickers — toddlers are obsessed with these)
- Googly eyes
- Feathers (craft feathers from a dollar store bag work perfectly)
- Pipe cleaners
- Ribbon or yarn scraps
From Your Kitchen
- Cupcake liners (especially pastel ones)
- Egg cartons
- Popsicle sticks or craft sticks
- Rubber bands
- Plastic forks (for painting — more on this later)
- Ziplock bags
Craft Overview at a Glance
| # | Craft | Best Age | Time | Mess Level | Key Supplies |
|---|---|---|---|---|---|
| 1 | Torn Paper Easter Eggs | 18 mo–3 yr | 15 min | Low | Construction paper, glue stick |
| 2 | Cotton Ball Bunny | 2–4 yr | 15 min | Low | Paper plate, cotton balls, glue |
| 3 | Dot Sticker Eggs | 18 mo–3 yr | 10 min | None | Egg outlines, dot stickers |
| 4 | Handprint Chick | 2–5 yr | 15 min | Medium | Yellow paint, paper |
| 5 | Pom Pom Stamped Eggs | 2–4 yr | 15 min | Medium | Pom poms, clothespins, paint |
| 6 | Paper Plate Bunny Mask | 3–5 yr | 20 min | Low | Paper plate, paint, pipe cleaners |
| 7 | Tissue Paper Sun Catchers | 2–5 yr | 20 min | Low | Contact paper, tissue paper |
| 8 | Coffee Filter Butterflies | 3–5 yr | 20 min | Medium | Coffee filters, markers, water |
| 9 | Egg Carton Chicks | 2–5 yr | 20 min | Medium | Egg carton, yellow paint, feathers |
| 10 | Cotton Swab Dotted Eggs | 2–4 yr | 15 min | Medium | Cotton swabs, paint, egg outlines |
| 11 | Cupcake Liner Flowers | 2–5 yr | 15 min | Low | Cupcake liners, glue, popsicle sticks |
| 12 | Mess-Free Paint Bag Eggs | 18 mo–3 yr | 10 min | None | Ziplock bag, paint, tape |
| 13 | Cardboard Tube Bunny | 3–5 yr | 25 min | Medium | TP roll, paint, paper |
| 14 | Fork-Printed Chicks | 2–4 yr | 15 min | Medium | Plastic fork, yellow paint |
| 15 | Paper Plate Easter Basket | 3–5 yr | 25 min | Low-Med | Paper plate, paint, stapler |
| 16 | Pasta Necklace (Spring Colors) | 3–5 yr | 20 min | Low | Dyed pasta, string |
| 17 | Fingerprint Carrot Garden | 2–4 yr | 15 min | Medium | Orange/green paint, paper |
| 18 | Bunny Ears Headband | 3–5 yr | 20 min | Low | Card stock, cotton balls, tape |
| 19 | Sheep Cotton Ball Craft | 2–4 yr | 15 min | Low | Black paper, cotton balls, glue |
| 20 | Sticker Mosaic Cross/Egg | 2–5 yr | 15 min | None | Dot stickers, paper template |
Egg Crafts: Decorating Without the Dye Disasters
Let’s start with eggs — the universal Easter symbol and the craft category with the widest age range. These work for everyone from the 18-month-old who just discovered the concept of “sticky” to the preschooler who wants everything to be symmetrical (good luck with that, buddy).
1. Torn Paper Easter Eggs
Age: 18 months to 3 years | Time: 15 minutes | Mess Level: Low
This is my number one recommendation for the youngest crafters. Tearing paper is one of the most developmentally appropriate activities for toddlers — it builds hand strength, bilateral coordination, and it’s deeply satisfying in a way that cutting with scissors isn’t yet accessible.
Supplies:
- Large egg shape cut from white card stock (you cut this out in advance)
- Strips of colorful construction paper or tissue paper
- Glue stick
Instructions:
- Cut a large egg shape from white card stock or cardboard — go big, at least 8 inches tall. Bigger is easier for tiny hands.
- Tear (or pre-tear) colorful strips of construction paper or tissue paper. For 18-month-olds, you’ll want to pre-tear and let them do the gluing. For 2-3 year-olds, demonstrate tearing and let them go wild.
- Show your child how to swipe the glue stick on the egg and press paper pieces down.
- Cover the whole egg. Overlap colors. Go off the edges. It does not matter. It all looks gorgeous.
Toddler tip: If your child just wants to peel and apply the glue stick without actually adding paper, let them. That’s fine. They’re exploring. The glue itself is the craft today.
2. Dot Sticker Decorated Eggs
Age: 18 months to 3 years | Time: 10 minutes | Mess Level: None
Zero mess. I repeat: zero mess. This is the craft you pull out when you need ten minutes of calm and cannot handle a single drop of paint on anything. If your child loves sticker activities, this one’s a guaranteed hit.
Supplies:
- Large egg shapes cut from white paper (one per child, or five — they’ll want more)
- Round dot stickers (available at any dollar store or office supply aisle)
Instructions:
- Cut out egg shapes in advance.
- Hand your child the sheet of dot stickers and the egg.
- That’s it. They peel and stick. You drink your coffee.
Why it works: Peeling stickers off a sheet is an outstanding fine motor activity. It requires the pincer grasp, hand-eye coordination, and patience. The fact that they’re decorating an egg is almost secondary to the developmental workout they’re getting. Try color patterns for preschoolers: “Can you make a line of all blue dots across the middle?”
3. Pom Pom Stamped Eggs
Age: 2 to 4 years | Time: 15 minutes | Mess Level: Medium
This is one of my all-time favorite painting techniques for little ones because it sidesteps the brush entirely. If your child struggles with brush control (which is totally normal under age 3), pom pom crafts give them a tool that’s easier to grip and makes beautiful prints.
Supplies:
- Large egg shape cut from white paper or card stock
- Clothespin + medium pom pom (clip the pom pom in the clothespin to make a stamper)
- Washable paint in several pastel colors, poured into a muffin tin or small cups
Instructions:
- Make your pom pom stampers: clip one medium pom pom into each clothespin. Make 3-4 in different colors.
- Pour small amounts of paint into a muffin tin — one color per well.
- Show your child how to dip the pom pom end into paint and stamp it onto the egg shape.
- Let them stamp freely. Encourage switching colors. Admire the beautiful overlapping circles.
Preschooler extension: Challenge them to create patterns — stripes of stamps across the egg, or a border of one color around the edge.
4. Cotton Swab Dotted Eggs
Age: 2 to 4 years | Time: 15 minutes | Mess Level: Medium
Pointillism for toddlers. Sounds fancy, looks adorable, and the cotton swab is the perfect tool for little hands that find paintbrushes unwieldy.
Supplies:
- Egg outlines printed or drawn on white paper
- Cotton swabs (bundle 3-4 together with a rubber band for bigger dots, or use individually)
- Washable paint in spring colors
Instructions:
- Draw or print egg shapes with clear outlines on paper.
- Set out paint in small dabs on a paper plate — one blob per color.
- Show your child how to dip the cotton swab tip into paint and dot it onto the egg.
- Fill the entire egg with colorful dots. The result looks like stained glass or confetti — genuinely beautiful every time.
Toddler tip: Bundling 3-4 cotton swabs together with a rubber band creates a thicker handle that’s easier to grip, and it makes bigger dots that cover the egg faster. Perfect for short attention spans.
5. Mess-Free Paint Bag Eggs
Age: 18 months to 3 years | Time: 10 minutes | Mess Level: Absolutely none
This is the ultimate “I love you but I cannot deal with paint cleanup right now” craft. Everything stays sealed. Your table stays clean. Your child still gets the sensory satisfaction of squishing paint. This technique is a cornerstone of mess-free painting for toddlers, and it translates beautifully to Easter.
Supplies:
- Quart-size ziplock bag (the heavy-duty freezer ones are best)
- Washable paint in 2-3 colors (squirt a tablespoon of each inside)
- White card stock cut in an egg shape (slide it inside the bag before sealing)
- Tape
Instructions:
- Cut a white egg shape from card stock and slide it into the ziplock bag.
- Squirt 2-3 colors of paint onto the card stock inside the bag.
- Seal the bag thoroughly. Then tape it shut. Then tape it to the table or highchair tray.
- Let your child press, squish, drag fingers, and push the paint around through the bag.
- When they’re done, carefully open the bag and pull out the egg. Let it dry. It will look like a gorgeous marbled watercolor.
Bonus: Tape the sealed bag to a sunny window for a light-table effect. The colors glow.
6. Sticker Mosaic Eggs
Age: 2 to 5 years | Time: 15 minutes | Mess Level: None
Another zero-mess option that scales beautifully with age. Toddlers place stickers randomly. Preschoolers can attempt patterns, color sections, or even simple pictures within the egg shape.
Supplies:
- Large egg outlines on paper
- Assorted stickers — dot stickers, foam stickers, mini stickers, whatever you have
Instructions:
- Print or draw large egg outlines. For younger kids, make the egg at least 8 inches tall.
- Set out a variety of stickers.
- Invite your child to fill the egg entirely with stickers, mosaic-style.
Preschooler challenge: Draw lines across the egg to create sections (like a decorated Easter egg) and challenge them to use a different color or type of sticker in each section.
Bunny Crafts: Every Kid’s Favorite Easter Animal
Bunnies. Toddlers love them. Preschoolers love them. I love them. Here are five bunny crafts ranging from dead-simple to slightly-more-involved, all achievable by small humans.
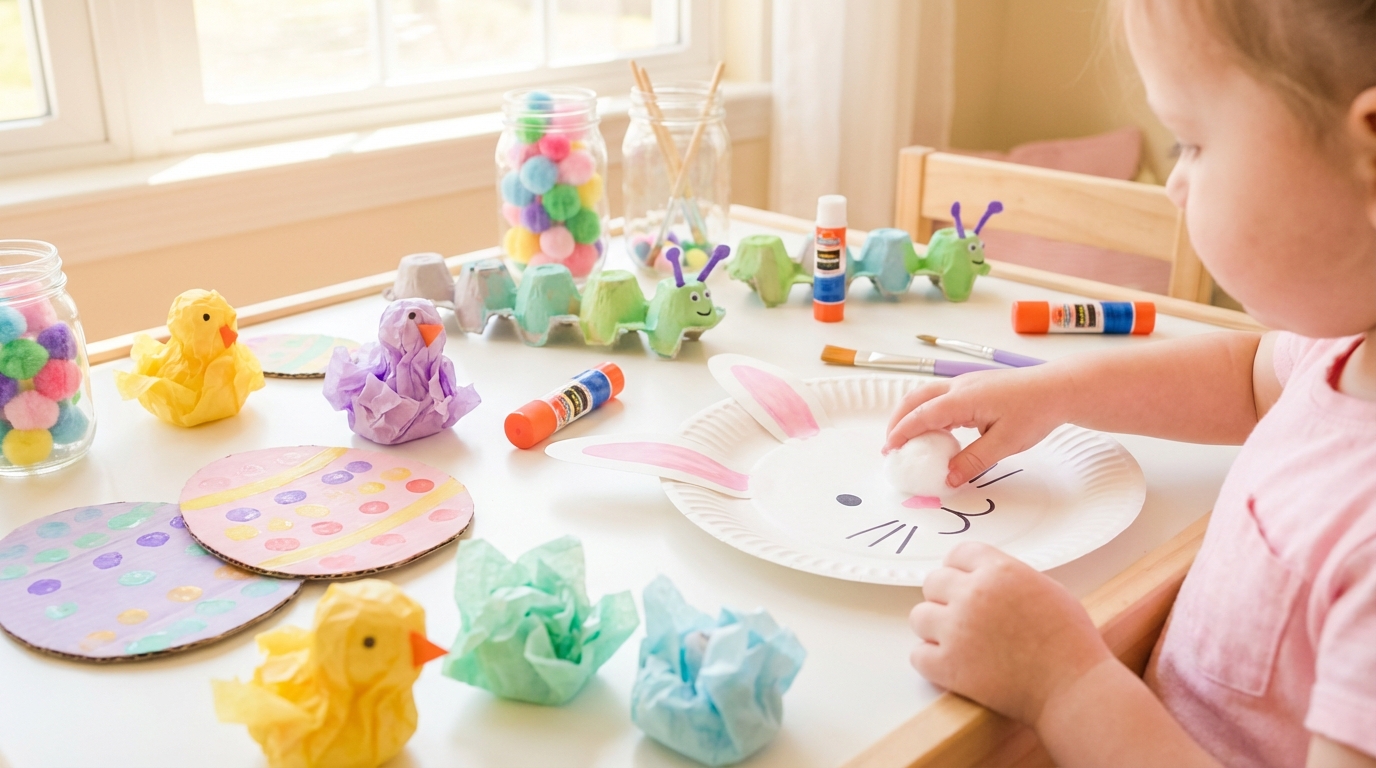
7. Cotton Ball Bunny
Age: 2 to 4 years | Time: 15 minutes | Mess Level: Low
This is the classic, and it endures for a reason. Cotton balls are inherently appealing to toddlers — soft, squeezable, and they stick to glue beautifully.
Supplies:
- Bunny shape drawn or printed on construction paper (or cut from a paper plate)
- Cotton balls — lots of them (15-20 per bunny)
- White school glue
- Googly eyes
- Pink paper or foam scrap for nose and inner ears
- Optional: a real pom pom for the tail
Instructions:
- Draw or print a simple bunny shape — round body, round head, two long ears. Keep it simple and large.
- Squeeze glue generously all over the bunny body and head (not the ears — those stay flat or get pink inner ear pieces).
- Let your child press cotton balls onto the glue, covering the entire body. Encourage them to squish each one down.
- Add googly eyes and a small pink triangle nose.
- Glue a fluffy pom pom or extra cotton ball on the back for the tail.
Real talk: Your toddler will want to pull the cotton balls back off after sticking them on. This is normal. This is fine. This is, in fact, excellent bilateral coordination practice. Just add more glue and more cotton balls.
8. Paper Plate Bunny Mask
Age: 3 to 5 years | Time: 20 minutes | Mess Level: Low
Paper plates are the Swiss Army knife of toddler crafts. I’ve written about paper plate crafts for every season, and this bunny mask is one of the simplest and most beloved. Your child will wear it for the rest of the day. Possibly the rest of the week.
Supplies:
- 1 white paper plate
- Pink and white construction paper
- Cotton balls (3-4)
- Pipe cleaners (white or pink — for whiskers)
- Glue stick and tape
- Scissors (adult use)
- Popsicle stick or elastic string
- Markers
Instructions:
- Hold the paper plate up to your child’s face and gently mark where the eye holes should go. Cut them out (adult job).
- Cut two long ear shapes from white paper — about 8 inches tall. Cut slightly smaller pink inner ear shapes and glue them on.
- Tape or glue the ears to the back of the plate at the top.
- Glue cotton balls in a cluster at the bottom center for the bunny’s fluffy cheeks.
- Add a pink triangle nose (drawn or cut from paper) between the cotton ball cheeks.
- Poke 3 short pieces of pipe cleaner through each side of the nose area for whiskers (poke holes with a pencil first, thread pipe cleaners through, bend the inside ends flat and tape down).
- Attach a popsicle stick to the bottom for a hand-held mask, or punch holes on each side and thread elastic string for a wearable mask.
Preschooler extension: Let them paint the plate pink or add glitter glue details before assembly.
9. Cardboard Tube Bunny
Age: 3 to 5 years | Time: 25 minutes | Mess Level: Medium
The toilet paper roll transforms yet again. This standing bunny makes a great table decoration or Easter basket addition.
Supplies:
- 1 toilet paper roll
- White or pink paint
- White and pink construction paper
- Cotton ball (for tail)
- Googly eyes
- Markers
- Glue
Instructions:
- Paint the entire toilet paper roll white (or pink, or brown — bunnies come in many colors). Let dry.
- While it dries, cut two ear shapes from white paper — about 4 inches long. Cut smaller pink inner ears and glue them on.
- Once the roll is dry, fold the top of the tube inward on both sides to create a flat top (like closing a box). This creates a natural ear-attachment point and gives the bunny a rounder head shape.
- Glue the ears to the back of the folded top so they stick up.
- Add googly eyes, draw a small pink nose and mouth with markers.
- Draw or glue on whiskers (thin strips of paper, or draw with a fine marker).
- Glue a cotton ball to the back for the tail.
Toddler modification: Skip the folding and the ears. Let your toddler paint the tube and stick on googly eyes. That’s a bunny. Done.
10. Bunny Ears Headband
Age: 3 to 5 years | Time: 20 minutes | Mess Level: Low
Your child will not take this off. Plan accordingly.
Supplies:
- 2 strips of white card stock (about 2 inches wide, 12 inches long) — for the headband
- 2 long ear shapes cut from white card stock (about 8 inches)
- Pink paper for inner ears
- Cotton balls
- Glue, tape, stapler
Instructions:
- Fit the two strips of card stock around your child’s head and staple or tape them into a circle headband that fits snugly.
- Cut two large bunny ear shapes from white card stock. Cut slightly smaller pink inner ear shapes and glue them on.
- Let your child glue cotton balls onto the pink inner ears for a fluffy texture.
- Tape or staple the ears to the inside of the headband so they stand up tall.
- Watch your child hop around the house for the next two hours.
Preschooler extension: Let them decorate the headband strip with stickers, stamps, or drawings before assembling.
Chick and Spring Animal Crafts: Beyond Bunnies
Easter isn’t just bunnies — it’s chicks, lambs, butterflies, and all the creatures of spring. These crafts celebrate the wider world of springtime animals.
11. Handprint Chick
Age: 2 to 5 years | Time: 15 minutes | Mess Level: Medium
Handprint art is the great equalizer of toddler crafts. Every child can make a handprint. And every parent secretly keeps handprint art forever because tiny hands don’t stay tiny.
Supplies:
- Yellow washable paint
- White or light blue paper
- Orange paper scrap (for beak and feet)
- Googly eye (just one — chicks in profile are easier and cuter)
- Marker
Instructions:
- Paint your child’s hand yellow (or let them press their hand into a thin layer of yellow paint on a plate).
- Press their hand firmly onto the paper, fingers spread. This is the chick’s body — the fingers are the tail feathers.
- Let it dry for a few minutes.
- Cut a small orange diamond shape and fold it in half for the beak. Glue it on the thumb side.
- Add a googly eye above the beak.
- Cut two small orange feet and glue them at the bottom.
- Optional: add a little tuft of yellow feather on top of the head.
Keepsake tip: Write your child’s name and the date on the back. These are the crafts you find in a box fifteen years from now and cry about.
12. Egg Carton Chicks
Age: 2 to 5 years | Time: 20 minutes | Mess Level: Medium
Egg cartons practically beg to be turned into chicks. Each cup is already the perfect round-body shape.
Supplies:
- Cardboard egg carton, cut into individual cups
- Yellow paint
- Small feathers (yellow or orange)
- Googly eyes
- Orange paper scraps (for beaks)
- Glue
Instructions:
- Cut the egg carton into individual cups (adult job).
- Let your child paint each cup yellow. Use thick paint — cardboard soaks it up. Two coats may be needed. Let dry.
- Glue two googly eyes near the top of the cup.
- Cut a tiny orange triangle for the beak and glue it below the eyes.
- Tuck a small feather or two into the top of the cup (a dab of glue holds them in place) for the chick’s head fluff.
- Optional: cut small orange feet from paper and glue to the bottom.
Make it a scene: Line several chicks up on a strip of green paper “grass.” Add a mama hen (a bigger cup, painted brown or red). Display on a windowsill.
13. Fork-Printed Chicks
Age: 2 to 4 years | Time: 15 minutes | Mess Level: Medium
This one always surprises parents. A plastic fork dipped in paint creates the most perfect feathery, fluffy texture. It looks like a real fuzzy chick, and your toddler will be amazed at what they made.
Supplies:
- Plastic fork
- Yellow paint (pour a thin layer onto a paper plate)
- White or blue paper
- Orange marker or paper for beak
- Googly eyes
- Glue
Instructions:
- Dip the back (tines) of the plastic fork into yellow paint.
- Press and slightly drag onto the paper in a circular cluster to create the chick’s round body. Repeat, overlapping, until you have a fluffy yellow circle.
- Make a slightly smaller cluster above for the head.
- Let dry briefly.
- Add googly eyes and an orange triangle beak.
- Draw two stick-figure orange legs and feet below.
Why forks work: The tines create natural separations in the paint that look like feathers or fuzz. It’s one of those happy accidents of craft engineering.
14. Coffee Filter Butterflies
Age: 3 to 5 years | Time: 20 minutes (plus drying time) | Mess Level: Medium
This craft has a genuine “wow” moment built in — when the water hits the marker ink and the colors bloom and bleed, your child will gasp. It’s basically science and art having a beautiful baby.
Supplies:
- Flat-bottom coffee filters (round ones work too)
- Washable markers (the brighter the better)
- Spray bottle of water (or a dropper)
- Pipe cleaner
- Clothespin (optional — for the body)
Instructions:
- Flatten the coffee filter on a protected surface.
- Let your child color all over it with washable markers. Heavy color works best — really load it up. Scribbles are perfect. No pattern needed.
- Lightly spray the filter with water (or use a dropper to drip water onto it). Watch the colors bleed and blend. This is the magic moment.
- Set aside to dry completely — about 30-60 minutes, or speed it up with a hair dryer on low.
- Once dry, pinch the filter in the center and twist a pipe cleaner around the pinched center. Curl the pipe cleaner ends for antennae.
- Optional: clip a clothespin over the center for a butterfly body. Paint the clothespin a bright color.
Display idea: Tape several to a window for a “butterfly garden” that catches the light.
15. Sheep Cotton Ball Craft
Age: 2 to 4 years | Time: 15 minutes | Mess Level: Low
Spring means lambs, and lambs mean cotton balls. This is almost too easy, and that’s exactly why it belongs here.
Supplies:
- Sheep body shape cut from white or light gray paper
- Black construction paper (for head, legs)
- Cotton balls (10-15 per sheep)
- Glue
- Googly eyes
Instructions:
- Cut a cloud-like oval shape from white paper for the sheep’s body. Cut a smaller black oval for the head. Cut four black rectangles for legs.
- Glue the head to one end of the body and the legs to the bottom.
- Squeeze white glue all over the body shape.
- Let your child press cotton balls onto the glue, covering the entire body. Fluffy = good.
- Add a googly eye to the black head. Draw a small mouth if you want.
Variation: Use this same approach for a cloud, a snowball, a polar bear… cotton ball crafts are endlessly adaptable.
Spring-Themed Crafts: Flowers, Gardens, and Sunshine
Easter falls right at the start of spring, and these crafts celebrate the season itself — flowers blooming, gardens growing, the world coming alive again after winter.
16. Tissue Paper Sun Catchers
Age: 2 to 5 years | Time: 20 minutes | Mess Level: Low
These look absolutely stunning on a window, and they’re one of the most forgiving crafts for young children. There’s truly no wrong way to do this.
Supplies:
- Clear contact paper (or wax paper with an iron — contact paper is much easier)
- Tissue paper in spring colors, torn or cut into small pieces
- Egg, bunny, or flower-shaped frame cut from construction paper (optional)
- Tape
Instructions:
- Cut a piece of clear contact paper and tape it sticky-side-up to the table.
- Optional: place a construction paper frame on top (cut out the center of an egg shape, leaving just the border) to give the sun catcher a defined shape.
- Let your child place tissue paper pieces onto the sticky surface. The pieces stick on contact — no glue needed. This is incredibly satisfying for toddlers.
- When covered, place another piece of contact paper on top, sticky side down, to seal.
- Trim edges and tape to a sunny window.
Why toddlers love this: The instant stick is deeply gratifying. Unlike glue, which takes time and coordination, contact paper gives them immediate results. Place, press, done.
17. Cupcake Liner Flowers
Age: 2 to 5 years | Time: 15 minutes | Mess Level: Low
If you have cupcake liners, you have flower petals. This is one of those crafts where the material does most of the visual work for you.
Supplies:
- Cupcake liners in various colors and sizes (mini and regular)
- Green pipe cleaners or popsicle sticks (for stems)
- Green paper (for leaves)
- Glue
- Yellow pom poms or crumpled yellow tissue paper (for flower centers)
- Paper or card stock base
Instructions:
- Flatten cupcake liners and glue them to the paper in a row or cluster. These are your flower heads.
- Glue a popsicle stick or pipe cleaner extending down from each flower for the stem.
- Cut simple leaf shapes from green paper and glue along the stems.
- Add a yellow pom pom or ball of crumpled tissue paper to the center of each flower.
- Optional: layer two different-sized liners (a mini inside a regular) for dimension.
Make a whole garden: Add a strip of green paper at the bottom for grass, a yellow circle and triangle rays for a sun, and a blue sky background. Frame-worthy.
18. Fingerprint Carrot Garden
Age: 2 to 4 years | Time: 15 minutes | Mess Level: Medium
What does the Easter bunny eat? Carrots. So let’s make a whole garden of them using nothing but fingers and paint.
Supplies:
- White paper
- Orange paint
- Green paint
- Brown marker or crayon (optional — for the dirt line)
- Wet wipes nearby (you’ll need them)
Instructions:
- Draw a horizontal brown line across the lower third of the paper — this is the ground.
- Below the line, show your child how to make a triangle shape with orange fingerprints: 3 prints on the bottom row, 2 in the middle, 1 on top. These are the carrots poking out of the ground. (Or just let them make orange blobs — that works too.)
- Above the ground line, add green fingerprints at the top of each carrot for the leafy greens sprouting up.
- Repeat to fill the garden with carrots.
Toddler reality check: Your toddler will likely make one carrot, then start fingerpainting freely all over the paper. This is fine. The paper is now a “carrot garden after a rainstorm.” Roll with it.
19. Paper Plate Easter Basket
Age: 3 to 5 years | Time: 25 minutes | Mess Level: Low to Medium
A functional (well, semi-functional) craft! This basket can hold a few pieces of Easter candy or small treats. Your preschooler will be extremely proud.
Supplies:
- 2 paper plates
- Paint or markers (spring colors)
- Stapler
- Strip of card stock (for the handle)
- Stickers, tissue paper, or other decorations
- Hole punch (optional)
Instructions:
- Let your child paint or color both paper plates on the bottom side. Let dry.
- Place the two plates together, decorated sides facing OUT, and staple around the bottom half — leaving the top half open like a pocket.
- Cut a strip of card stock about 1.5 inches wide and 14 inches long. Staple each end to opposite sides of the plate opening for the handle.
- Decorate: add stickers, glue on tissue paper flowers, draw Easter eggs, add a cotton ball bunny tail — whatever they want.
- Fill with Easter grass (shredded green paper works) and a few treats.
20. Pasta Necklace (Spring Edition)
Age: 3 to 5 years | Time: 20 minutes (plus pasta dyeing time if doing it fresh) | Mess Level: Low
Threading pasta onto string is outstanding fine motor practice, and a spring-colored version makes a festive Easter accessory.
Supplies:
- Tubular pasta (penne, rigatoni, or ziti — anything with a hole through the center)
- Food coloring + rubbing alcohol OR washable paint (for dyeing the pasta)
- Ziplock bags (for dyeing)
- String, yarn, or pipe cleaners
- Tape (wrap a piece around the string end to make a “needle”)
Preparing the pasta (do this ahead of time):
- Put 1 cup dry pasta in a ziplock bag.
- Add 1 tablespoon rubbing alcohol and several drops of food coloring.
- Seal and shake until evenly coated.
- Spread on wax paper to dry — takes about an hour.
- Repeat with different colors: pink, yellow, purple, green, blue.
Assembly:
- Wrap a small piece of tape around one end of the string to create a stiff “needle.”
- Tie a piece of pasta to the other end so the rest don’t slide off.
- Let your child thread pasta onto the string in whatever color order they choose.
- Tie ends together when done. Easter jewelry, ready to wear.
Threading tip: If string is too floppy for your child, use a pipe cleaner instead — it’s naturally stiff and holds its shape, making threading much easier for younger preschoolers.
Tips for Crafting with Toddlers: Keeping It Real
I’ve done hundreds of crafts with toddlers and preschoolers, and here’s what I’ve learned the hard way. Tape this list to the inside of your craft supply cabinet.
Set Up Before They Sit Down
Toddlers have a window of about 90 seconds between “I want to do a craft!” and total meltdown if the craft isn’t ready. Pre-cut your shapes. Pre-pour your paint. Have the glue open. Have the googly eyes in a small bowl. Once their bottom hits the chair, everything should be within reach.
Lower Your Expectations (Then Lower Them Again)
A 2-year-old’s bunny will not look like a bunny. It will look like a white blob with possibly one googly eye on it. This is perfect. This is developmentally appropriate. This is art. If you need a picture-perfect craft, make one yourself after bedtime. The one your child makes is for them.
Time It Right
Best crafting windows:
- After breakfast/morning snack (fed, rested, alert)
- After nap (refreshed and looking for engagement)
- NOT right before mealtime (hungry toddler + glue = catastrophe)
- NOT right before bedtime (overstimulated toddler + paint = tears)
Embrace the 5-Minute Craft Session
If your toddler stamps three pom pom prints on an egg, declares “ALL DONE,” and leaves the table, that craft is finished. Congratulations. It’s beautiful. Do not try to coax them back to “finish” it. There is no finish. There’s only done.
Dress for Disaster
Strip them down to a diaper in warm weather. In cold weather, use an oversized old t-shirt as a smock (an adult shirt worn backward covers them to the knees). Do not put them in that cute outfit your mom bought and then hand them paint. You will regret it.
Contain the Chaos
Best containment strategies:
- Highchair tray — built-in edges, easy to clean, keeps the mess in one zone
- Sheet pan or baking tray — raised edges catch paint drips
- Plastic tablecloth taped to the table — cheap, disposable, saves your sanity
- Outside — the ultimate mess containment. Tape paper to the patio table and let them go
Offer Choices, Not Open-Ended Freedom
“Do you want the blue or the pink?” works infinitely better than “What color do you want?” for toddlers. Two choices prevents overwhelm. Five choices causes paralysis. This applies to everything: colors, stickers, shapes, which craft to do first.
Age-by-Age Crafting Guide
Not sure which crafts to try first? Here’s a breakdown by age:
18 Months to 2 Years
Best crafts from this list: Torn Paper Eggs (#1), Dot Sticker Eggs (#2), Mess-Free Paint Bags (#5), Tissue Paper Sun Catchers (#7 — with contact paper)
What they can do:
- Tear paper (with help)
- Peel and place large stickers
- Squish and press with hands
- Dip and stamp with a pom pom tool
- Place items on sticky surfaces
- Finger paint (on paper or in bags)
What they can’t do yet:
- Cut with scissors
- Draw recognizable shapes
- Follow multi-step instructions
- Resist eating the supplies (keep an eye on those pom poms)
2 to 3 Years
Best crafts from this list: All egg crafts, Cotton Ball Bunny (#7), Handprint Chick (#11), Fork-Printed Chicks (#13), Sheep (#15), Fingerprint Carrots (#18)
What they can do:
- All of the above, plus:
- Use a glue stick independently
- Apply cotton balls and pom poms to glue
- Make handprints and fingerprints with paint
- Stick googly eyes (approximately where they should go)
- Tear paper independently
- Use dot markers and stampers
3 to 5 Years
Best crafts from this list: All of them! Plus they’ll get more detail from the mask, headband, basket, and necklace crafts.
What they can do:
- All of the above, plus:
- Use kid-safe scissors (with supervision)
- Follow 2-3 step instructions
- Create intentional patterns
- Thread pasta or beads onto string
- Paint with some color control
- Tell you exactly how the craft should look (and get frustrated when it doesn’t match their vision — deep breaths, everyone)
How to Display Easter Crafts
Your child worked hard on these. Don’t let them disappear into the craft graveyard (that drawer we all have). Here’s how to show them off:
Easter Craft Clothesline: String a piece of twine or yarn across a wall or window and use mini clothespins to clip up each finished craft. Instant gallery.
Window Display: Sun catchers, coffee filter butterflies, and tissue paper crafts all look stunning taped to windows where light comes through.
Easter Table Centerpiece: Stand the cardboard tube bunnies and egg carton chicks on the dining table around a plate of plastic eggs. Homemade Easter decoration, done.
Gift Tags: Take photos of each craft and use them as the images on Easter cards for grandparents. Or tape small crafts directly to Easter baskets as toppers.
Craft Photo Album: Take a photo of each craft with your child holding it. At the end of the season, you have a portfolio of their spring art. These make beautiful grandparent gifts when printed.
Crafty Mama
Crafty Mama is a former elementary art teacher turned stay-at-home parent who believes every child is creative — they just need the right invitation. She develops age-appropriate activities, crafts, and projects that spark imagination while keeping mess (and parent stress) to a minimum.
Frequently Asked Questions
What age can toddlers start doing Easter crafts?
You can start simple Easter crafts as early as 12-18 months. At this age, stick to sensory-based activities: mess-free paint bags, placing tissue paper on contact paper, and peeling large stickers. By 2, most toddlers can do glue-and-stick crafts, fingerpainting, and stamping activities. The key is matching the craft to the skill level — keep the steps minimal and the materials chunky and easy to grasp.
How do I keep my toddler from eating craft supplies?
First, the reality check: most toddlers under 2 will attempt to taste craft supplies at some point. Use only non-toxic, washable materials — this is non-negotiable for this age group. Avoid small items like individual googly eyes, small pom poms, or beads with children who still mouth objects. Supervise constantly, redirect calmly (“Paint goes on the paper, not in your mouth”), and keep a snack nearby so they’re not actually hungry while crafting. If mouthing is still a major issue, stick to mess-free paint bags and sticker activities where there’s nothing loose to grab.
My toddler won’t follow the craft instructions. Is that normal?
Completely, wonderfully, 100% normal. Toddlers are not miniature adults following a craft tutorial — they are tiny scientists conducting experiments. If you set up a bunny craft and your child just wants to squeeze glue for 10 minutes, that IS the craft. Process matters infinitely more than product at this age. If you want a craft that looks like the picture, make it yourself after bedtime. Your child’s job is to explore, not execute.
What’s the best type of paint for toddler Easter crafts?
Washable tempera paint is the gold standard for toddler crafts. It’s non-toxic, washes out of clothes and off surfaces, comes in bright colors, and has a thick consistency that doesn’t drip as much as watercolors. Crayola Washable Kids’ Paint and Colorations Washable Tempera are both excellent and widely available. For truly zero-mess painting, try paint inside sealed ziplock bags, or use dot markers (like Do A Dot markers) which are essentially paint in a self-contained stamper.
How long should I expect a toddler craft session to last?
For 18-month to 2-year-olds: 5-10 minutes is a great session. Do not expect more. For 2-3 year-olds: 10-15 minutes is typical. For 3-5 year-olds: 15-25 minutes is common, though some kids will happily craft for 45 minutes if they’re into it. The key is following your child’s lead. When they’re done, they’re done — even if you think the craft needs more cotton balls. It doesn’t. It’s perfect.
Can I adapt these crafts for a group or Easter party?
Absolutely. The best group crafts from this list are: Dot Sticker Eggs (#2), Torn Paper Eggs (#1), Cotton Ball Bunnies (#7), and Tissue Paper Sun Catchers (#16). These are easy to prep in bulk, don’t require much adult help per child, and have fast cleanup. Set up stations with pre-cut shapes and pre-portioned supplies, and let kids rotate through. Tip: pre-pour paint into muffin tins (one per station) and limit to 2-3 colors per station to prevent muddy paint mixing.
What do I do with all the finished Easter crafts?
Display your favorites (see the display section above), photograph everything, and then — here’s the part nobody says out loud — recycle most of it after a week or two. You cannot keep every craft your child makes or your house will be knee-deep in cotton ball bunnies by June. Take a photo, admire it together, display it for the holiday, and then let it go. Keep one or two special pieces per season in a memory box. The experience of making it was the point, not the permanence of the object.
Your Easter Crafting Game Plan
Here’s what I’d do if I had a free afternoon and a toddler or preschooler staring at me expectantly:
If you have 10 minutes: Dot Sticker Eggs or Mess-Free Paint Bags. Fast, minimal setup, no cleanup drama.
If you have 20 minutes: Pom Pom Stamped Eggs or Cotton Ball Bunny. Satisfying, tactile, and they produce something your child will be proud of.
If you have an hour: Set up a crafting station with 3-4 projects and let your child move between them. Start with painting (egg carton chicks or fork-printed chicks), then move to a sticking activity (tissue paper sun catchers), then finish with something calming (sticker mosaic or pasta necklace).
If you’re crafting with multiple ages: Pair the torn paper eggs (toddler) with the paper plate basket (preschooler). They’re both working, both engaged, and the older child doesn’t feel like they’re doing a “baby craft.”
Easter is April 5 this year, which means you have a beautiful window right now — the next two to three weeks — to pick a handful of these projects and spread them across several crafting sessions. You don’t have to do all twenty. You don’t have to do any of them perfectly. You just have to show up with some cotton balls and a glue stick and a willingness to let a tiny human put googly eyes in unexpected places.
That’s the whole secret, honestly. Show up. Let them lead. Clean up later.
Happy Easter crafting, friends. May your cotton balls stick and your paint stay washable.