Mess-Free Art Activities for Toddlers: 15 Creative Projects with Zero Cleanup
Discover 15 mess-free art activities for your toddler (ages 1-4) that build essential skills without the cleanup. You'll learn how these creative projects foster development using materials you already have, set up in under five minutes.
- Access 15 battle-tested mess-free art activities for your toddler.
- Develop your toddler's fine motor skills and creativity without the mess.
- Set up engaging art projects in under five minutes using common items.
- Understand how mess-free art provides the same developmental benefits.
- Explore activities like Squish Painting in a Zip-Lock Bag for easy fun.
Here is a scene that plays out in homes everywhere, every single day. Your toddler is restless. They need something creative to do. You know art is good for them. You know it builds fine motor skills, sparks imagination, and gives them a sense of accomplishment.
But you also know what happened last time.
Last time involved washable paint that was not as washable as the label promised, a kitchen table that looked like a crime scene, and a bath that took longer than the actual art project. You found a blue handprint on the wall three days later. The dog had something green in her fur for a week.
Here is the good news: your toddler can have a rich, creative art experience without destroying your house. Mess-free art is not a compromise. It is not watered-down creativity. When set up thoughtfully, mess-free activities develop the exact same skills as their messier counterparts, with the enormous bonus that you do not have to spend twenty minutes cleaning up afterward.
This guide contains 15 tested mess-free art activities that genuinely work for toddlers aged 1 through 4. Every activity develops real skills, uses materials you probably already have, and can be set up in under five minutes. Most importantly, every single one of these activities has been battle-tested by actual toddlers, who are, as we all know, the most ruthless product testers on the planet.
Let’s get creative without getting messy.
Why Mess-Free Art Still Develops Creativity and Motor Skills
Some parents worry that mess-free art is “less than” compared to traditional finger painting or clay sculpting. That concern is understandable, but it is based on a misconception.
The developmental value of art comes from the process, not the mess. When a toddler peels a sticker and places it on paper, they are practicing the same pincer grasp they would use holding a paintbrush. When they press their hands against a paint-filled bag and watch colors blend, they are learning the same color mixing concepts they would learn with open paint cups. When they tear tape and stick it to a surface, they are building the same bilateral coordination they develop with scissors.
Here is what mess-free art absolutely does develop:
- Fine motor skills. Peeling stickers, pressing through bags, placing items, and rubbing crayons all strengthen hand muscles and improve dexterity.
- Color recognition. Many of these activities involve vibrant colors that toddlers can name, sort, and mix.
- Cause and effect understanding. Press here, color appears there. Move your hand this way, the paint blends that way. Toddlers are learning that their actions create visible results.
- Focus and attention span. Art activities that last 10 to 20 minutes are building your toddler’s ability to sustain attention, which is a critical pre-academic skill.
- Creative expression. Even within a structured activity, toddlers make choices: which sticker to place where, which color to use, how hard to press. Those choices are creative decisions.
- Sensory exploration. Many mess-free activities still provide rich sensory input through textures, temperatures, and visual feedback, just without the cleanup consequences.
The goal is not to avoid mess forever. It is to have options. Some days are finger-painting days. Some days are mess-free days. Both have value, and both deserve a place in your toddler’s creative routine.
Bag and Window Art
These activities use sealed bags and transparent surfaces to let toddlers explore color and texture without anything touching their clothes, the table, or the floor.
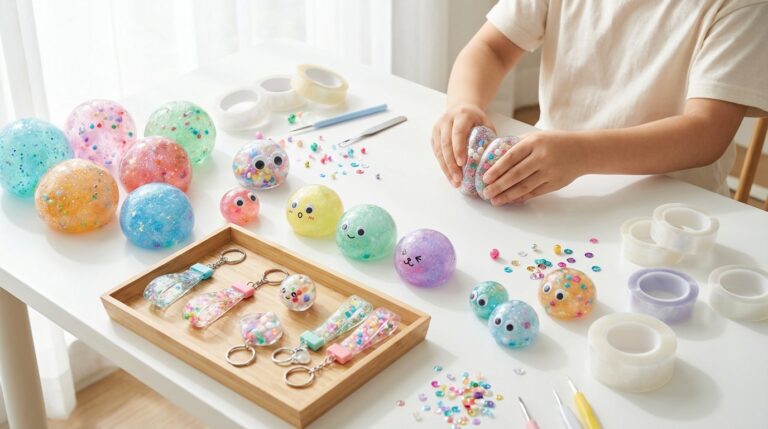
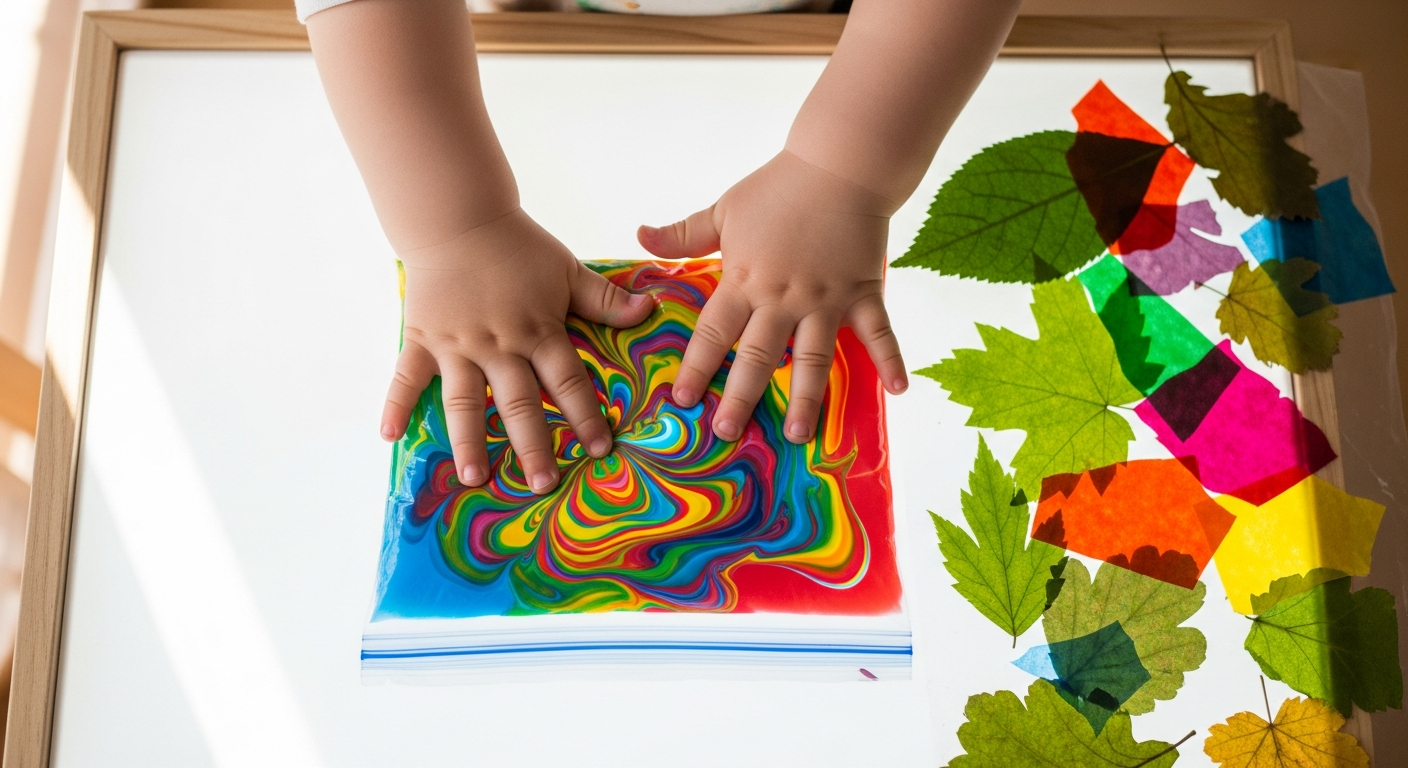
Activity 1: Squish Painting in a Zip-Lock Bag
Materials Needed:
- 1 gallon-size zip-lock bag (freezer bags are sturdiest)
- 2-3 colors of washable paint (or finger paint)
- Packing tape
- Optional: glitter, sequins, or small beads
Setup Instructions:
- Squeeze 3 to 4 quarter-size dollops of paint into the bag. Use 2 or 3 different colors and place them in different spots.
- If adding glitter or sequins, drop those in now.
- Squeeze out as much air as possible and seal the bag.
- Run a strip of packing tape along the sealed edge for extra security. This is the step that prevents disaster. Do not skip it.
- Tape the bag flat to a table, high chair tray, or window.
How To Do It:
Let your toddler press, squish, poke, and slide their fingers across the bag. They will watch the colors mix together, feel the paint shifting under the plastic, and discover that their hand movements create patterns. Taping the bag to a sunny window adds a beautiful backlit effect.
Skill Development:
This activity builds fine motor strength (pushing and pressing against resistance), color mixing concepts, and cause-and-effect understanding. The sensory feedback of the paint moving under the bag is soothing for many toddlers and can even work as a calming activity.
Age Tips:
- Ages 1-2: Tape the bag to the high chair tray so it stays flat and accessible. Use just 2 contrasting colors (red and yellow, or blue and yellow) for clear, dramatic mixing results.
- Ages 3-4: Let them use fingers, cotton swabs, or even toy cars on top of the bag to make tracks and patterns. Ask them to predict what color two paints will make when mixed.
Activity 2: Contact Paper Sticky Collage
Materials Needed:
- Clear contact paper (the kind used for lining shelves)
- Scissors
- Painter’s tape
- Collage materials: tissue paper pieces, feathers, yarn scraps, leaves, flower petals, pom-poms, googly eyes, fabric scraps
Setup Instructions:
- Cut a piece of contact paper roughly 12 by 18 inches.
- Peel off the backing to expose the sticky side.
- Tape the contact paper sticky-side-out to a wall, window, or table at your toddler’s height. For wall mounting, use painter’s tape on all four edges.
- Set out a bowl or tray of collage materials within reach.
How To Do It:
Your toddler picks up items from the tray and sticks them onto the contact paper. That is it. The items adhere to the sticky surface without any glue. They can peel items off and rearrange them. When finished, you can lay a second piece of contact paper on top (sticky sides together) to seal the collage and create a permanent piece of art that can hang in a window like stained glass.
Skill Development:
This activity is a powerhouse for fine motor skills. Picking up small items uses the pincer grasp. Placing them deliberately on the sticky surface develops hand-eye coordination and spatial awareness. Choosing which items to use and where to place them exercises creative decision-making.
Age Tips:
- Ages 1-2: Use larger items that are easy to grasp (big tissue paper pieces, large feathers, chunky pom-poms). Keep the contact paper lower on the wall or flat on the floor.
- Ages 3-4: Provide smaller, more varied items and suggest themes. “Can you make a garden?” “Can you make a face?” Encourage them to plan their design before sticking.
Activity 3: Window Painting with Dry-Erase Markers
Materials Needed:
- Dry-erase markers (the thick, toddler-friendly kind)
- A glass window or sliding glass door
- A damp cloth for erasing
Setup Instructions:
None. Seriously. Hand your toddler the markers and point them at the window.
How To Do It:
Let your toddler draw directly on the glass. Dry-erase markers wipe off glass surfaces with a damp cloth in seconds. The window becomes a giant, reusable canvas. Toddlers love the large scale (it is much more exciting than a piece of paper), and the ability to erase and start over removes any performance pressure.
Skill Development:
Drawing on a vertical surface strengthens shoulder and arm muscles differently than drawing on a table. It also promotes wrist extension, which is an important pre-writing skill. The large surface encourages big arm movements and full-body engagement.
Age Tips:
- Ages 1-2: Provide just 2 or 3 marker colors. Expect scribbles, and celebrate them. The act of making marks is the point.
- Ages 3-4: Draw simple shapes or letters on the window first and let them trace over or around them. Play games like “Can you draw a circle around the tree you see outside?”
Sticker and Tape Art
Stickers and tape are mess-free art staples. They come off fingers easily, they do not stain anything, and toddlers find them irresistible.
Activity 4: Sticker Scenes
Materials Needed:
- A variety of stickers (themed packs are great: animals, shapes, stars, vehicles)
- Plain paper or cardstock
- Optional: a printed background scene (a farm, an ocean, a road)
Setup Instructions:
- Set out the paper and open the sticker sheets.
- If using a themed background, print or draw a simple scene first (a green hill with a blue sky, a pond with some grass around it, a street with buildings).
How To Do It:
Your toddler peels stickers off the sheet and places them on the paper to create a scene, a pattern, or just a colorful arrangement. There is no wrong way to do this. A cow on a cloud? A star in the ocean? That is art.
Skill Development:
Peeling stickers is one of the best fine motor exercises for toddlers. It requires thumb and finger coordination, controlled pulling force, and the ability to manipulate a thin, slightly tricky material. Placing stickers develops spatial awareness and creative thinking.
Age Tips:
- Ages 1-2: Partially peel the stickers off the backing sheet ahead of time so your toddler can grab them more easily. Use large stickers at first.
- Ages 3-4: Use smaller stickers for a greater fine motor challenge. Provide themes and encourage storytelling: “Tell me about the picture you are making.”
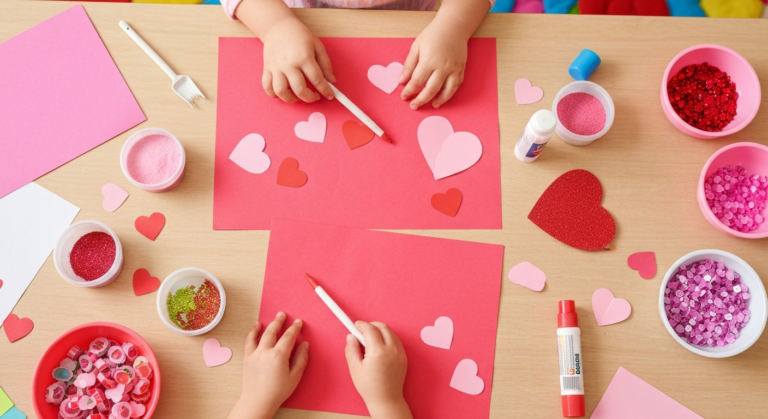
Activity 5: Tape Resist Art
Materials Needed:
- Painter’s tape or washi tape
- Paper or cardstock
- Crayons, colored pencils, or dot markers
Setup Instructions:
- Tear strips of painter’s tape or washi tape and stick them onto the paper in random lines, crosses, or simple shapes (a star, a heart, the first letter of your child’s name).
- Set out crayons or dot markers.
How To Do It:
Your toddler colors over the entire paper, including over the tape. When they are done, carefully peel off the tape to reveal the white lines or shapes underneath. The big “reveal” moment is incredibly satisfying for toddlers.
Skill Development:
Coloring over the tape develops grip strength, pressure control, and full-arm coordination. The reveal teaches patience and introduces the concept of positive and negative space. It also gives toddlers the thrill of a surprise result, which builds motivation for future art projects.
Age Tips:
- Ages 1-2: Use wide painter’s tape in simple straight lines. Give them chunky crayons or dot markers, which are easier to grip. Keep the coloring area small.
- Ages 3-4: Create more complex tape designs. Let them help apply the tape. Use the activity to practice letter recognition by taping letters and having them color around them.
Activity 6: Washi Tape Murals
Materials Needed:
- Multiple rolls of washi tape in different colors and patterns
- A large piece of paper, cardboard, or a section of wall protected with butcher paper
Setup Instructions:
- Tape a large piece of butcher paper or cardboard to the wall at toddler height. Or if you use washi tape directly on a smooth wall, it peels off cleanly without damage (test a small area first).
- Set out the washi tape rolls.
How To Do It:
Your toddler tears or cuts (with child-safe scissors for ages 3 and up) strips of washi tape and sticks them to the surface to create designs, roads, buildings, abstract patterns, or whatever they imagine. They can layer tapes, make shapes, and peel and reposition as they go.
Skill Development:
Tearing tape develops bilateral coordination (one hand holds, the other tears). Placing tape on a vertical surface builds shoulder stability and upper body strength. The open-ended nature of the activity promotes creative expression and spatial planning.
Age Tips:
- Ages 1-2: Pre-tear tape strips and stick them lightly to the edge of a table where your toddler can pull them off and apply them to the paper. Focus on the pull-and-stick motion.
- Ages 3-4: Let them tear their own tape. Suggest a collaborative project: “Let’s make a city with tape roads and buildings.” Introduce patterns (alternating colors, stripes, borders).
Crayon and Color Activities
Crayons are the OG mess-free art supply. They do not spill, they do not stain (much), and they give toddlers direct control over their mark-making.
Activity 7: Crayon Rubbings
Materials Needed:
- Crayons with the paper wrapping removed
- Thin paper (printer paper or newsprint works best)
- Textured objects: coins, leaves, textured placemats, lace, corrugated cardboard, keys, stencils, sandpaper
Setup Instructions:
- Gather a collection of textured items and place them on a flat surface.
- Remove the paper wrappers from several crayons so your toddler can use the long side.
How To Do It:
Place a textured object under the paper. Show your toddler how to hold the crayon on its side and rub back and forth across the paper. The texture of the object appears on the paper like magic. Try different objects and different crayon colors for a full exploration.
Skill Development:
Crayon rubbings develop pressure control (too light and nothing shows, too hard and the paper tears), grip variety (using the side of the crayon is different from the tip), and observational skills (noticing patterns and textures). It also introduces the concept of cause and effect in a highly visual way.
Age Tips:
- Ages 1-2: Tape the paper down to prevent sliding. Use large, bold textures that show up easily (corrugated cardboard, textured placemats). You may need to guide their hand at first.
- Ages 3-4: Send them on a texture hunt around the house. Can they find 10 different textures to rub? Let them create a “texture collection” page.
Activity 8: Dot Marker Pages
Materials Needed:
- Dot markers (also called bingo daubers or do-a-dot markers)
- Printed dot marker coloring pages (widely available free online) or plain paper
- Optional: paper plates or cardstock for sturdier surfaces
Setup Instructions:
- Print a few dot marker pages or draw simple outlines with large circles inside them.
- Set out the dot markers. They come in a wide range of colors.
How To Do It:
Your toddler stamps the dot marker inside the circles or uses them freely on blank paper. Dot markers produce a satisfying round stamp with each press. They do not require controlled fine motor skills the way crayons do, which makes them ideal for younger toddlers who are still developing grip strength.
Skill Development:
The stamping motion strengthens hand muscles and develops controlled downward pressure. Following the dots into designated circles builds hand-eye coordination and early pre-writing skills. Color identification is built into the activity naturally as toddlers choose which marker to use.
Age Tips:
- Ages 1-2: Use blank paper and let them stamp freely. The goal is simply the hand motion and the cause-and-effect of pressing and seeing color appear. Use smocks or old shirts even though dot markers are relatively clean. Relatively.
- Ages 3-4: Use printed pages with letters, numbers, or complex designs. “Fill in all the circles in the butterfly with blue.” This builds following directions and color matching.
Activity 9: Color-by-Sticker Pages
Materials Needed:
- A color-by-sticker book (widely available at bookstores and online) or DIY version
- For DIY: printed simple image outlines divided into numbered sections, with matching numbered colored stickers
Setup Instructions:
For store-bought books, simply open to a page. For DIY versions, draw or print a simple image (a fish, a flower, a house), divide it into large sections, number each section, and provide corresponding numbered stickers in different colors.
How To Do It:
Your toddler matches the sticker number or color to the correct section on the page and places it there. As they fill in sections, the image gradually reveals itself. It is like painting by numbers, but with stickers instead of paint.
Skill Development:
This activity combines fine motor skills (peeling and placing stickers), color recognition, number matching (for older toddlers), and patience. The gradual reveal of the image teaches delayed gratification and sustained effort.
Age Tips:
- Ages 1-2: Skip the numbering system. Simply provide large colored stickers and an outline, and let them fill it in however they like.
- Ages 3-4: Use the numbered system for color matching. Increase complexity with more sections and more colors. Celebrate the finished product.
Sensory-Safe Art
These activities provide rich sensory experiences using materials that are taste-safe (because we all know where toddler hands end up) and cleanup-friendly.
Activity 10: Edible Finger Paint
Materials Needed:
- Plain yogurt (vanilla or unflavored)
- Food coloring
- A high chair tray, baking sheet, or plastic placemat
- Optional: whipped cream as an alternative base
Setup Instructions:
- Scoop a few tablespoons of yogurt into 3 or 4 small bowls.
- Add a few drops of a different food coloring to each bowl and stir.
- Dollop the colored yogurt onto the tray or baking sheet.
How To Do It:
Let your toddler smear, spread, swirl, and mix the colored yogurt with their hands. They can explore freely knowing that every material on the tray is completely safe to eat. This is particularly valuable for babies and young toddlers who mouth everything.
Skill Development:
This is a full sensory experience: the cool temperature of the yogurt, the smooth texture, the bright colors, and yes, the taste. It develops tactile awareness, color mixing concepts, and fine motor control as toddlers use their fingers, palms, and even forearms to spread the “paint.”
Age Tips:
- Ages 1-2: This is the perfect first art experience for babies and young toddlers. The edible nature means zero stress about what goes in their mouth. Keep it on the high chair tray for easy cleanup.
- Ages 3-4: They may be past the mouthing stage, but the sensory experience is still valuable. Add tools like popsicle sticks, forks, or cookie cutters for pattern-making. Challenge them to mix specific colors.
Activity 11: Water Painting on Concrete
Materials Needed:
- A cup or bucket of plain water
- Large paintbrushes (the cheap kind from the hardware store or dollar store)
- A sidewalk, driveway, patio, or concrete stepping stones
Setup Instructions:
Pour water into a cup or small bucket. Hand your toddler a paintbrush. Go outside.
How To Do It:
Your toddler dips the brush in water and “paints” on the concrete. The water creates dark marks on the dry surface that look just like real paint. They can draw shapes, write letters, paint pictures, or just enjoy the sweeping brush strokes. As the water evaporates, the art disappears, and they can start again on a fresh “canvas.” This is a deeply satisfying activity that many toddlers will happily do for 30 minutes or more.
Skill Development:
Holding a paintbrush builds grip strength and wrist control. Painting on a large surface develops gross motor skills and full-arm movement. The temporary nature of the art removes performance pressure and encourages experimentation. The concept of evaporation can be introduced naturally: “Where did your painting go?”
Age Tips:
- Ages 1-2: Use a wide brush and a shallow container of water. Expect more dunking and dripping than actual painting, and that is perfectly fine. The process is the point.
- Ages 3-4: Give them multiple brush sizes and a bucket. Challenge them to paint a mural, write their name, or race against the evaporation. On a hot day, the fast disappearing act adds excitement.
Activity 12: Ice Cube Painting
Materials Needed:
- Ice cube tray
- Water
- Food coloring
- Popsicle sticks or toothpicks
- Paper (cardstock or watercolor paper holds up best)
Setup Instructions:
- Fill an ice cube tray with water.
- Add a few drops of food coloring to each compartment (vary the colors).
- Place a popsicle stick or toothpick into each compartment as a handle.
- Freeze until solid (at least 4 hours or overnight).
How To Do It:
Pop the colored ice cubes out of the tray. Your toddler holds the popsicle stick handle and glides the ice cube across the paper. As the ice melts, it leaves beautiful, translucent trails of color. The colors blend where they overlap. The paper gets damp but not soaked if you use cardstock or watercolor paper.
Skill Development:
This activity engages multiple senses simultaneously: the cold temperature, the smooth gliding sensation, and the visual feedback of color appearing. It builds grip strength (holding the stick), controlled movement, and introduces concepts like melting, temperature, and color blending.
Age Tips:
- Ages 1-2: Supervise closely since ice cubes can be a choking risk. Use large ice molds instead of standard cubes for easier (and safer) gripping. Let them explore the cold sensation and the color trails without any expectations about what they “should” paint.
- Ages 3-4: Encourage them to mix colors intentionally. “What happens when your blue ice touches the yellow trail?” Let them create a picture with the ice and then paint over it with regular watercolors once dry for a layered effect.
Digital-Free Tracing and Transfer Art
These activities focus on the satisfying process of reproducing images and patterns without screens.
Activity 13: Light Table Tracing
Materials Needed:
- A light source: a tablet with the screen brightness on maximum showing a white screen, a window during daytime, or an actual light table if you have one
- Plain white paper
- Printed simple images or coloring pages underneath
- Crayons, markers, or colored pencils
Setup Instructions:
- Tape the printed image to the window or place it on the light table.
- Tape a blank sheet of paper directly over it.
- The light shining through makes the image visible under the blank paper.
How To Do It:
Your toddler traces the lines they can see through the paper. For young toddlers, use very simple images with bold, thick lines (a circle, a star, a simple fish). For older toddlers, increase complexity. The tracing feels like “magic” because they can see the guide image glowing through the paper.
Skill Development:
Tracing develops pre-writing skills by teaching controlled pencil movement along a guided path. It builds hand-eye coordination, fine motor control, and patience. The sense of accomplishment when they complete a traced image boosts confidence.
Age Tips:
- Ages 1-2: This is better suited for the older end of the age range (18 months and up). Use extremely simple shapes with thick lines. Accept that “tracing” will be approximate scribbling near the lines, and that is developmentally appropriate.
- Ages 3-4: Use more detailed images. Encourage them to trace first, then color in their traced picture. Compare the original to their tracing and celebrate the similarities.
Activity 14: Mess-Free Stamp Art with Foam Stickers
Materials Needed:
- Foam craft stickers (the thick, adhesive-backed kind available at craft stores)
- Wooden blocks, cardboard squares, or large bottle caps (as stamp bases)
- An ink pad (washable ink) or a thin layer of washable paint on a paper plate
- Paper
Setup Instructions:
- Peel foam stickers and press them onto the flat surface of wooden blocks or cardboard squares to create custom stamps.
- Press the ink pad or dip the stamp lightly into the thin paint layer.
- Set out paper for stamping.
How To Do It:
Your toddler presses the stamp onto the ink pad (or paint), then stamps it onto the paper. The foam shapes create clean, repeating prints. Because the paint is contained on the pad and the stamp, mess is minimal. Create patterns, scenes, or abstract art with repeated stamping.
Skill Development:
Stamping develops controlled downward pressure, hand-eye coordination (lining up the stamp where they want it), and patterning skills. Making custom stamps from foam stickers adds a design element. The repetitive motion is also calming and meditative for many toddlers.
Age Tips:
- Ages 1-2: Use pre-made stamps with large handles. Ink pads are easier than paint for this age since there is less dripping. Accept that stamps will overlap and placement will be random.
- Ages 3-4: Let them design their own foam stamps. Introduce patterns: “Can you stamp a row of stars, then a row of hearts?” Make wrapping paper, greeting cards, or book covers with their stamp art.
Activity 15: Sandpaper and Crayon Transfer Art
Materials Needed:
- Fine-grit sandpaper (220 grit or higher for a smoother surface)
- Crayons
- Plain white paper
- An iron (for the transfer step, adult only)
- An old towel or cloth
Setup Instructions:
- Cut the sandpaper to a manageable size (roughly the size of a standard piece of paper).
- Set out crayons with wrappers removed.
How To Do It:
- Have your toddler draw on the rough side of the sandpaper using crayons. The sandpaper grips the crayon wax and produces intensely vibrant, thick colors that look completely different from coloring on regular paper. The texture makes every stroke bold and saturated.
- When the drawing is complete, place it crayon-side-down on a piece of white paper.
- Place the old towel on top.
- An adult carefully presses a warm iron (low heat, no steam) over the towel for about 10 to 15 seconds.
- Lift the sandpaper to reveal a mirror-image transfer of the drawing on the white paper.
Skill Development:
Drawing on sandpaper develops significant grip strength because more pressure is needed to make marks than on regular paper. The textured surface provides proprioceptive feedback that helps toddlers develop pressure awareness. The transfer step introduces concepts of mirror images and cause and effect.
Age Tips:
- Ages 1-2: Focus only on the sandpaper drawing step. The texture is the exciting part for this age. Skip the ironing transfer and display the sandpaper art directly.
- Ages 3-4: Complete the full activity including the transfer. Let them compare the original sandpaper art to the paper transfer. Talk about how the image is reversed. Try different color combinations and see which produce the most vibrant transfers.
The Developmental Benefits of Art for Toddlers
Understanding WHY art matters helps you prioritize it even on busy days. Here is what art activities, messy or mess-free, actually do for your toddler’s development.
Fine Motor Skills
Every art activity in this guide strengthens the small muscles in your toddler’s hands and fingers. Peeling stickers, gripping crayons, pressing stamps, and pinching tape all develop the same muscles that your child will eventually need for writing, buttoning shirts, using utensils, and tying shoes. Art is pre-writing practice disguised as fun.
Color Recognition
By age 2, most toddlers can begin identifying basic colors. Art activities reinforce color names naturally. “You picked the red marker! Look at that red circle you made!” Repetition in a playful context is the most effective way toddlers learn color vocabulary.
Creativity and Self-Expression
Even mess-free art gives toddlers choices. Which sticker to use. Where to place the tape. What color crayon to pick. These small decisions are the foundation of creative thinking. A toddler who regularly makes creative choices builds confidence in their own ideas.
Focus and Attention Span
Art activities require sustained attention, which is a skill that develops gradually. A 1-year-old might engage for 3 minutes. A 4-year-old might focus for 20 minutes. Both are building their attention muscles. Do not pressure your toddler to finish an activity. When they are done, they are done. The practice of focusing, however briefly, is the benefit.
Emotional Regulation
Art can be deeply calming. The repetitive motions of stamping, coloring, and sticking are soothing for toddlers who are overwhelmed. Many of the activities in this guide (squish painting, water painting, crayon rubbings) are inherently meditative. Keep these in your toolkit for moments when your toddler needs to regulate their emotions.
Language Development
Art time is conversation time. “What color is that? What are you making? Tell me about your picture.” These open-ended questions during art activities expand vocabulary, encourage storytelling, and give toddlers practice expressing their ideas verbally.
How to Set Up a Toddler Art Station
Having a dedicated space for art eliminates the “where should we do this” friction that stops many parents from offering art activities regularly.
Choose the Right Location
The best spot is somewhere with easy-to-clean surfaces, good lighting, and minimal precious belongings nearby. Top options:
- Kitchen table with a plastic tablecloth or silicone mat underneath
- High chair tray for the youngest toddlers (contained and at the right height)
- A small child-size table and chair dedicated to art in a corner of the playroom or kitchen
- An easel for vertical art (painting, drawing, and sticker activities)
Stock the Station
Keep these mess-free supplies organized and within your reach (not your toddler’s unsupervised reach):
| Supply | Why You Need It |
|---|---|
| Chunky crayons | Easy to grip, hard to break, washable |
| Dot markers | Satisfying, bold colors, minimal mess |
| Sticker sheets | Fine motor goldmine, variety of themes |
| Painter’s tape or washi tape | Reusable, repositionable, no residue |
| Zip-lock bags (gallon size) | Squish painting, sensory play |
| Contact paper | Sticky collages, window art |
| Dry-erase markers | Window drawing, whiteboard play |
| Plain paper and cardstock | Every activity needs a canvas |
| Smocks or old t-shirts | For the rare occasion things get damp |
Create a Routine
Toddlers thrive on routine. Consider making art a regular part of your day:
- Morning art time after breakfast while the high chair is already out
- After nap as a calm, focused transition activity
- While you cook dinner as an independent activity (for age-appropriate, supervision-free options like stickers and crayons)
Even 10 to 15 minutes of daily art practice adds up to enormous skill development over weeks and months.
Display Their Work
When toddlers see their art displayed, they learn that their creative efforts have value. Hang a simple clothesline with clips in the playroom or use painter’s tape to create a rotating gallery wall. For 3D creations, dedicate a shelf. Rotate regularly, photograph what you take down, and save a few special pieces in a keepsake box.
When to Introduce Messy Art (Developmental Readiness Signs)
Mess-free art is wonderful, but there comes a time when your toddler is ready for the full sensory experience of open paint, clay, and glue. Here are signs they are developmentally ready to get messy.
They keep their hands mostly on the activity. If your toddler can do a squish bag without immediately trying to open it and pour paint on the floor, they may be ready for open paint with supervision.
They follow simple instructions. “Keep the paint on the paper” is an instruction. If your toddler can follow basic guidance like this (most of the time, nobody is perfect), they can handle messier materials.
They show sustained interest. A toddler who engages with art for 10 or more minutes has the attention span to participate in a messier activity that requires more setup and cleanup.
They are past the “everything in my mouth” stage. Non-edible art supplies like glue, standard paint, and clay should only be introduced when mouthing is no longer a primary exploration method, typically around age 2 to 2.5 for most children.
They express interest in messy play. If your toddler is drawn to mud, water play, or food smearing, they are signaling readiness for sensory-rich art. Follow their lead.
You are emotionally ready. This one matters too. If the thought of open paint fills you with dread, it is completely fine to stick with mess-free options. Your stress level affects your toddler’s experience. A relaxed parent doing sticker art with their child creates a better creative environment than a stressed parent hovering over open paint. Be honest with yourself about what you can handle today.
The Gradual Introduction Approach
You do not have to go from zip-lock bag painting to full-body finger painting in one leap. Here is a gentle progression:
- Start with mess-free activities (everything in this guide).
- Introduce “contained mess” activities. Painting with brushes on paper at the table, using playdough on a mat, gluing pre-cut shapes. Mess exists but stays in one area.
- Move to “supervised mess” activities. Finger painting on paper, painting with unusual tools (sponges, cotton balls, forks), watercolor explorations.
- Embrace “full mess” activities. Outdoor mud painting, body painting (washable, in the bathtub), large-scale spray painting on butcher paper, slime-making.
Each step introduces a bit more sensory input and a bit more cleanup. Move at whatever pace works for your family.
Crafty Mama
Crafty Mama is a former elementary art teacher turned stay-at-home parent who believes every child is creative — they just need the right invitation. She develops age-appropriate activities, crafts, and projects that spark imagination while keeping mess (and parent stress) to a minimum.
Frequently Asked Questions
What age can toddlers start doing art activities?
Toddlers can begin simple art activities as early as 10 to 12 months. At this age, focus on taste-safe materials like edible finger paint (yogurt with food coloring) and water painting. By 18 months, most toddlers can handle chunky crayons, stickers with pre-peeled edges, and squish bag activities. By age 2, the full range of mess-free activities in this guide becomes accessible. Remember that every child develops at their own pace, so follow your toddler’s interest and ability level rather than strict age guidelines.
Are mess-free art activities really as beneficial as messy ones?
Yes, for fine motor development and creative expression, mess-free activities are genuinely comparable to messy ones. The developmental value of art comes from the process of making decisions, manipulating materials, and creating something, not from the mess itself. Where messy art does offer an advantage is in full-body sensory input. The feeling of paint between fingers, the squish of clay, and the slipperiness of wet materials provide tactile experiences that mess-free alternatives cannot fully replicate. The best approach is to use both types depending on the day and your capacity.
My toddler eats everything. Is art safe?
For toddlers who are still in the mouthing stage (typically under 2), stick exclusively with taste-safe materials. Edible finger paint made from yogurt, water painting, and food-coloring-based ice cube painting are all completely safe to taste. Crayons are non-toxic but should still be supervised. Avoid anything small enough to be a choking hazard (small stickers, beads, pom-poms) unless you are sitting right there. As your toddler moves past the mouthing stage, gradually introduce standard non-toxic art supplies while continuing to supervise.
How long should I expect a toddler to engage with an art activity?
Attention spans vary widely by age and individual temperament. As a general guide: 12 to 18 months old may engage for 2 to 5 minutes. 18 to 24 months old may focus for 5 to 10 minutes. 2 to 3 years old typically sustain 10 to 15 minutes. 3 to 4 years old can often focus for 15 to 25 minutes. These are averages, not targets. Some toddlers will happily sticker for 30 minutes. Others are done after 3. Both are normal. Never force a toddler to continue an activity they have lost interest in. Short, frequent art sessions are more valuable than long, forced ones.
How do I keep mess-free art truly mess-free?
The “mess-free” label means dramatically less mess, not zero mess. A few tips to keep things as clean as possible: Always tape squish bags shut with packing tape (the zip-lock alone will eventually fail under toddler enthusiasm). Use smocks or old shirts even for “clean” activities. Put a plastic tablecloth or silicone mat under the work surface. Choose washable versions of every supply. Keep a damp cloth nearby for quick hand wipes. And accept that some minor mess is part of life with a toddler. The goal is manageable, not pristine.
What if my toddler shows no interest in art activities?
Some toddlers are simply not drawn to art, and that is completely normal. A few strategies: try different types of activities (a child who dislikes coloring might love stickers or stamping). Change the setting (try outdoor water painting if indoor activities fall flat). Make it social (do art alongside them rather than watching them). Reduce pressure (never say “make something” or “draw a picture;” instead, just put materials out and see what happens). Some children come to art later, around age 3 or 4, when their motor skills catch up with their interest. In the meantime, offer the materials without expectation and let them come to it on their own terms.
Can I use these activities for quiet time or independent play?
Several of these activities work well for supervised independent play for toddlers aged 3 and up: sticker scenes, dot marker pages, color-by-sticker books, crayon coloring, and washi tape murals are all activities that an older toddler can manage without direct adult involvement. For younger toddlers (under 2.5), all activities should be supervised. Even mess-free activities can become choking hazards if small pieces are involved, and young toddlers may find creative ways to turn any material into a mess. That said, even supervised art gives YOU a calmer period because your toddler is focused and engaged, which is a win for everyone.
Go Ahead and Hand Them the Crayons
Art with a toddler does not have to mean a paint-splattered kitchen and a 20-minute cleanup. It can be a sticker on a page. A crayon rubbing of a leaf. A zip-lock bag full of swirling color pressed against a sunny window. A water paintbrush on a warm sidewalk that dries to nothing, ready for the next masterpiece.
The most important thing is not what activity you choose. It is that you make space for creativity in your toddler’s day. Ten minutes of mess-free art practice, done regularly, builds more skills and confidence than an elaborate Pinterest-worthy project done once a month.
Your toddler does not care if their art is messy or mess-free. They care that they are making something, that someone is watching them make it, and that the thing they made gets taped to the fridge.
So grab the stickers, tear off some tape, hand them a crayon, and let them create. Your kitchen will survive. Your toddler will thrive. And the art on your fridge will be priceless, even if nobody can quite tell what it is.