Sticker Activities Beyond Just Sticking
Discover a dozen creative sticker activities for ages 18 months to 6, transforming simple dots into tools for math, literacy, art, and fine motor skill development. You'll also learn essential safety rules and the best sticker types for different age groups.
- Utilize stickers for diverse learning in math, literacy, art, and fine motor skills.
- Closely supervise children under 4; treat all stickers as small parts due to choking risk.
- Choose appropriate sticker types, noting age restrictions for foam and googly eyes.
- Engage your child with activities like Number Match, Pattern Strips, or Sticker Peel Practice.
This post contains affiliate links. As an Amazon Associate I earn from qualifying purchases.
I used to think stickers were just reward-chart currency and notebook decoration. Then I opened our junk drawer, found a pile of half-used sheets, and realized we’d been wasting a very cheap learning tool.
Below are a dozen sticker activities for ages 18 months to 6, covering math, letters, art and fine motor skills. Most need only dot stickers, paper and a marker.
In this article (10 sections)
- Sticker Activities at a Glance
- Sticker Safety Rules for Toddlers
- Best Stickers for Toddlers and Preschoolers
- Sticker Math Activities for Toddlers and Preschoolers
- Sticker Letter, Name and Story Activities
- Sticker Art Projects for Kids
- Sticker Fine Motor Activities for Ages 18 Months to 5
- Why Stickers Help Little Hands
- Sticker Tips: Buying, Storing and Cleanup
- Sticker Activity FAQ
Sticker Activities at a Glance
| Activity | Age | Main skill | Materials |
|---|---|---|---|
| Number Match | 3+ | Counting | Paper, dots |
| Sticker Graphing | 4+ | Sorting, comparing | Graph, dots, blocks |
| Pattern Strips | 3+ | Patterns | Paper strips, dots |
| Storytelling Scenes | 3+ | Vocabulary | Scene, theme stickers |
| Letter Hunt and Stick | 4+ | Letter recognition | Magazine, removable dots |
| Name Sticker Art | 3+ | Name recognition | Bubble-letter name |
| Dot Sticker Masterpieces | 3+ | Color, patience | Paper, colored dots |
| Sticker Resist Art | 3+ (with help) | Art concepts | Watercolor paper, paint |
| Googly Eye Everything | 4+ | Placement, humor | Eye stickers, phone |
| Dot-to-Dot Placement | 2+ | Hand-eye coordination | Marker circles, dots |
| Line Tracing | 3+ | Pre-writing | Thick-marker lines, dots |
| Sticker Peel Practice | 18 months+ | Pincer grasp | Large stickers |
Sticker Safety Rules for Toddlers
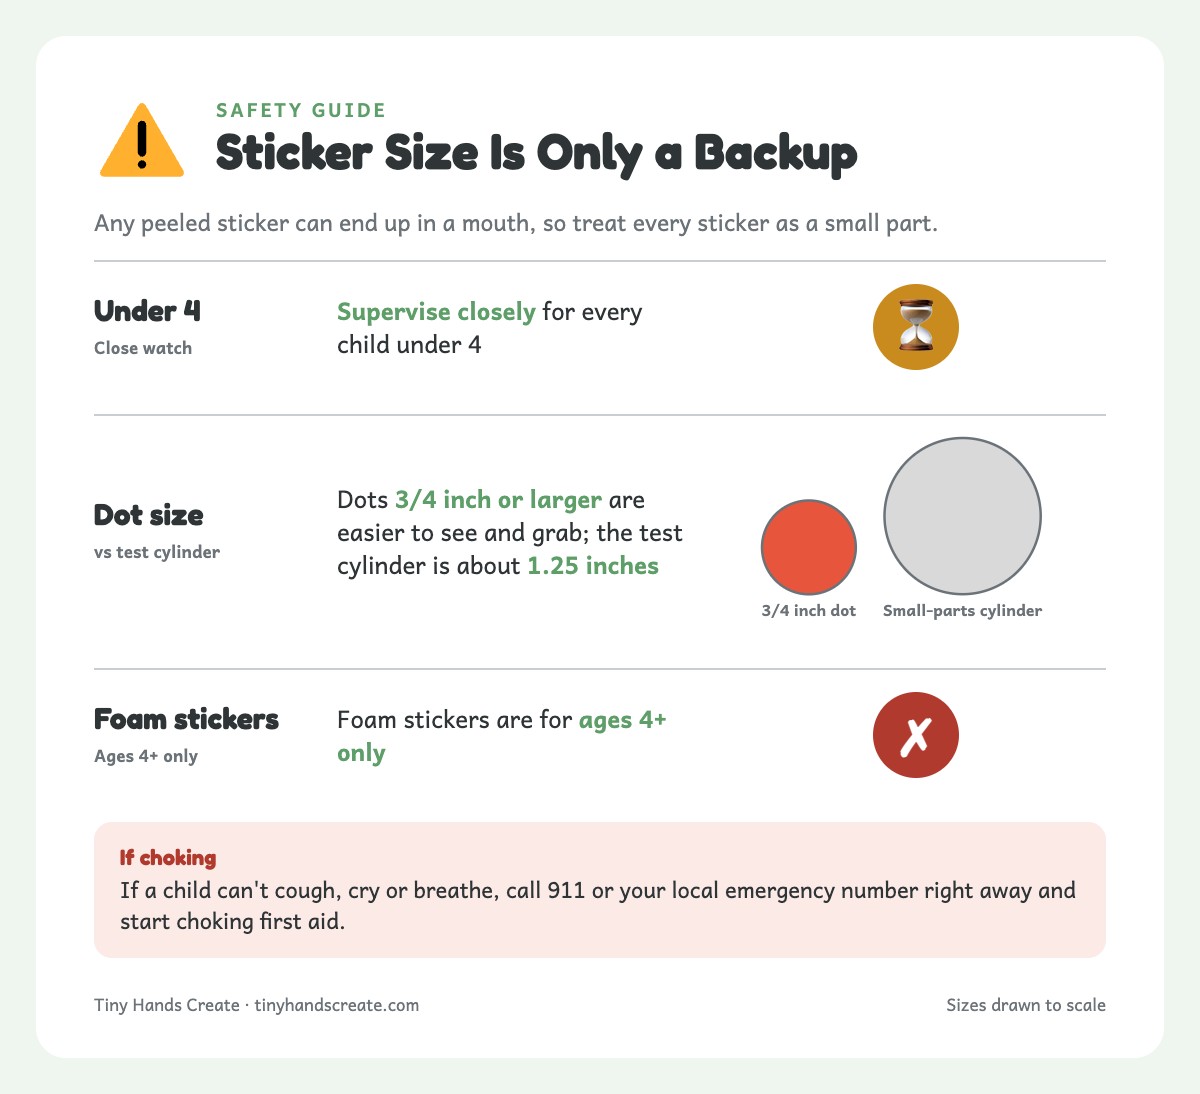
Safety firstAny peeled sticker can end up in a mouth, so supervision matters more than dot size. These are my rules of thumb, not an official standard.
- Supervise closely for every child under 4.
- Size is a backup, not a safeguard. I pick dots 3/4 inch or larger for under-4s because they are easier to see and grab. A flat sticker of any size can still be mouthed.
- For reference, the standard small-parts test cylinder is about 1.25 inches wide. Most stickers fit inside it, so treat every sticker as a small part.
- Foam stickers are for ages 4+ only.
- For googly eyes, use flat printed or flat adhesive eye stickers, ages 4+ only. Skip the kind with loose plastic wiggle eyes for under-4s. Check each one after play and count them back.
- Collect loose stickers and backing sheets after every session, and keep spares out of reach.
- Throw away torn or chewed stickers, and keep stickers off faces and mouths.
- If a child puts a sticker in their mouth, remove it right away.
- Choking is an emergency. If a child can’t cough, cry or breathe, call 911 or your local emergency number right away and start choking first aid.
- If they swallowed a sticker but are breathing normally, call your doctor or Poison Control (1-800-222-1222 in the US).
Best Stickers for Toddlers and Preschoolers
| Sticker type | Best for | Age and safety note | Watch out for |
|---|---|---|---|
| Round dots (office supply aisle) | Math, patterns, targeting | Supervise closely; 3/4 inch or larger is easier to grab | Permanent adhesive can tear paper |
| Foam stickers | Tactile play, easy peeling | Ages 4+ only | Pieces can be bitten off; bin torn or chewed ones |
| Theme stickers (animals, stars, letters) | Sorting and storytelling | Check size; supervise under 4 | Tiny shapes are easy to swallow |
| Flat googly-eye stickers | Silly indoor photo play | Ages 4+ only; choose flat printed or flat adhesive eyes and count them back | Plastic wiggle eyes can pop off; peel every sticker off afterward |
| Repositionable stickers / window clings | Moving pieces around | Supervise under 4 | Lose stickiness with lots of handling |
Sticker Math Activities for Toddlers and Preschoolers
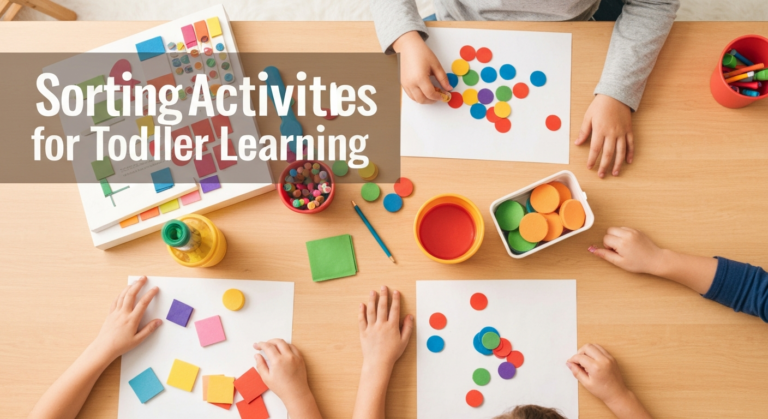
Once placed, they stay put, so you can see exactly what your child counted or sorted.
Number Match (Ages 3+)
Materials: Paper with large numbers 1-10 written on it, round dot stickers
Write a large number on paper. Your child places that many stickers next to it: three stickers for a 3, seven for a 7.
This builds number recognition, counting and one-to-one correspondence, the idea that each sticker is one unit. Follow up with our number tracing worksheets when they’re ready to write the numbers.
For an advanced version, draw empty ten-frames (2×5 grids). Have children fill them with the right number of dots.
Sticker Graphing (Ages 4+)
Materials: Paper with a simple bar graph drawn on it, colored dot stickers, and large colored objects to sort (blocks, big pom poms, toy cars)
Good to knowThis one is for ages 4+. For under-4s, skip small items like buttons and pasta and sort big blocks or large pom poms into cups instead. If you use candy, check for allergens such as peanut, milk and soy.
- Draw the grid. Put color labels along the bottom.
- Sort the objects. Your child groups them by color.
- Stick one per item. Each sticker goes in the matching column.
- Compare. Ask “Which color has the most? The fewest? How many more red ones are there than blue?”
Pattern Strips (Ages 3+)
Materials: Strips of paper (about 2 inches wide), colored dot stickers in 2-4 colors
Start a pattern on the strip — red, blue, red, blue — and challenge your child to continue it using stickers. Begin with simple AB patterns for younger kids, then try ABC, AABB and ABB.
| Pattern | Sample sequence |
|---|---|
| AB | red, blue, red, blue |
| ABC | red, blue, yellow, red, blue, yellow |
| AABB | red, red, blue, blue, red, red, blue, blue |
Patterns help build early math thinking. Peeling and placing each sticker slows kids down enough to think about what comes next. For more practice, try our pattern worksheets for preschool.
Sticker Letter, Name and Story Activities
Real print, your child’s own name and a made-up story all make stickers feel like a game.
Sticker Storytelling Scenes (Ages 3+)
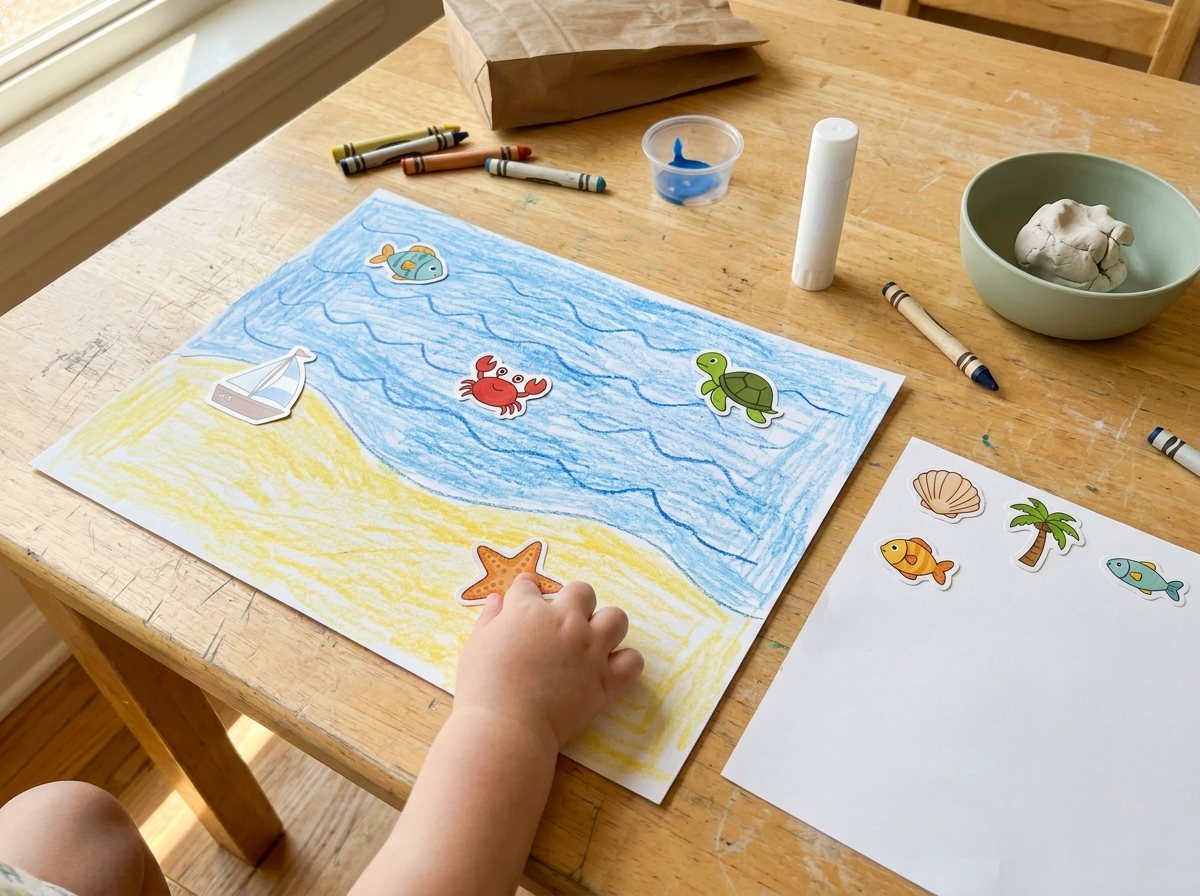
Materials: A large piece of paper with a simple background drawn on it (a house, a field, an ocean), theme stickers (animals, people, vehicles, trees)
Draw a basic scene, such as a blue ocean with a sandy beach or a green field with a fence. Hand your child some themed stickers and invite them to build a story by placing characters in the scene.
Ask story-building questions as they go: “Where is the fish going? Who lives in that house? What’s the dog looking at?” Write their story at the bottom of the page. It builds vocabulary and shows that stories have characters, settings and events.
Letter Hunt and Stick (Ages 4+)
Materials: A printed alphabet page, a magazine or junk mail, removable dot stickers or transparent sticky flags
Open a magazine or junk mail to any page. Call out a letter, have your child find it, then place a small sticker on it. Hunting through real text makes this feel more like a game than flashcards.
For kids who know their letters, ask them to sticker every word that starts with a certain sound. Never use library books or favorite picture books, since permanent dots tear the pages. Our alphabet worksheets make a good follow-up.
Name Sticker Art (Ages 3+)
Materials: A piece of paper with the child’s name written in large bubble letters, small stickers of their choice
Write your child’s name in large outline letters and let them fill each letter with stickers. It mixes name recognition, letter-shape awareness and fine motor placement. Hang the finished art on their bedroom door.
Sticker Art Projects for Kids
Here the stickers are the art supplies. Dots cover color, and removable stickers handle the painting projects.
Dot Sticker Masterpieces (Ages 3+)
Materials: White paper or canvas, round dot stickers in multiple colors
Challenge your child to make a whole picture using only round dot stickers, with no crayons or paint. Try one of these:
- A tree: brown dots for the trunk, clusters of green dots on top.
- A rainbow: bands of colored dots curving across the page.
- A sunset: dots moving from yellow to orange to red to purple.
Expect a few dots stuck on top of each other, which is part of the charm. Kids practice color choice and patience, and you get a proud display piece.
Our do-a-dot printables are another way to play with dots, and our shape recognition worksheets pair well for shape-built pictures.
Sticker Resist Art (Ages 3+ With Help)
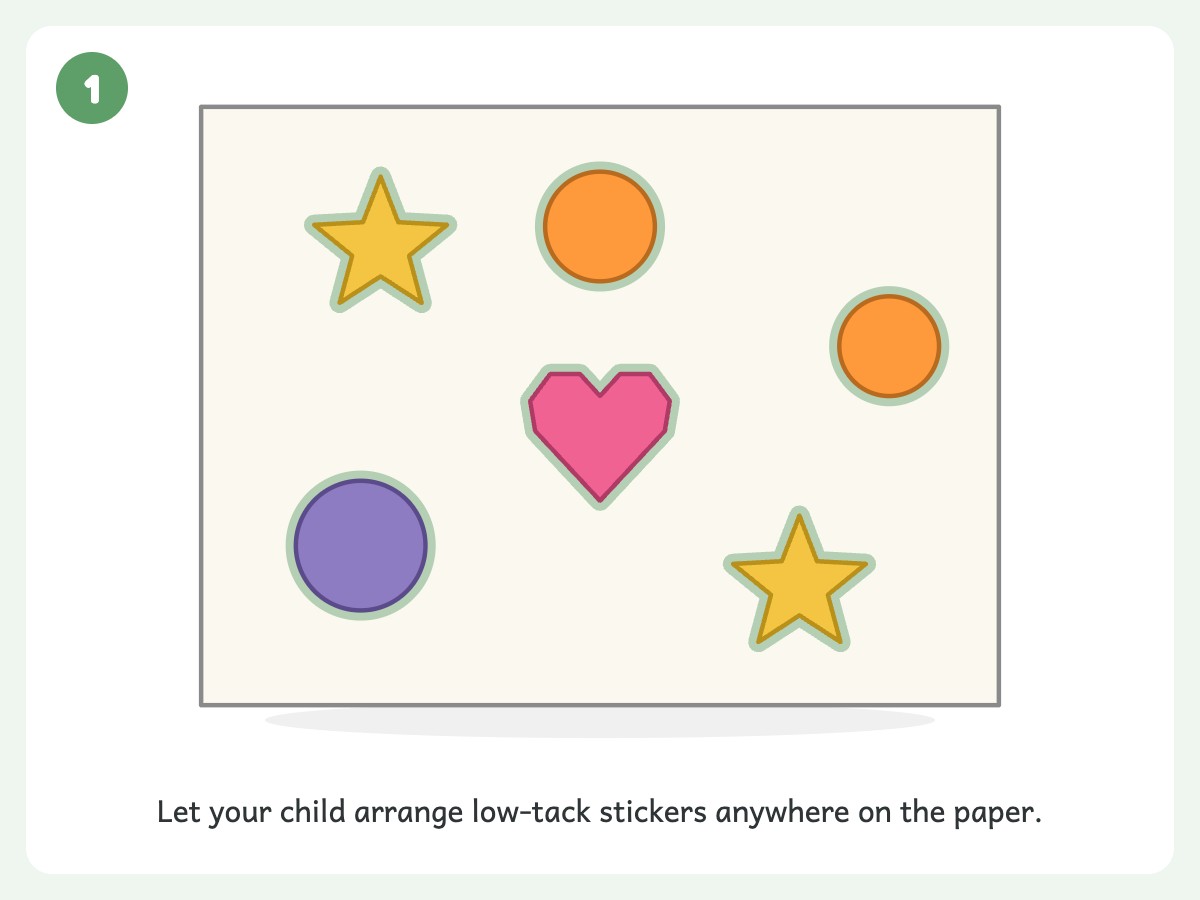
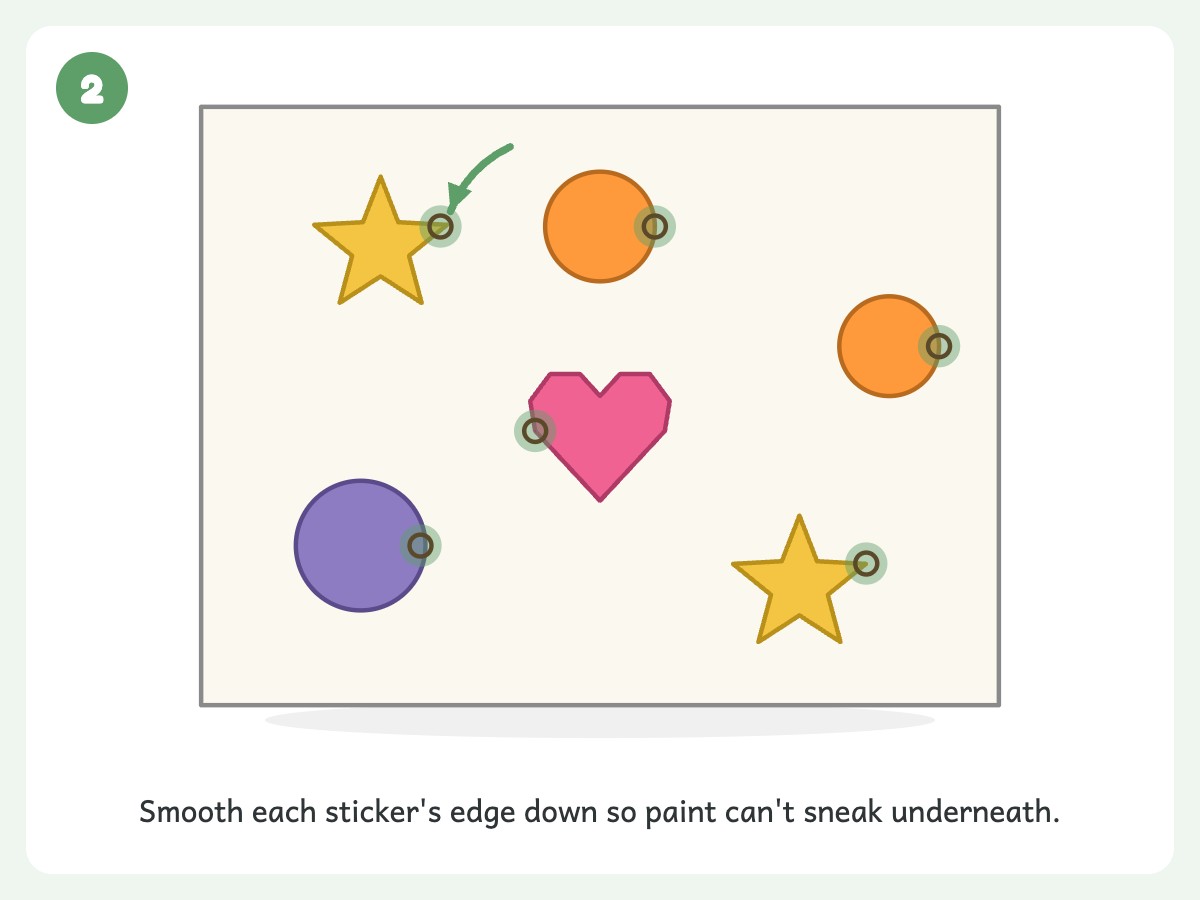
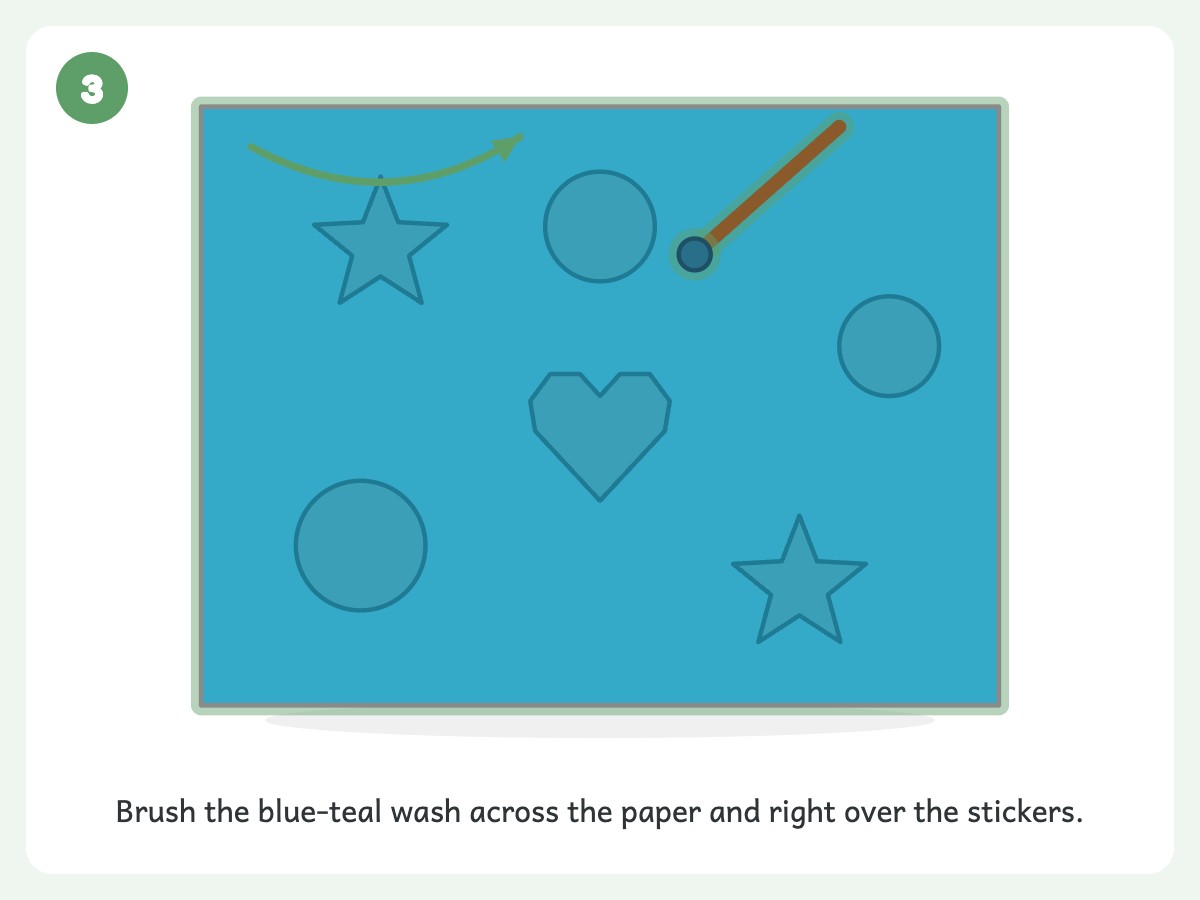
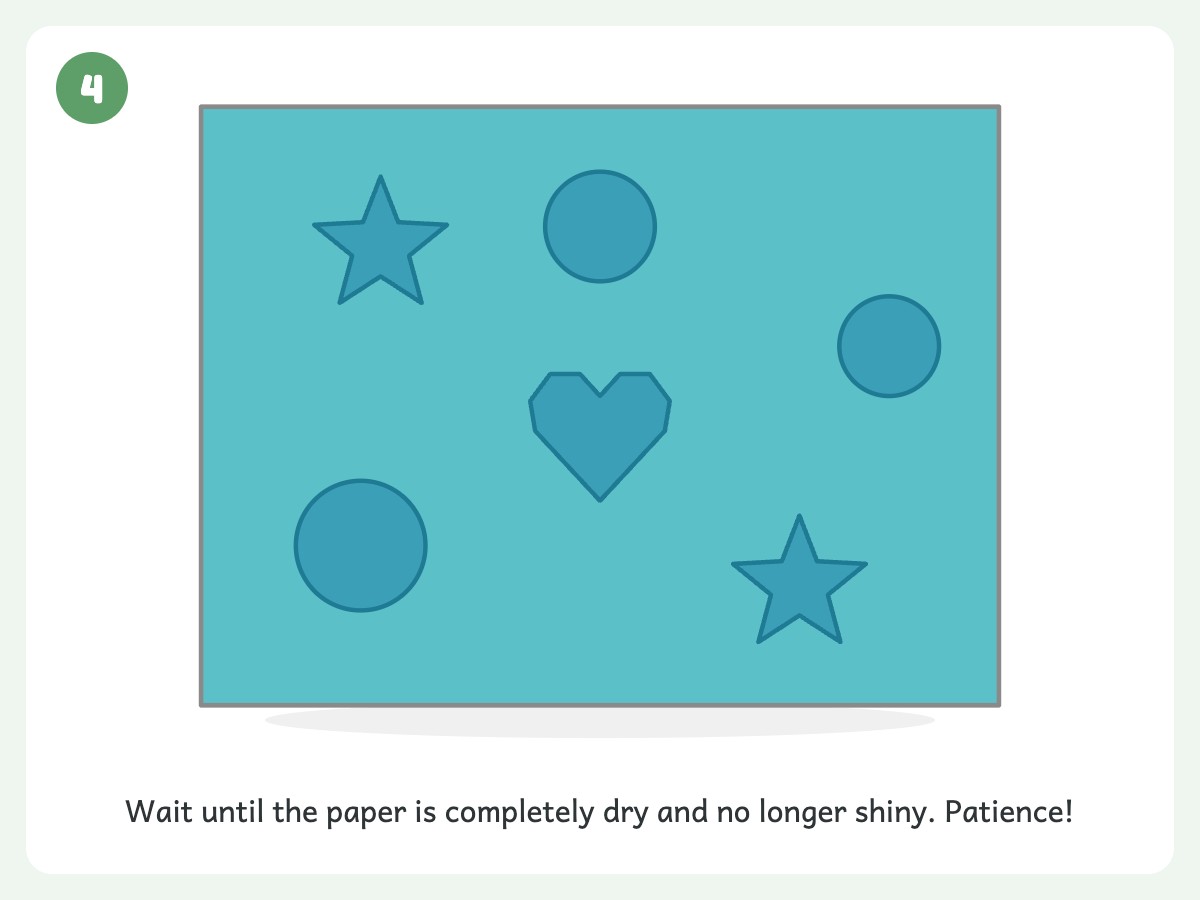
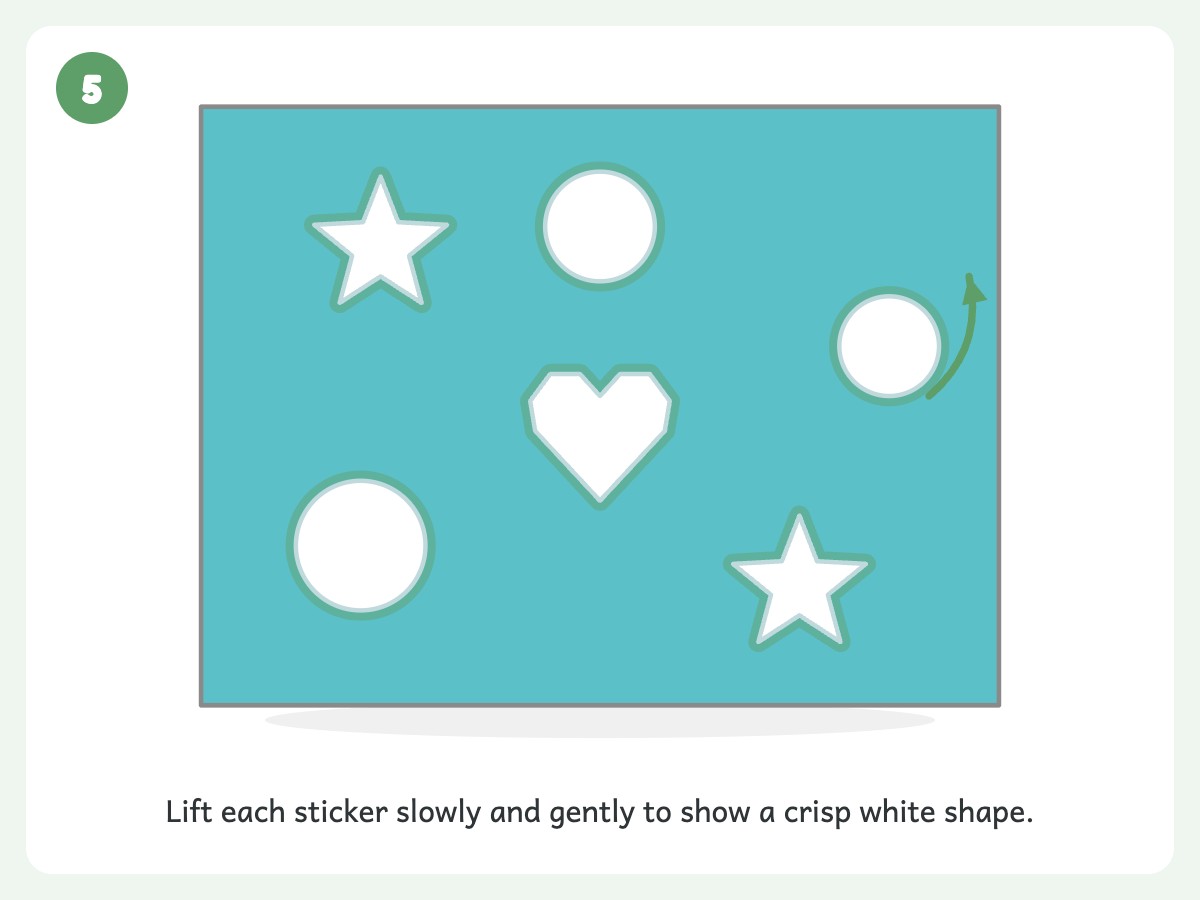
Materials: Watercolor paper, removable or low-tack stickers in various shapes, watercolor paint and brushes
Stickers block the paint, so peeling them off reveals white shapes. Kids love the surprise, and it introduces resist art and positive and negative space.
- Place the stickers. Your child arranges them on watercolor paper however they like.
- Press the edges flat. This helps keep paint from sneaking underneath.
- Paint over everything. Cover the paper and the stickers.
- Let it dry fully. This takes patience.
- Peel slowly. Lift each sticker gently to reveal the shape.
Results vary. On thin printer paper, regular stickers tend to tear the page when peeled, and paint can bleed underneath. Our first try on printer paper took a corner of the page with it, so test one sticker first.
TipUse watercolor paper and low-tack stickers, press the edges flat, and let the paint dry fully before peeling.
Googly Eye Everything (Ages 4+)
Materials: A sheet of flat googly eye stickers (printed or flat adhesive, not loose plastic wiggle eyes), a camera or phone
Walk around the house and put googly eye stickers on indoor, non-food objects. The refrigerator, a shoe, a mug, a stuffed animal. Photograph each one.
Kids get to ask “What would look funny with eyes?” while practicing fine motor placement.
Keep it indoors and skip anything near food or pet bowls. Count the eyes going on and count them back when you’re done. Have your child help peel off every one.
Safety firstSome brands have a loose plastic eye inside a dome that can pop off. Skip those with under-4s around. If your pack has them, check that each one is intact before and after play.
Sticker Fine Motor Activities for Ages 18 Months to 5
These get harder step by step, so start at the age-2 level and move up.
Dot-to-Dot Sticker Placement (Ages 2+)
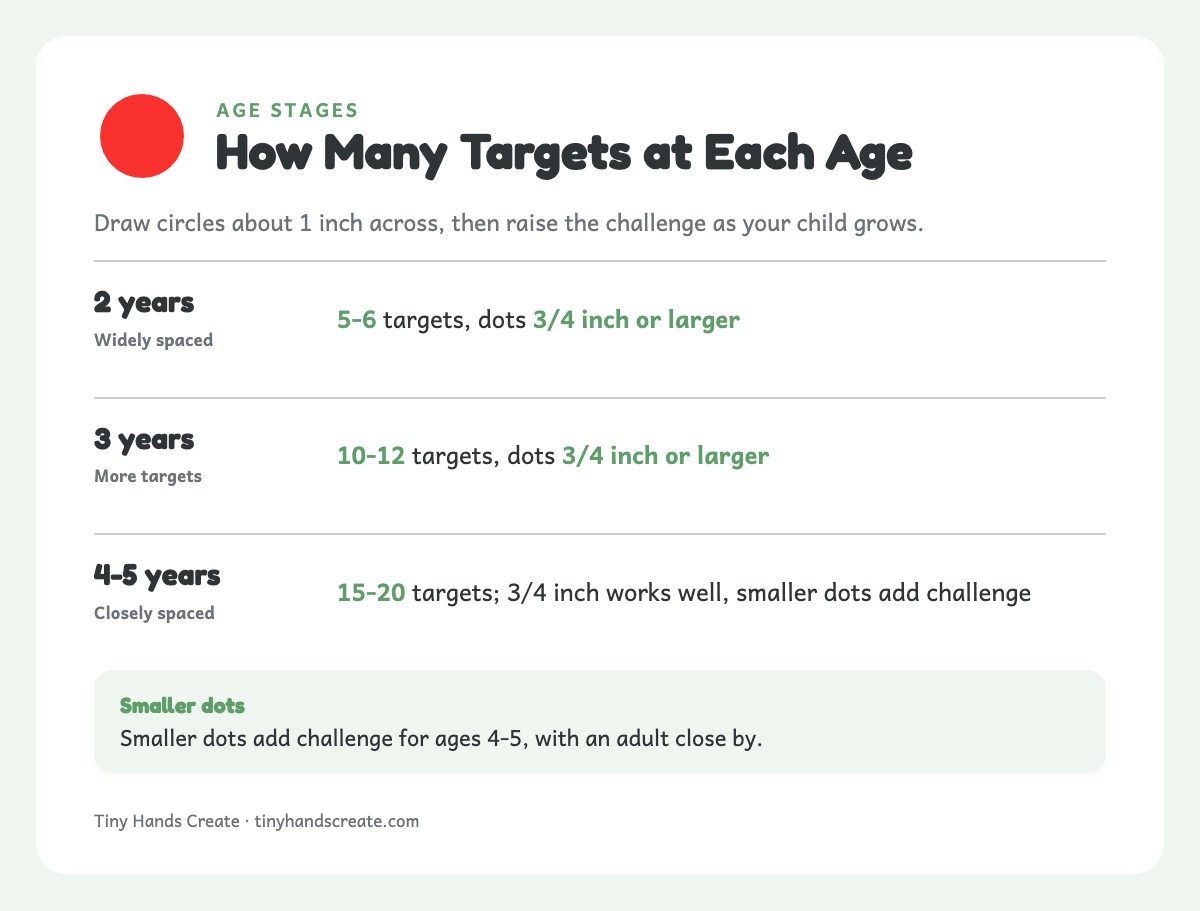
Materials: Paper with large colored dots drawn on it (using markers), matching colored dot stickers
Each sticker goes on a matching drawn circle. It builds hand-eye coordination, color matching and precise placement.
- Draw the targets. Make colored circles about 1 inch across.
- Hand over matching dots. Use the same colors as the circles.
- Match and stick. Your child covers each circle with its matching dot.
Raise the challenge with age using the table below. More ideas are in our fine motor activities for toddlers.
| Age | Targets | Dot size |
|---|---|---|
| 2 years | 5-6, widely spaced | 3/4 inch or larger |
| 3 years | 10-12 | 3/4 inch or larger |
| 4-5 years | 15-20, closely spaced | 3/4 inch works well; smaller dots add challenge, with an adult close by |
Line Tracing With Stickers (Ages 3+)
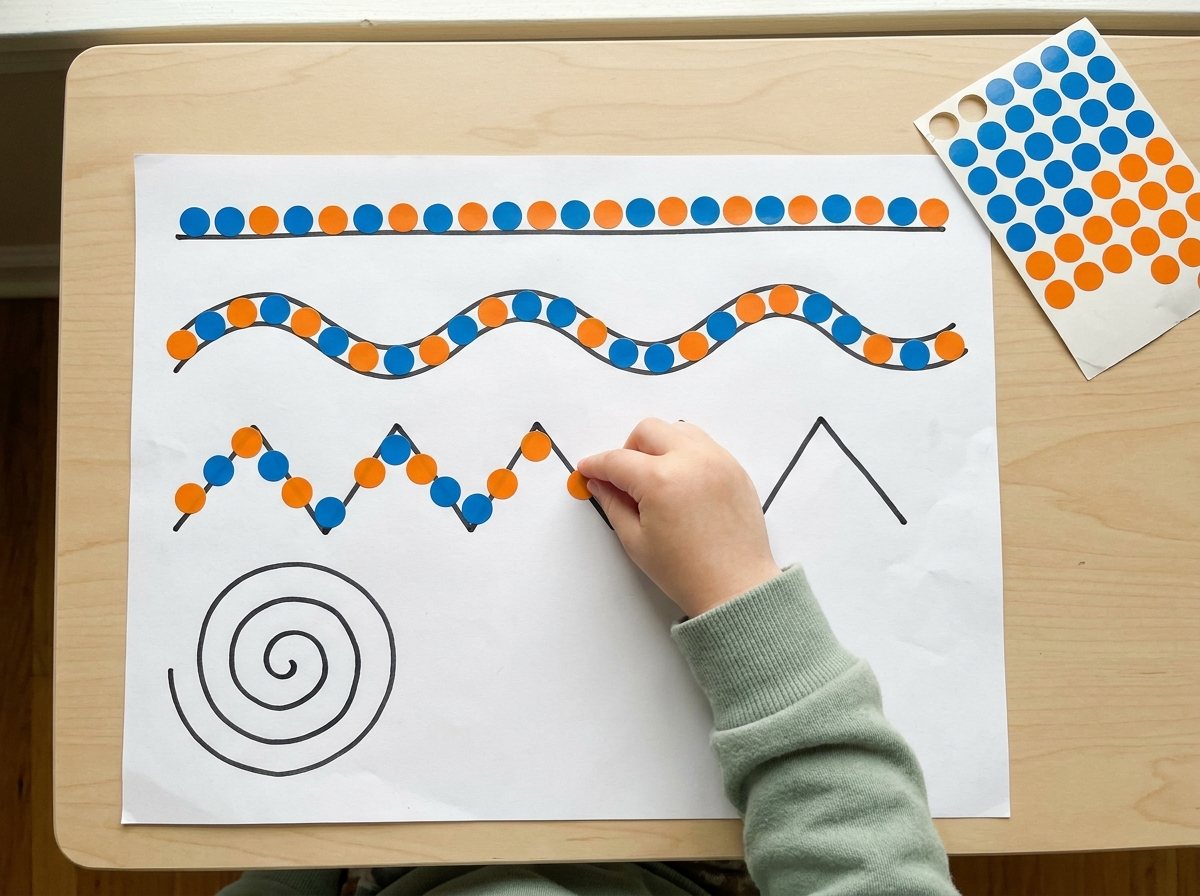
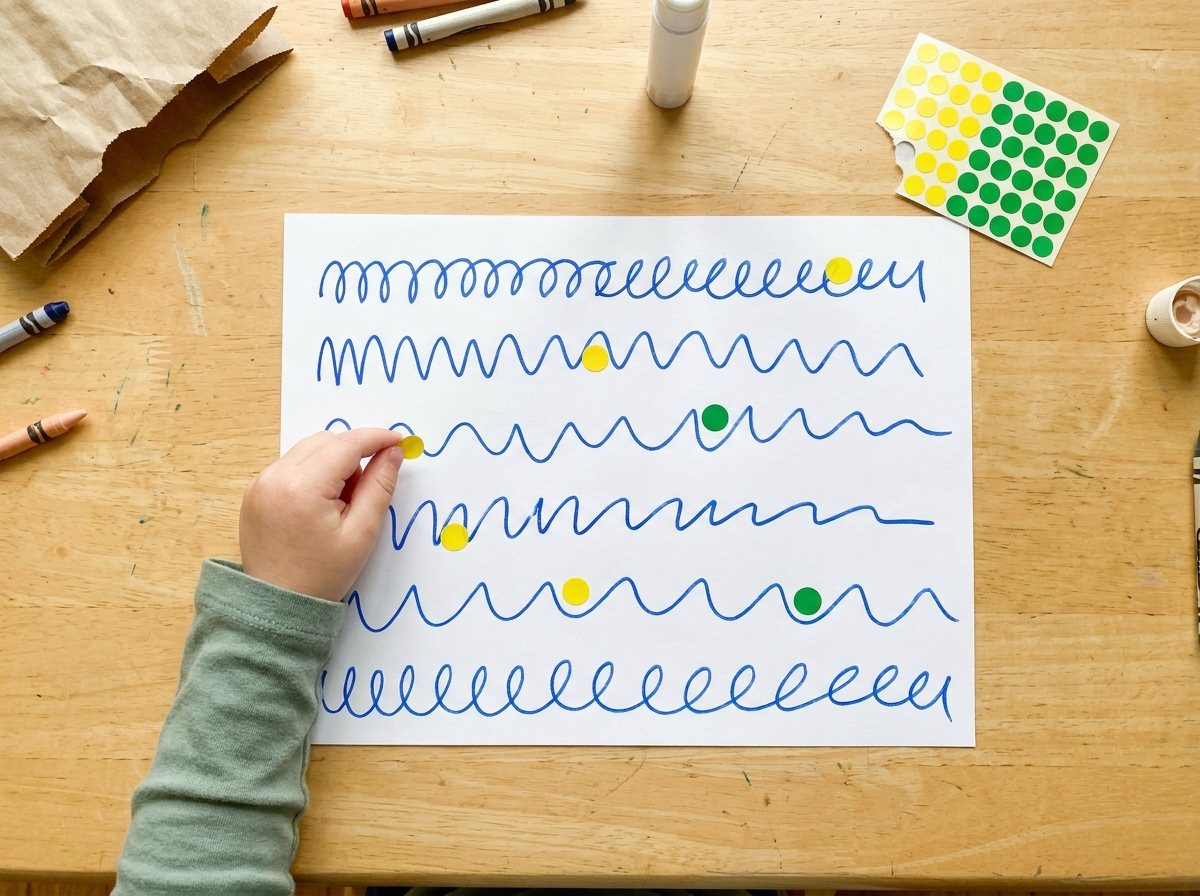
Materials: Paper, a thick marker, 3/4 inch dot stickers
Draw thick lines on the paper: straight, wavy, zigzag and spiral. Your child places dots along each path from start to finish.
It’s pre-writing practice in disguise. Following lines, curves and zigzags can help build the hand control behind letter formation.
Sticker Peel Practice for Tiny Fingers (Ages 18 months+)
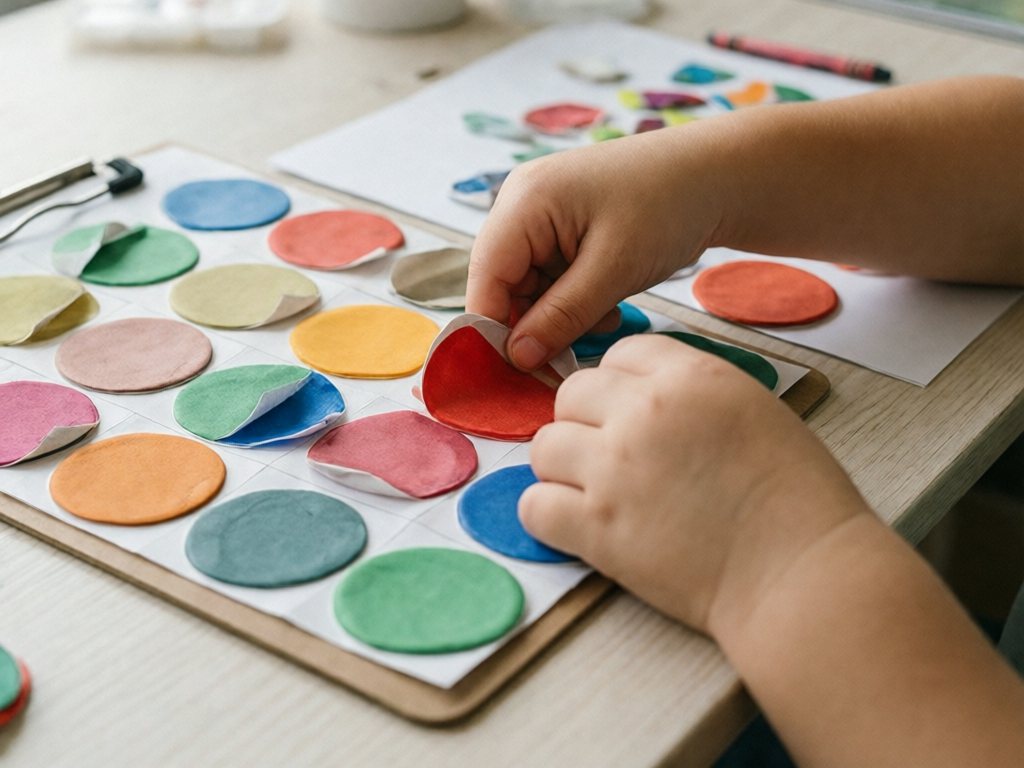
Materials: Large stickers partially peeled (lift a corner beforehand), a surface to stick them on
My toddler’s first move with a sticker sheet was to peel the whole thing at once and stick it to the table.
If your toddler can’t peel yet, pre-lift the corner of each sticker so there’s a tab to grab. Put the sheet on a clipboard or tape it to the table so it stays flat.
Over several weeks, lift the corners less and less until they can peel on their own. This gradual approach builds independence and cuts down on the frustration that sends sticker sheets flying across the room. For more age-2 ideas, see our play-based learning ideas for 2-year-olds.
TipPre-lift the corners, tape the sheet down, and keep the spare sheets out of reach. Painter’s tape can pull the finish on some wood tables, so use a clipboard there. Stay right next to your toddler, and expect stickers to end up on the dog, the floor and your sleeve.
Why Stickers Help Little Hands
Every sticker is a chain of small skills: spotting the edge, peeling with a pincer grasp, aiming, and pressing flat. Repeat that 20 times in a sitting and it becomes a fine motor workout that feels like play, supporting the control behind pre-writing.
With a little setup, stickers also target math, letters, creative expression and problem-solving. Expect a few detours along the way. It’s part of the process.
Sticker Tips: Buying, Storing and Cleanup
Little habits keep sticker time calm: buy cheap, store flat, tape everything down.
- Buy dots from the office supply aisle. They usually cost less than “craft stickers” and work for most of these activities. Prices vary by store, so compare pack sizes.
- Store sheets flat on their original backing in a binder with plastic sleeves, sorted by type. For loose stickers, use parchment or silicone release paper.
- Use a clipboard. It holds the paper steady so kids can focus on peeling and placing.
Safety firstToddlers love sticking stickers on arms and bellies, but regular stickers aren’t made for skin.
- Use only products labeled skin-safe, such as temporary tattoos or body stickers.
- Keep them away from eyes, nose and mouth, and supervise young children.
- If redness appears, stop and wipe the skin with a damp cloth. See a doctor if it persists.
Sticker Session Checklist
- Sheets taped down
- Removable stickers for anything near books
- Backing sheets and loose stickers collected
- Torn or chewed stickers thrown out
- Googly eyes all peeled off
- Hands and table wiped
Stickers are a cheap, low-mess way to practice math, letters, art and fine motor skills. Mess is minimal, not zero. Backing sheets and loose stickers need collecting after each session, and adhesive can mark walls and furniture.
Next up: try our cutting practice sheets for more scissor and hand control, or explore process art for toddlers.
Sticker Activity FAQ
What age can toddlers use stickers?
Many toddlers can start around 18 months with large stickers and a pre-lifted corner, as long as an adult supervises closely.
Are stickers safe for toddlers?
Only with close supervision. Any sticker or backing scrap can be a choking hazard, whatever its size. Dots 3/4 inch or larger are easier to grab back, and torn or chewed stickers should be thrown away.
How do I keep stickers off walls?
Tape the paper to a clipboard or table, give one sheet at a time, and keep spare sheets out of reach. Wipe any adhesive marks promptly.
What stickers don’t tear paper?
Removable or low-tack stickers on sturdier paper, such as watercolor paper, are least likely to tear. Test one first.
Crafty Mama
Crafty Mama is a former elementary art teacher turned stay-at-home parent who believes every child is creative — they just need the right invitation. She develops age-appropriate activities, crafts, and projects that spark imagination while keeping mess (and parent stress) to a minimum.