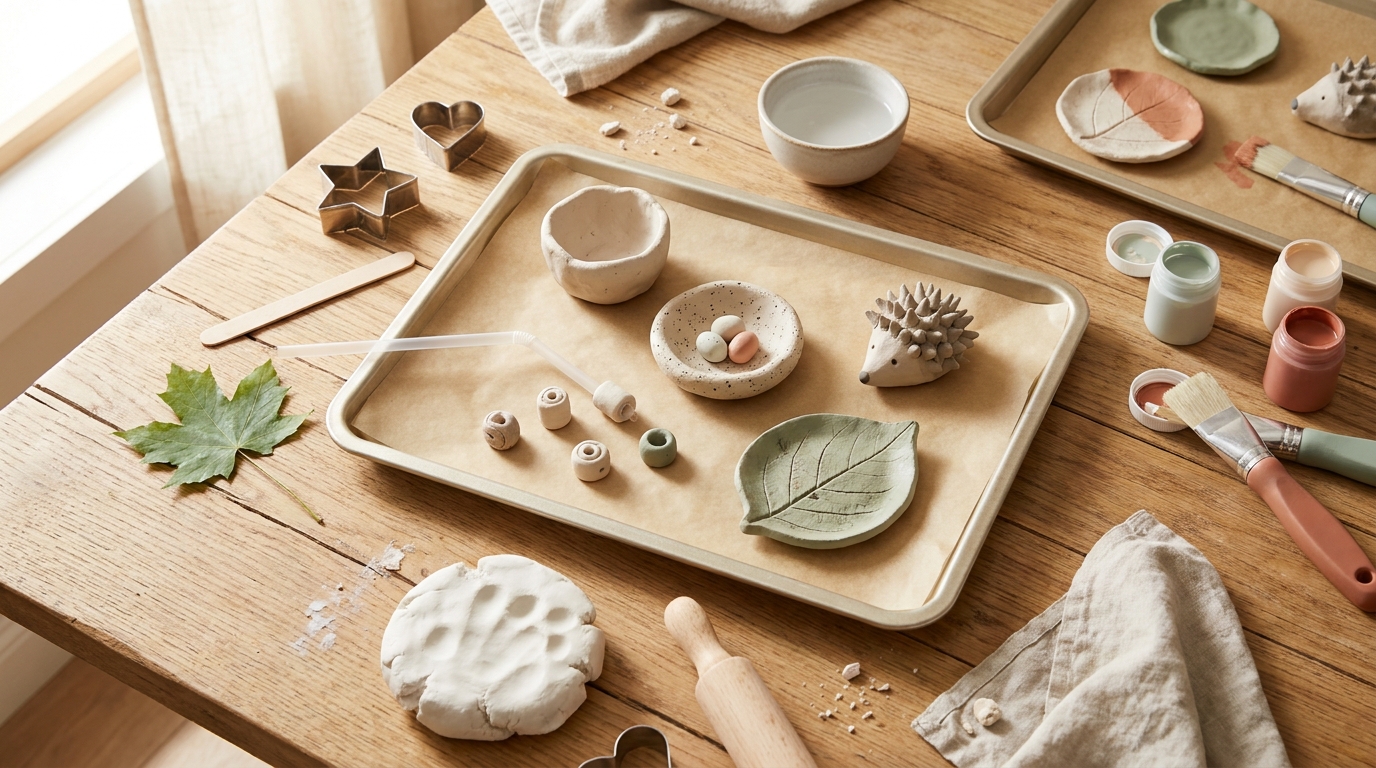
10 Air-Dry Clay Projects for Preschoolers (Beginner-Friendly)
This post contains affiliate links. As an Amazon Associate I earn from qualifying purchases.
The first time I handed my four-year-old a block of air-dry clay, I had big plans. A little bowl, maybe a tiny vase, something for the windowsill that I could point to and say, “She made that.” Eleven minutes later she was holding a flat gray pancake with seventeen fingerprints in it, announcing it was a “moon cookie for the dog.” The bowl never happened. The moon cookie, though, dried on the counter, got painted purple, and is still sitting on our bookshelf two years later.
That’s the whole secret to clay projects for kids in the preschool years. The projects that work are not the ones that look like something from a pottery catalog. They’re the ones built on movements a three-, four-, or five-year-old can already do: squish, poke, roll, press. Give a preschooler a shape that matches what their hands want to do anyway, and they finish it, love it, and ask to do it again.
This guide is a narrowed-down list of ten beginner clay crafts kids can actually complete without meltdowns (theirs or yours). Every project comes from just three base techniques, and there’s an age-by-age table below showing how each one scales from age 3 to age 5. So if you have a three-year-old and a five-year-old at the same table, you can hand out the same clay and let each kid work at their own level.
Fair warning about mess: clay gets on things. Little bits crumble off, water gets sloshed, and someone will inevitably wipe a gray hand down a clean shirt. I’ll tell you exactly how to set up so it’s a five-minute cleanup and not a forty-five-minute one.
In this article (14 sections)
- Why Air-Dry Clay Works So Well for Preschoolers
- What You Need (It’s Less Than You Think)
- The Three Base Techniques (Everything Below Uses These)
- Pinch Projects: The Easiest Place to Start
- Roll Projects: Snakes, Beads, and Coils
- Press Projects: Imprints, Cutters, and Textures
- How to Dry, Paint, and Seal Your Clay
- Fixing Common Clay Problems
- Setting Up for Low-Mess Clay Time
- A Sample First Clay Session (For Kids Who’ve Never Done It)
- More Clay Ideas for Kids Once You’ve Got the Basics
- Safety Notes for Preschoolers
- Frequently Asked Questions
- Give It a Try (and Keep Your Expectations Squishy)
Why Air-Dry Clay Works So Well for Preschoolers
If you’re wondering whether air dry clay for preschoolers is worth the trouble compared to the playdough already living in your pantry, here’s my honest take: they do different jobs.
Playdough is for play. It’s soft, reusable, and forgiving, and it gets squashed back into a ball at the end of the day. Air-dry clay is for making something that stays. That permanence is a big deal to preschoolers. They get to make a thing, wait for it to dry (a lesson in patience they don’t love, but it’s real), paint it, and then hold the actual finished object. It’s one of the first times a small child sees the whole arc of a project from start to finish.
Here’s what makes clay a good fit at this age:
- It builds hand strength. Pinching, rolling, and pressing all work the small muscles in the hands and fingers. If that’s something you’re focused on, this pairs nicely with the ideas in fine motor activities for toddlers, and clay is the natural next step up once a child has outgrown those activities.
- There’s no wrong answer. A lumpy pinch pot is still a pinch pot. Preschoolers are often perfectionists in disguise, and clay’s forgiving nature (you can always smoosh it and start over) helps.
- It’s sensory without being a big production. Clay is cool, slightly dense, and a little chalky. Kids who avoid wet, messy textures often like clay because it doesn’t stick to their hands the way glue or slime does.
- It ends in a keepsake. A dish for a grandparent, a bead necklace for a stuffed animal, an ornament to hang on the tree. Kids remember these.
What to Realistically Expect at Each Age
Before the projects, a quick reality check so nobody’s disappointed:
- Age 3: Expect short attention (10 to 15 minutes), lots of poking, and finished pieces that are more “clay with a texture” than “recognizable object.” A three-year-old will often be more excited by the process than by any outcome. That’s fine. Let it be fine.
- Age 4: Most four-year-olds can follow a two-step project and will have a clear idea of what they’re making, though it may change halfway through. Attention stretches to 20 minutes or so.
- Age 5: Five-year-olds can plan, roll snakes with some consistency, and care about details like eyes and stripes. They can also handle a little more waiting between steps.
What You Need (It’s Less Than You Think)
You don’t need a pottery studio. Most of this is already in your kitchen.
| Supply | Why you need it | Notes |
|---|---|---|
| Air-dry clay (1 to 2 lb block) | The main event | White or terracotta both work. Check the label for “non-toxic” and remember it is not edible. |
| Parchment paper, wax paper, or a vinyl placemat | Work surface | Clay peels off cleanly and cleanup is just folding it up. |
| Small bowl of water | Smoothing and joining | A few tablespoons is plenty. Too much water is the #1 cause of soggy mush. |
| Rolling pin or a cylinder-shaped jar | Flattening clay | A short kid-sized rolling pin is great, but a smooth jar works too. |
| Cookie cutters | Cutting shapes | Simple shapes only for this age. |
| Craft sticks, toothpicks, or a plastic knife | Poking, carving, drawing lines | Blunt tools only for the three-year-old crowd. |
| Textures: leaves, buttons, forks, lace, a toothbrush | Pressing patterns | Great free materials. |
| Washable tempera or acrylic paint | Coloring after drying | Acrylic is more durable. Tempera is more forgiving for little kids. |
| Old shirt or apron | Protecting clothes | Clay dust is a pain to get out of dark clothes. |
| A tray or baking sheet | Drying spot | Lets you move projects without breaking them. |
A note on choosing clay: white air-dry clay is easiest to paint, and it dries to a pale, matte finish. Terracotta-colored clay looks charming with just a clear sealer on it. Avoid anything labeled as “polymer clay” for this list, since that needs to be baked, and the kids-and-oven combination is a whole other article.
If you’re not sure your child is ready for real clay yet, or you’d like a warm-up round, make a batch of soft homemade playdough first. It gives them a low-stakes way to practice the same three moves before committing to something that dries.
The Three Base Techniques (Everything Below Uses These)
Every project in this list is built from one of three moves. Once a child has practiced the move, they can invent their own projects. That’s the real goal.
- Pinch: Push a thumb into a ball of clay and pinch the walls up between thumb and fingers. This makes pots, bowls, and animal bodies.
- Roll: Roll clay between palms or on the table to make snakes, balls, and coils. This makes beads, nests, snails, and letters.
- Press: Push an object, a texture, or a cookie cutter into flat clay. This makes ornaments, tiles, and imprints.
Here’s how each one scales as your child grows:
Age-by-Age Adaptation Table
| Technique | Age 3 | Age 4 | Age 5 |
|---|---|---|---|
| Pinch | Push a thumb into a ball and call it a bowl. Adult helps thin the walls if needed. Finished pot may be thick and small. | Pinch while turning the ball in one hand to make walls of fairly even thickness. Can add a simple pinched “pour spout” or ears. | Shapes walls carefully, smooths the rim with a wet finger, adds attached details like feet, handles, or a lid made by a second pinch. |
| Roll | Rolls short, fat, wobbly snakes and balls. Adult may help break clay into equal chunks. Great for 3 to 5 beads. | Rolls longer, more even snakes on the table and can coil them into a spiral. Makes 6 to 8 beads. | Rolls consistent thin snakes, coils them into a base and builds walls upward, or forms letters and simple shapes. Makes matched sets. |
| Press | Presses hands, fingers, or a large leaf into a thick slab. Adult cuts around the shape. | Presses cookie cutters and textures independently, and can roll the slab out with a small rolling pin (with help lifting). | Rolls an even slab, chooses a texture design, presses carefully, cuts around shapes, and pokes a hanging hole with a straw. |
Use this table as a menu. When you get to a project below, I’ve noted which base technique it uses so you can quickly adjust for your child.
Pinch Projects: The Easiest Place to Start
Pinching is the friendliest technique for first-timers. There’s no tool involved, it uses only the hands, and any result looks charming.
1. Thumb Pinch Pots (The Classic First Project)
Technique: Pinch. Time: 15 minutes. Mess level: Low.
This is the one I’d start with every single time. A pinch pot is a small bowl made from a ball of clay, and it’s the perfect first shape because it’s nearly impossible to get wrong.
How to do it:
- Give each child a ball of clay about the size of a small plum or a large egg.
- Have them roll it between their palms until it’s round-ish. Perfection isn’t needed.
- Hold the ball in one hand. Push the thumb of the other hand into the center, stopping about a quarter inch from the bottom.
- Gently pinch the clay between thumb and fingers, rotating the ball a little after each pinch, until the walls thin out and the opening widens.
- Set it on the tray to dry.
What to expect: A three-year-old will probably push their thumb all the way through the bottom at least once. That’s normal. Just say “Oops, now it’s a napkin ring!” and roll a new ball. Or pat the bottom back together, since clay is forgiving.
Ways to use it: A ring dish, a place for a tooth-fairy tooth, a tiny bowl for paperclips, a pinch pot “cupcake” once painted. Remember these are decorative, not food-safe.
Sneaky learning moment: Talk about thick and thin. “Feel the wall with your finger. Is it thick or thin? Can you make it thinner?”
2. Pinch Pot Bird Nest with Clay Eggs
Technique: Pinch + roll. Time: 20 minutes. Mess level: Low.
This one is a good next step because it uses two techniques and ends with a tiny story. A shallow pinch pot becomes a nest, and small rolled balls become eggs.
How to do it:
- Make a shallow pinch pot, wider and flatter than the first one. Encourage kids to press the walls outward so it looks like a bowl, not a cup.
- To make it nest-like, use a toothpick or craft stick to scratch lines all over the outside and inside. This is the textured “twigs” look.
- Roll three small balls, about the size of grapes, for the eggs. Slightly flatten one side of each so they sit still.
- Let everything dry separately, then paint the eggs in speckled pastel colors and place them in the nest.
Age adaptation: Threes can make the nest and just one or two eggs. Fives can make a mama bird using a pinched teardrop shape with a little beak pulled out with two fingers.
Mess tip: Don’t attach the eggs to the nest with water while wet, because they’ll just squish and stick. Paint and place them after drying, and add a dab of white glue if you’d like them to stay.
3. Little Pinch-Pot Hedgehogs or Mice
Technique: Pinch. Time: 20 to 25 minutes. Mess level: Low to medium.
For kids who like animals (so, all of them), a hedgehog is a pinch technique with a twist. You’re pinching the clay into a teardrop instead of a bowl.
How to do it:
- Roll a ball of clay about the size of a golf ball.
- Gently pinch one side into a point to make the nose. The other end stays round for the back.
- Use a toothpick to poke a small hole for each eye, and one dot for the nose.
- For spikes, have kids use a craft stick or the tines of a fork to poke rows of short marks all over the back. A little “stab and lift” motion makes the spiky texture.
- Dry, then paint the face and belly a lighter shade and the back darker.
Making a mouse instead: Same teardrop body, plus two flattened circles pressed on for ears, and a thin rolled tail.
Why it works: Kids love poking, and this project turns poking into the actual technique. It’s also the point where your three-year-old and your five-year-old can make the same thing and both feel proud.
Roll Projects: Snakes, Beads, and Coils
Rolling is the second technique to introduce. It’s a bit trickier, since rolling an even snake takes coordination, but it’s very satisfying.
A quick tip before you start: teach your child the “hot dog” trick. Start with a lump shaped like a hot dog, then roll it back and forth on the table with flat fingers (not fists), moving from the middle outward. Fists squish clay flat, and flat fingers spread the pressure evenly.
4. Rolled Clay Bead Necklaces
Technique: Roll. Time: 20 minutes making, plus drying, plus 10 minutes stringing. Mess level: Low.
Beads are a fantastic beginner clay project because each bead is small, quick, and disposable, so there’s no pressure. If one turns out lopsided, it’s just character.
How to do it:
- Break off marble-sized bits of clay. For threes, you may want to pre-portion these.
- Roll each into a ball between palms.
- Poke a hole straight through each ball with a straw or a wooden skewer. Adults should handle the skewer for the youngest kids, or use a straw, which is safer and leaves a nice wide hole.
- Let dry for 24 to 48 hours. Sit them on a piece of parchment and turn them once so they dry evenly.
- Paint, let the paint dry, and string on yarn or a shoelace. Yarn with a taped tip (“a needle” for little fingers) makes stringing easier.
Age adaptation: Threes make five or so beads and often skip the hole-poking step (adult does it). Fours can make 8 to 10 in mixed sizes. Fives can plan a pattern, such as big-small-big-small, and paint stripes or dots.
This pairs well with stringing practice, and if your child gets hooked, an older sibling might enjoy the techniques in a friendship bracelet project.
5. Snail Coil Creatures
Technique: Roll. Time: 20 minutes. Mess level: Low.
A snail is really just a rolled snake, coiled up. Kids get the pride of a finished animal, and you get a project that only requires one technique.
How to do it:
- Roll a snake about as thick as a pencil and about 8 inches long.
- Coil it up into a flat spiral. This is the shell.
- Roll a second, thicker snake, about 4 inches long, and flatten it slightly on the bottom. This is the body.
- Press the shell onto the back of the body. A dab of water on the touching surfaces helps them stick. (Just a dab. Not a splash.)
- Pinch up one end of the body to make a head, and add two thin snake “eyestalks” with tiny ball eyes.
Troubleshooting: If the shell keeps unraveling, press it gently onto a flat piece of body clay and smooth the seam with a wet fingertip. Older kids can learn “scoring”: scratch little crosshatch lines on both surfaces before joining them, which helps them hold.
6. Name Letters and Initial Charms
Technique: Roll. Time: 15 to 25 minutes. Mess level: Low.
Rolling a snake and bending it into a letter is basically pre-writing practice in disguise. It’s especially helpful for kids who resist paper-and-pencil work.
How to do it:
- Roll a snake about the thickness of a crayon.
- Bend it into the first letter of your child’s name, and let them do the bending as much as possible.
- For letters with straight lines, like L, T, or E, use a few shorter snakes and join them.
- Press the finished letter gently onto a slab of clay if you want a plaque, or leave it free-standing to hang later. Poke a hole at the top with a straw for hanging.
Why I love it: A five-year-old who is learning letters gets to touch and shape them, and a three-year-old can simply make a “wiggle snake” and call it their letter. Both are learning something.
Press Projects: Imprints, Cutters, and Textures
Pressing is the technique that produces the most “wow, you made that?” results with the least skill required. Even a child who struggles with rolling can press a leaf into a slab and have something beautiful.
To do these, you’ll need a flat slab of clay. Have an adult roll it out to about a quarter to a half inch thick. Thinner slabs crack and curl, while thicker slabs dry slowly and can crack from the inside out. Half an inch is a good, safe default for preschoolers.
7. Leaf-Imprint Trinket Dishes
Technique: Press. Time: 20 minutes. Mess level: Low.
This is a beautiful early-fall project and a great excuse for a nature walk first. Collect leaves with strong veins, since maple, oak, and sage leaves all leave lovely impressions.
How to do it:
- Roll a slab of clay about half an inch thick.
- Place a leaf vein-side-down on the clay. (The veins are raised on the underside, so this leaves the best imprint.)
- Roll gently over it with a rolling pin, or press firmly with the palm of the hand.
- Peel the leaf off slowly, and the pattern will stay.
- Cut around the leaf shape with a plastic knife, or let the child trace with a craft stick.
- Drape the shape over a small bowl or press it inside a shallow one to make a curved dish. Let it dry in the bowl.
Finishing: A watered-down brown or gold acrylic paint, wiped off right away with a paper towel, sinks into the veins and makes them pop. Kids call this “magic paint.” I call it “how to make anything look expensive.”
If your child loves leaf-based projects, there are more nature-forward ideas in easy clay crafts for kids to make at home, which covers other no-kiln projects to try once this list feels easy.
8. Cookie-Cutter Ornaments and Gift Tags
Technique: Press. Time: 20 minutes. Mess level: Low.
This is the most foolproof clay activity for preschoolers on the whole list, and it doubles as a gift. It works for holidays, birthdays, or just because.
How to do it:
- Roll a slab about a third of an inch thick.
- Press a cookie cutter down firmly and wiggle it slightly. Lift the cutter, then gently push the clay shape out.
- Use a straw to poke a hanging hole near the top. Keep it at least half an inch from the edge, or it’ll crack.
- Press textures into the surface: lace, a fork, a button, a stamp, or fingertips.
- Dry flat for 24 to 48 hours, flipping once halfway through.
- Paint, seal, and thread with ribbon or twine.
Simple cutter shapes for beginners: Circles, hearts, stars, and gingerbread people. Skip anything with skinny arms and tiny tips, since they snap off once dry.
Seasonal variety is easy here. Use pumpkin and leaf cutters in the fall, snowflakes in winter, and flowers in spring. In October, small ghost or pumpkin ornaments make sweet handmade decorations to pair with a no-carve pumpkin decorating session.
9. Fossil and Texture Tiles
Technique: Press. Time: 15 to 20 minutes. Mess level: Low.
Kids love pretending to be paleontologists, and clay is the easiest way to make “fossils.” Make a small square or circle slab, and press an object into it to leave a print.
Good things to press:
- Plastic dinosaurs and toy animals (great for “footprints”)
- Shells from the beach or craft store
- Textured toy blocks, big buttons, or old keys
- A fork, comb, or toothbrush for “scratchy” patterns
- Their own fingertips, in rows or circles
How to do it:
- Roll a small ball of clay and flatten it into a disc about the size of a cookie, half an inch thick.
- Press the object down firmly, and wiggle it very slightly.
- Lift straight up, admire the print, and repeat with a different object.
- Dry and (optionally) rub with a little brown paint to make the impression stand out.
Why it’s good for the preschool crowd: There’s no skill barrier at all. Anything a child presses in will look like something, and the results feel like a discovery, not a “did I do it right?” moment.
10. Handprint or Footprint Keepsake Dish
Technique: Press. Time: 15 minutes, plus a bit of adult help. Mess level: Medium (there will be clay hands).
Every parent ends up doing this one eventually, so consider it a rite of passage. It also tends to be the most treasured project on this list years later.
How to do it:
- Roll a big ball of clay and flatten it into a slab about 5 to 6 inches across and about three-quarters of an inch thick. This is thicker than the other slabs, because a deeper impression needs a thicker canvas.
- Have your child spread their fingers and press their hand straight down into the clay. Adults, help by pushing gently on top of their hand for a deep, clear print.
- Lift straight up. (Warn them first: it’ll feel like a strange, cool suction.)
- Trim around the edge with a plastic knife, or leave it organic.
- Write the date and their age into the clay with a toothpick.
- Let it dry very slowly, away from heat and direct sun, for 48 to 72 hours.
A note on toddlers and squirmy threes: If your three-year-old won’t hold still, press the hand yourself, guiding them like a stamp. Many kids actually prefer this. Or just skip the hand and try a foot instead, since feet are bigger, and kids find the whole thing hilarious.
If you’re already making fall keepsakes, this pairs nicely with a handprint turkey craft when November rolls around, and you’ll have two different handprint memories from the same year.
How to Dry, Paint, and Seal Your Clay
Half the battle with clay isn’t making the thing. It’s getting it to survive the wait.
Drying: Slow and Steady
- Time: Most preschool-sized pieces take 24 to 72 hours to dry fully, depending on thickness and humidity. The clay lightens in color and feels room-temperature (not cool) to the touch when it’s ready.
- Where: A flat tray in a room-temperature spot, out of direct sunlight, and away from heaters and fans. Fast drying is the main reason clay cracks.
- Flip it: Flat pieces like ornaments and tiles should be flipped after 12 to 24 hours so the underside can dry too.
- Don’t cover with plastic. It traps moisture and can make the clay stay soft or grow mold.
Tell your child in advance that the clay needs “sleeping time.” I say something like, “It’s going to take a nap and wake up hard.” Kids handle waiting better when there’s a story attached.
Painting
Once the clay is bone dry, it’s ready for color.
- Acrylic paint: More durable and vivid. It’s the better choice for anything that will be handled a lot, like beads and ornaments.
- Washable tempera: Fine for a first-time painter, but it can rub off, so plan on sealing it.
- Watercolor: Works on white clay for a soft, pastel look, but it’s very absorbent and needs a light touch.
Let your child do the painting with big, chunky brushes. If you want a bit more painting inspiration for your budding artist, watercolor painting for kids has tips on brush handling and color mixing that carry over nicely.
Sealing
A sealer protects the paint and gives the piece a finished look. Brush-on matte or gloss craft sealer (Mod Podge-style) works well. An adult should apply it, and it needs good ventilation if you use a spray. Let it dry completely before handling.
A reminder: Air-dry clay isn’t waterproof, even when sealed. Don’t put water in a pinch pot, and don’t put food directly on it. Think trinket dish, not soup bowl.
Fixing Common Clay Problems
You will hit at least two of these. Here’s the cheat sheet.
| Problem | Why it happens | Fix |
|---|---|---|
| Cracks appear while working | Clay is drying out as kids work | Dab a fingertip in water and smooth the crack. Keep the unused clay wrapped in plastic or a damp cloth. |
| Cracks appear after drying | Dried too fast, or the piece was too thick or thin | Mix a little clay with water into a paste (a “slip”) and fill the crack. Let it dry again, then paint over it. |
| Pieces fall off (ears, tails, legs) | Attached without scoring or not enough pressure | Scratch both surfaces, add a dab of water, and press firmly. After drying, use white glue. |
| Clay is too sticky and soggy | Too much water | Knead in a small piece of dry clay, or let it sit uncovered for 10 minutes. |
| Clay is dry and crumbly | Air exposure | Knead in a few drops of water. If it’s too far gone, save it for crumbling into a “fossil dig.” |
| Flat pieces curl up while drying | Uneven drying | Dry them on a flat surface, flip regularly, and place a light book on top for the first few hours. |
| Paint looks blotchy | Clay was still damp | Wait longer. Damp clay makes paint bead up and dry unevenly. |
| Ornament hole broke off | Hole was too close to the edge | Start over with a new piece, or glue a small paper clip into the top with strong craft glue. |
Most of these are fixable, and honestly, part of the value is showing your child that “broke” doesn’t mean “ruined.” I’ve narrated “That’s okay, clay can be fixed!” more times than I can count.
Setting Up for Low-Mess Clay Time
I promised you a plan for the mess, so here it is. This is the setup I use with kids ages 3 to 5, and it makes cleanup almost trivial.
Before you start:
- Cover the table with a vinyl tablecloth, a big piece of parchment, or a cutting board for each child. A rimmed baking sheet as a personal “workspace” is my favorite trick, since it corrals the crumbs.
- Give each child a small portion of clay at a time (about the size of a plum). Keep the rest wrapped tightly in a zip-top bag or plastic wrap.
- Put on old clothes or an apron. Clay dust washes out of most fabrics, but it’s easier if you don’t have to worry.
- Set one small cup of water per child. Only a small one. A big bowl of water becomes a swimming pool.
During:
- Keep a damp paper towel nearby for wiping fingers. Clay is drier than dough, so it gets on hands more readily and comes off with a wipe.
- Remind kids that clay stays on the table and their project, and not on their siblings or the dog. (I still say this every time.)
After:
- Let dried clay crumbs sit, then sweep them up. Wet clay smeared into a rug is a pain, but dry crumbs vacuum right up.
- Don’t rinse large amounts of clay down the sink drain, since it can build up in the pipes. Wipe hands with paper towels first, then wash.
- Store leftover clay in an airtight container with a slightly damp paper towel on top.
A Sample First Clay Session (For Kids Who’ve Never Done It)
If it’s your child’s very first time, here’s a 45-minute plan that keeps things paced and low-stress.
- Minutes 0 to 5: Explore. Give each child a lump of clay with no instructions. Let them poke, squeeze, and smell. This “free play” moment is important, and you’ll learn a lot about how their hands like to work.
- Minutes 5 to 15: Base project. Do the thumb pinch pot together. Model it slowly, and keep your own pot a little lopsided on purpose so they see that’s okay.
- Minutes 15 to 30: Second project. Choose either beads or a cookie-cutter ornament, depending on your child’s energy level.
- Minutes 30 to 40: Free creation. Let them make whatever they want with the remaining clay. This is often where the best, weirdest stuff appears.
- Minutes 40 to 45: Tidy and tray. Have the kids help carry their projects to the drying tray. Write their names on a sticky note next to each piece so nothing gets lost.
Then ask them what they want to paint first, and plan a second session in two to three days.
If your child loses steam after the first project, that’s a win, not a failure. Stop there. A short, happy clay session beats a long, grumbly one every time.
More Clay Ideas for Kids Once You’ve Got the Basics
Once your child has done a few of the above, they’ll start inventing on their own. Here are some easy follow-up ideas that use the same three techniques:
- Pinch: Little “monster” faces, tiny flower pots, a pinch pot with a lid, a family of pinched animals.
- Roll: Clay worms, a bowl made from coiled snakes, rolled “spaghetti” nests, tiny birthday candles for a play cake.
- Press: Stamped “pizza” with pretend toppings, pressed rainbow tiles, magnets (glue a magnet to the back after drying), name plaques.
- Combined: A pinch-pot fairy house with a rolled door and pressed window, a clay “garden” with pinched flowers and rolled stems, an acorn set inspired by the ideas in acorn crafts for toddlers.
Free play with leftover clay bits is often where the magic is. Set out a tray of “loose parts,” like buttons, beads, sticks, and pebbles, and let your child decorate their creations however they want. It gets them problem solving and imagining without you saying a word.
Safety Notes for Preschoolers
A few honest reminders, because three-year-olds put things in their mouths:
- Air-dry clay is not food. Most brands are labeled non-toxic, but that means it won’t poison a child who takes a tiny taste, not that it’s meant to be eaten. Supervise closely with young preschoolers.
- Watch small parts. Dried clay beads and tiny clay pieces are choking hazards for kids under three, and worth keeping away from younger siblings.
- Sharp tools are for adults. Toothpicks and skewers should be handled by an adult for the three-year-olds. Plastic knives and craft sticks are a safe substitute.
- Wash hands after. Clay is drying to the skin, so a little lotion afterward is nice, especially if you do this often.
- Check the label. If a child has allergies or sensitivities, especially to wheat, gluten, or latex, look at the ingredient list before buying, because formulas vary between brands.
Frequently Asked Questions
What is the best air dry clay for preschoolers?
Look for a soft, non-toxic, white or natural-colored air-dry clay that’s easy to knead straight out of the package. Softer clays are much easier for small hands to pinch and roll than stiff ones. Avoid polymer clay (which needs baking) and anything labeled for adult sculpting, since those tend to be firmer and harder for little fingers. If a clay feels too stiff, knead in a few drops of water to soften it.
How long does air dry clay take to dry?
Most preschool-sized projects, like pinch pots, beads, and ornaments, take about 24 to 72 hours to dry completely. Thicker pieces like a handprint dish can take longer. The clay will be lighter in color and feel dry, not cool, when it’s ready. Dry it at room temperature, away from heaters and direct sun, because rapid drying is the main cause of cracks.
Is air dry clay safe for 3-year-olds?
Most air-dry clays are labeled non-toxic and are commonly used with young children, but they aren’t meant to be eaten. For three-year-olds, stay close, keep portions small, and don’t let them put clay in their mouths. Keep tiny finished pieces, like beads, away from any younger siblings. Always check the label on your specific brand, especially if your child has allergies.
What are the easiest clay projects for kids who’ve never tried clay?
Start with a thumb pinch pot, rolled beads, and a cookie-cutter ornament. Each one uses just one basic move (pinch, roll, or press), takes 15 to 20 minutes, and looks good even if the shape isn’t perfect. Handprint and leaf-imprint dishes are also great for beginners because there’s almost no way to get them wrong.
How do I keep air dry clay from cracking?
Keep your slab at least a quarter inch thick (half an inch is safer), dry pieces slowly at room temperature, and flip flat pieces partway through. While working, smooth any small cracks with a dampened fingertip. If cracks show up after drying, fill them with a paste made of clay and water, let it dry, then paint over it. Don’t dry projects on a radiator or in direct sun.
Can I use air dry clay for things that hold food or water?
No. Air-dry clay isn’t food-safe and isn’t waterproof, even when sealed. Water will soften it over time. Stick to decorative and keepsake projects like trinket dishes, ornaments, and beads. If your child wants to make something functional for the kitchen, the safest option is to make it decorative-only, like a ring dish or a pencil-top decoration.
What if my child gets frustrated or loses interest halfway?
That’s completely normal, especially at age three. Shrink the goal: instead of finishing a project, aim for “explore the clay for ten minutes.” Pinching and poking counts as clay play, and if they walk away, wrap the clay and try again another day. You can also switch to a press project, like stamping textures into a slab, since it requires the least skill and gives instant results.
Give It a Try (and Keep Your Expectations Squishy)
The best clay projects for kids aren’t the prettiest ones. They’re the ones your child made with their own two hands, lopsided edges and fingerprints and all. A thumb pot with walls half an inch thick, a bead necklace with five uneven beads, a moon cookie for the dog: these are the things that end up on shelves, in keepsake boxes, and in the stories you tell years from now.
So grab a block of clay, cover the table, and let your preschooler squish. Start with a pinch pot, save the painting for another day, and let the mess be part of the memory. You’ve got this, and if the first attempt collapses into a puddle, well, that’s just a new kind of art.